Thursday, January 26, 2012

My holy grail: Tip #353

Ever since I heard of tip #353 I've wanted to get my hands on one. It's not a tip I've ever run across at cake decorating stores; Michael's definitely doesn't have it. I suppose I could have gone straight to eBay, but yesterday I found one at Sugar N Spice in Daly City, CA. What got me all fired up about tip #353 was this book, "Wilton: The Uses of the Most Popular Decorating Tips," originally published in 1986:
When I found it at Michael's I was amazed they had something so old school lying around, considering the turnover of merchandise at that place. Then I turned the book over…
…and discovered it's been reprinted. The graphic design is like night and day between the front and back covers! Anyway, it's an enchanting book, if you're into seeing pictures of cakes decorated before fondant became ubiquitous. I love everything about it; the writing style, the color palette, and especially the examples of piping you can do with all the various tips. In particular the page about "special use tips" caught my eye:
I already owned all the tips featured on this page, with the exception of this one, tip #353:
Normally I'm not a huge fan of tips that only do one thing, but a tip that makes three-dimensional hearts has the potential to be pressed into service constantly! Not only that, but three piped hearts can be made into a shamrock, along with a stem from a small, round tip #2. These hearts also make a great border. It took me a number of tries to figure out the angle and pressure for the piping bag. I think things might have gone smoother with a thinner consistency icing, but the thick royal icing I had on hand for class worked out OK. I usually have Nilla Wafers on hand; they're great as a base for all sorts of piped flowers, including the shaggy mums on the cake at the top of the chocolate fondant from scratch post. Nilla Wafers made a great practice surface for figuring out how to pipe hearts. It's very important to keep the tip clean; the end of this tip has a deep crescent-shaped cut and excess icing always seemed to be getting left behind in it like this:
Keep a damp cloth handy and you'll be able to wipe the tip clean for each new heart. I keep a box of unscented baby wipes around for this purpose. To pipe hearts with the tip #353, hold the bag a little higher than a 45 degree angle to the surface and with one of the tips of the crescent touching the surface:
Squeeze hard and the upper bulbous curves of the heart will form out both sides of the crescent. Keep squeezing, but decrease the pressure as you move the tip along for about 3/4".
Stop squeezing, and pull the tip away when you reach the end. You can use your fingers to gently tap out any imperfections in the heart, and also use one of the points of the tip's crescents shape to gently define the divot between the two upper bulbs of the heart. 
Here are three of my favorites; I'm looking forward to trying this again with a thinner frosting, because I think the result might be smoother. I'm glad I found this tip in time for Valentine's Day!


Wednesday, January 25, 2012

Primroses and Apple Blossoms

Session 2 of the 4-session Wilton class "Flowers and Cake Design" was a lot more enjoyable than the first, in which most of the time was dedicated to creating Gum Paste Button Flowers. I'm still pretty convinced that the only reason Wilton has worked this piece into the curriculum is because somewhere there are ten warehouses filled to the gills with unsold Wilton Button Flower Cut & Press Sets. In Session 2, we learned how to make The Wilton Rose, primroses, and apple blossoms, all from royal icing (of which I am extremely fond and likely to eat to the point of regret). We started with the primrose, which is made on a flower nail (I almost always refer to these things as "rose nails" but that's only because up until recently I'd never seen them used to make anything else). In addition to the rose nail (which has a template decal on it because I don't quite trust myself to get the same effect freehand yet), you'll need a 2" by 2" parchment square for each flower, two piping bags filled with different colors of royal icing and fitted with couplers, the tips 101, 1, 14, and 104, a glue stick for holding the parchment squares to the nail, and a wave flower former to dry the flowers on after. I also like to have a Styrofoam block handy to park the nail in on those occasions when being born with three hands would have been convenient.
To make the primrose, attach the 104 tip (it's a rose petal tip) to either bag, hold the wide end of the tip at the center of the circle with the tip about 1/8" off the surface. It's hard to see the tiny dotted lines radiating out from the middle in between the larger bold lines, but they're there for a reason. Start by holding the wide end tip alongside them, and you'll be in a better position to make the correct shape of the petal. 

Squeeze out a heart-like shape, keeping more or less between the lines of that fifth of the template:
You'll notice there are some yellow smears on the parchment paper square. That's because the first flower I tried had to be immediately "recycled"; sometimes it takes me a few tries to figure out the consistency of the icing and remember how my hands work. You'll want to pipe four more "hearts," each one starting with the tip sort of buried under the right edge of the last petal you piped. Here's the second:
And the third:
The fourth…
…and the fifth. 
I find that it's challenging to remove the tip from the flower after piping the fifth petal without doing some damage, but the trick for getting out of there cleanly is in sliding the tip out flat across the surface of the flower, following a line between petals that's already there, in sort of a shaving motion. Some flaws can be covered by finishing off the center with a small star (tip #14) topped with a tiny dot (tip #1):
The procedure for making the apple blossom is so similar, it's no wonder they're taught back-to-back. The main difference is the petals are round (not heart-shaped), and much smaller (only to the first circle indicated on the template. I actually find these more challenging, but they sure are adorable. A #101 tip is used (a smaller rose tip), and it's held in a similar position to the primrose (wide end in the middle, narrow end almost level with the surface of the nail). Here's the first petal:
Tucking the tip near the base of the first petal, squeeze out the second one:
You could almost stop there and have a sweet little heart! But since we're making flowers, continue on to the third:
With certain angle adjustments, it's not far off from being a 3-leaf clover. Or a shamrock:
And here it is finished:
Pipe five tiny dots using a #1 tip in a contrasting color for the center of the flower:
And then allow it to dry next to its friend on a wave former; this gives it a bit of shape (although it would still be pretty if it were allowed to dry flat):
The apple blossom is so tiny and lightweight I actually had to put a bit more glue from the glue stick on the underside of the parchment paper to hold it in place on the former. When the royal icing flowers are dry, they'll peel off the paper very easily. You can then store them in a cardboard box away from heat and light until you're ready to use them; they'll keep for months (unless you eat them). 

Tuesday, January 24, 2012

Chocolate Fondant From Scratch

The first time I tried to adapt the fondant from scratch recipe to be chocolate, the result was a total toss-out; completely unsalvageable garbage fondant. About a year ago I figured out what I did wrong, and guess what: I forgot to write down the recipe. However, it apparently was rattling around somewhere in my brain because I just pulled the ingredients together, and I think I have it more or less down. The ingredients are mostly the same as regular fondant (powdered sugar, glycerine, gelatine, corn syrup, vanilla, Crisco). The main difference is, of course, chocolate. I'm partial to Hershey's Special Dark, which is unsweetened. The other difference is the vanilla; with regular fondant you can use any flavor you want. With the chocolate I'd recommend vanilla, but you could probably use peppermint or go in some other direction with it.
All of the steps and measurements are the same as for the regular fondant recipe, with the exception of the first one. Start by putting a large sifter into a large bowl, and pour about 3/4 of a 2-pound bag of powdered sugar into it. I use a scale to get this weight as accurate as possible. Then, remove about a cup of sugar from the middle of the powdered sugar in the sifter; I used a measuring cup. Then put 4 oz. (half of the 8 oz. package of cocoa) in its place like this:
Sift the sugar and cocoa together into the bowl and form a hole in the middle:
Prepare the liquid ingredients (gelatine, water, corn syrup, glycerine, vanilla) according to the fondant from scratch recipe and pour them into the hole:
Start stirring; it's hard to describe how sticky this mixture will get:
It may seem like all the ingredients will never incorporate with each other but eventually they'll go from that to this:
You may find it's handy to have a long, dull knife like a dinner knife handy to scrape the sides of the bowl. A rubber spatula is just too floppy for this job. Scrape as much as you can into one complete ball, and dump it into the middle of a pile of powdered sugar sifted over your work area. You'll probably use all of that cup you removed earlier from the sifter and then some:
It's hard to imagine that powdery wad of stuff could ever evolve into something beautiful, huh? Smear your palms with about half a teaspoon of Crisco and work it in. Eventually, you'll have this sort of marbled mass that can be easily handled…
…and in no time at all you'll have this gorgeous deep brown fondant in your hand; not sticky at all:
 At this point you absolutely must sample it. I think you'll be pretty impressed! It'll probably be all you can do to not roll this out to cover a cake with it immediately, but it really should rest a while to cool off; that's a whole other project. Double wrap it with plastic wrap, and put it in a tightly sealed container away from heat and light.
As you can see, it weighs just over 30 ounces, definitely enough to cover 2 two-layer 8" or 9" cakes. I used one batch to cover the cake at the top of this post, and this one:
I'll use this batch I just made in a project soon and post the results here. No matter what it looks like, I'm pretty sure it will be yummy!


Monday, January 23, 2012

The Wilton Rose: A Variation


I don't think there's an icing flower that has more online tutorials than The Wilton Rose (including this one on the Wilton site). So, my goal isn't to provide the world with yet another one, but rather to show you a small trick I figured out for making a better looking Wilton Rose. Every time I attempted it, I'd wind up with a squashy, melted puddle of icing, no matter what temperature or consistency I was working with. Case in point:
I roll my own eyes. They look like wads of chewed-up, stepped-on gum; all wrong! And I swear, I followed those directions to the letter, both on my own and in class. It wasn't until I figured out how to make royal icing pine cones that I came up with the idea of piping the base, letting it dry, and then piping the petals. Here's the set-up:
That's a Styrofoam brick, which makes a great third hand when you're hard at work. There's a rose nail stuck into it; the rose nail has a decal on it that provides a guide for how large to pipe the base. To the left are a 2" by 2" piece of parchment paper (you'll need one for each rose), a glue stick (for temporarily attaching the paper to the rose nail, and the medium round tip #12 and the rose petal tip #104. Start by putting a dab from the glue stick on the nail, and attaching a parchment paper square to it:
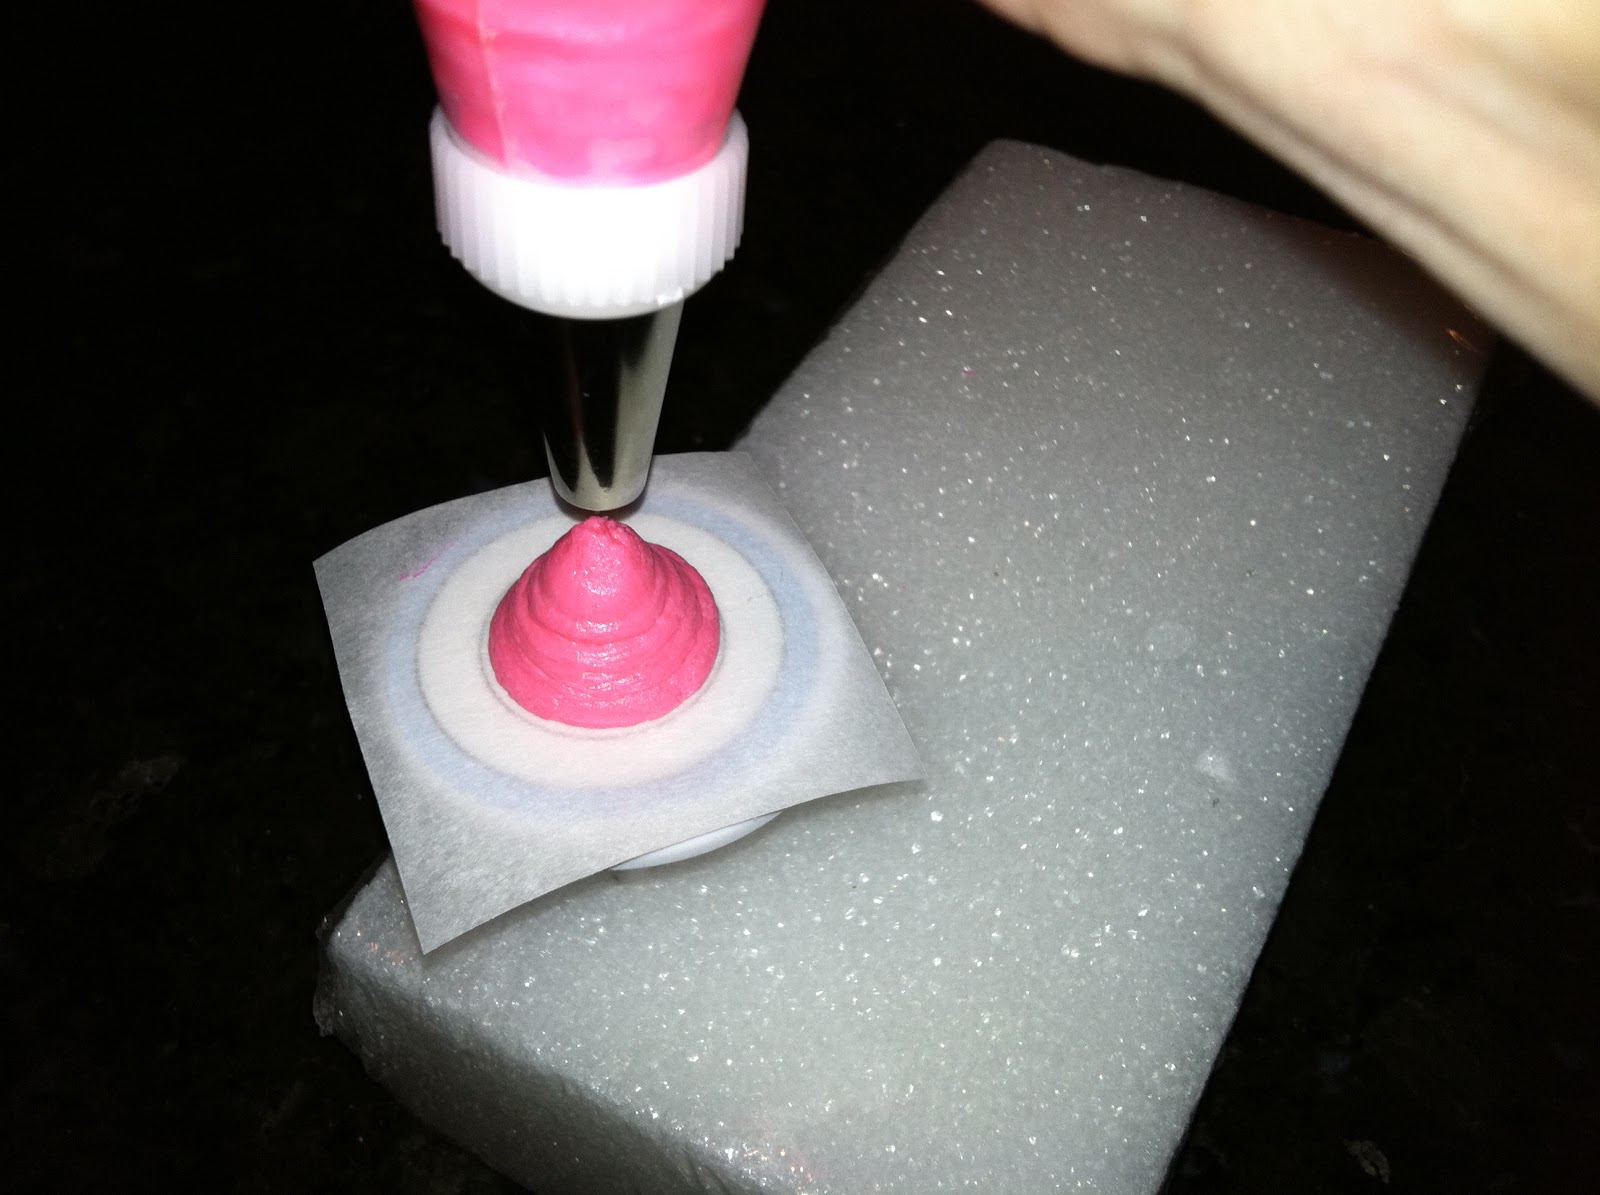
Load two piping bags with royal icing in whatever color the roses are going to be, or one bag with the round tip and a coupler. Start by piping the base, which is basically a Hershey's Kiss (the official Wilton tutorial linked to earlier will provide you with more complete guidelines regarding angle and pressure):
Slide the paper with the piped base on it gently off the nail and set it aside; tug it gently to release it from the glue. Allow the base to dry about 20 minutes; it will crust over sufficiently. Here are a variety of bases; the best one is in the middle, but remember: they don't need to be perfect…
…because they'll be covered with petals. The center petal is spiraled around the tip of the base, using the #104 tip:
Three overlapping petals are then piped around:
And then five petals:
And then seven:
The difference between these roses and my earlier efforts is pretty dramatic! Incidentally, the icing I used for both attempts at The Wilton Rose came from the same batch, which I made following this recipe. I recommend it wholeheartedly; not only does it work well for piping flowers (and pine cones), I actually think it tastes pretty good!


Sunday, January 22, 2012

Fondant Leaves and Chocolate Glaze

Finally, the time has come to bake the Stump de Noel cake and assemble the creations of the past few days, including the meringue toadstools, royal icing pine cones, and royal icing pine needles. Bear in mind, even though Williams Sonoma is no longer carrying this unusual cake pan, it can easily be found on eBay. I baked a box mix in it (Chocolate Fudge by Betty Crocker) for 60 minutes at 325 degrees. When I removed it from the oven I let it sit in the pan for 10 minutes, and then flipped it out onto a cake lifter, so the cooling rack wouldn't leave parallel lines on the top of the cake (which has a really cool pattern that looks like the stump's rings). The cake had developed an enormous crown, which would have probably caused the whole thing to crack.
I sliced it off with a large serrated knife, and was blown away by the amount of steam that poured forth; seriously, it was like a tiny volcano on my stovetop:
Here's the crown on the left, the cake on the right. That crown made for some mighty good snacking, let me tell you!
Here's what the cake looked like when I set it right-side up:
The pan came with a wonderful recipe for a glaze, which was simple and delicious. All you need is half a cup of heavy cream, and 4 ounces of chocolate:
I figured a semi-sweet bar would be sufficient, as the cake is plenty sweet on its own. On a carving board, finely mince the bar of chocolate with a sharp, heavy knife:
Put the minced chocolate in a bowl. 
Pour half a cup of the heavy cream into a small saucepan, and simmer over medium heat. 
Pour over the minced chocolate and start stirring. It will go from this…
…to this…
…to this…
…and then this…
…in a matter of moments. Make sure there's a piece of waxed paper under the rack your cooled cake is on, and pour the glaze all over the cake:
It was at about this point I realized I really needed to add a spot of color to this cake to keep it from being too brown and beige. I decided to try making some fondant leaves for the first time. Here's the set up:
That's a 9" rolling pin with purple rings on it to keep the fondant at a consistent thickness, a set of leaf-shaped fondant cutters, a piece of thin, pink foam for forming fondant or gum paste shapes on, a double-ended veining tool (part of the Wilton Gum Paste Tool Set; a bargain at any price when you buy it using a 40% off coupon at Michael's), and a golf ball-sized piece of green fondant from scratch. I spread some powdered sugar on the work surface, and rolled out the fondant:
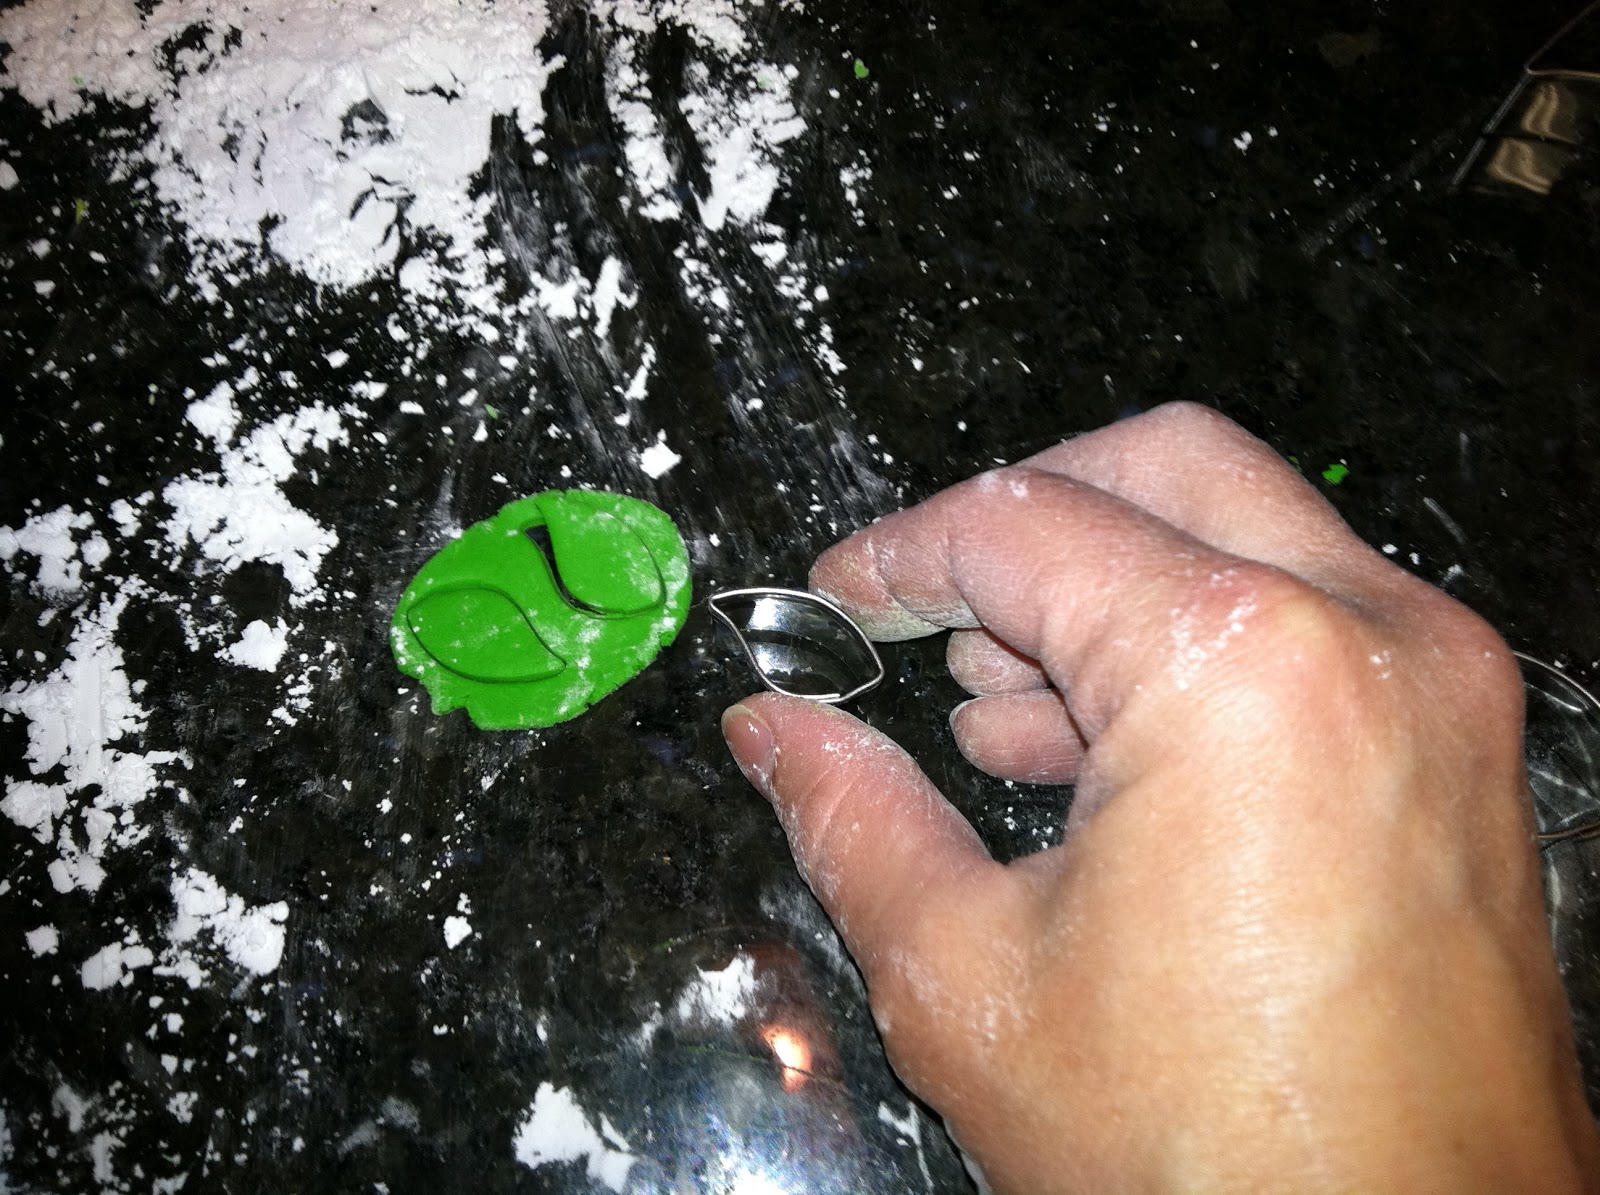
Remember, the powdered sugar more or less gets absorbed by the fondant; don't worry if there's an accumulation of it on the fondant's surface. Cut out a number of leaves…
Keep re-rolling the scraps and cutting out more leaves until you're left with a situation like this; I'm always so thankful for those tiny cutters!:
Then, use the veining tool to draw some details on the leaves, like a center line…
…and lines around the edges. Use the piece of thin foam as a work surface; it will have just the right amount of "give":
Put the leaves to dry on flower formers; that will give them a bit of curve:
My leaves stuck a bit; I probably should have dusted the formers with powdered sugar or laid down a piece of plastic wrap first. I was able to pry them up with the tiny palette knife/spatula that came with the Gum Paste Tool Set. Finally, the cake was ready to assemble, which included a last-minute sprinkling of "snow"; powdered sugar in a dusting pouch:
This cake was a real hit with the crowd it was served to; every bit of it was devoured, because every bit of it was edible! I'm so glad I didn't wait until next Christmas to try out this Yule log-inspired pan; it can definitely be tailored for any season of the year.