Showing posts with label tip #1. Show all posts

Monday, July 23, 2012

Royal Icing Bees

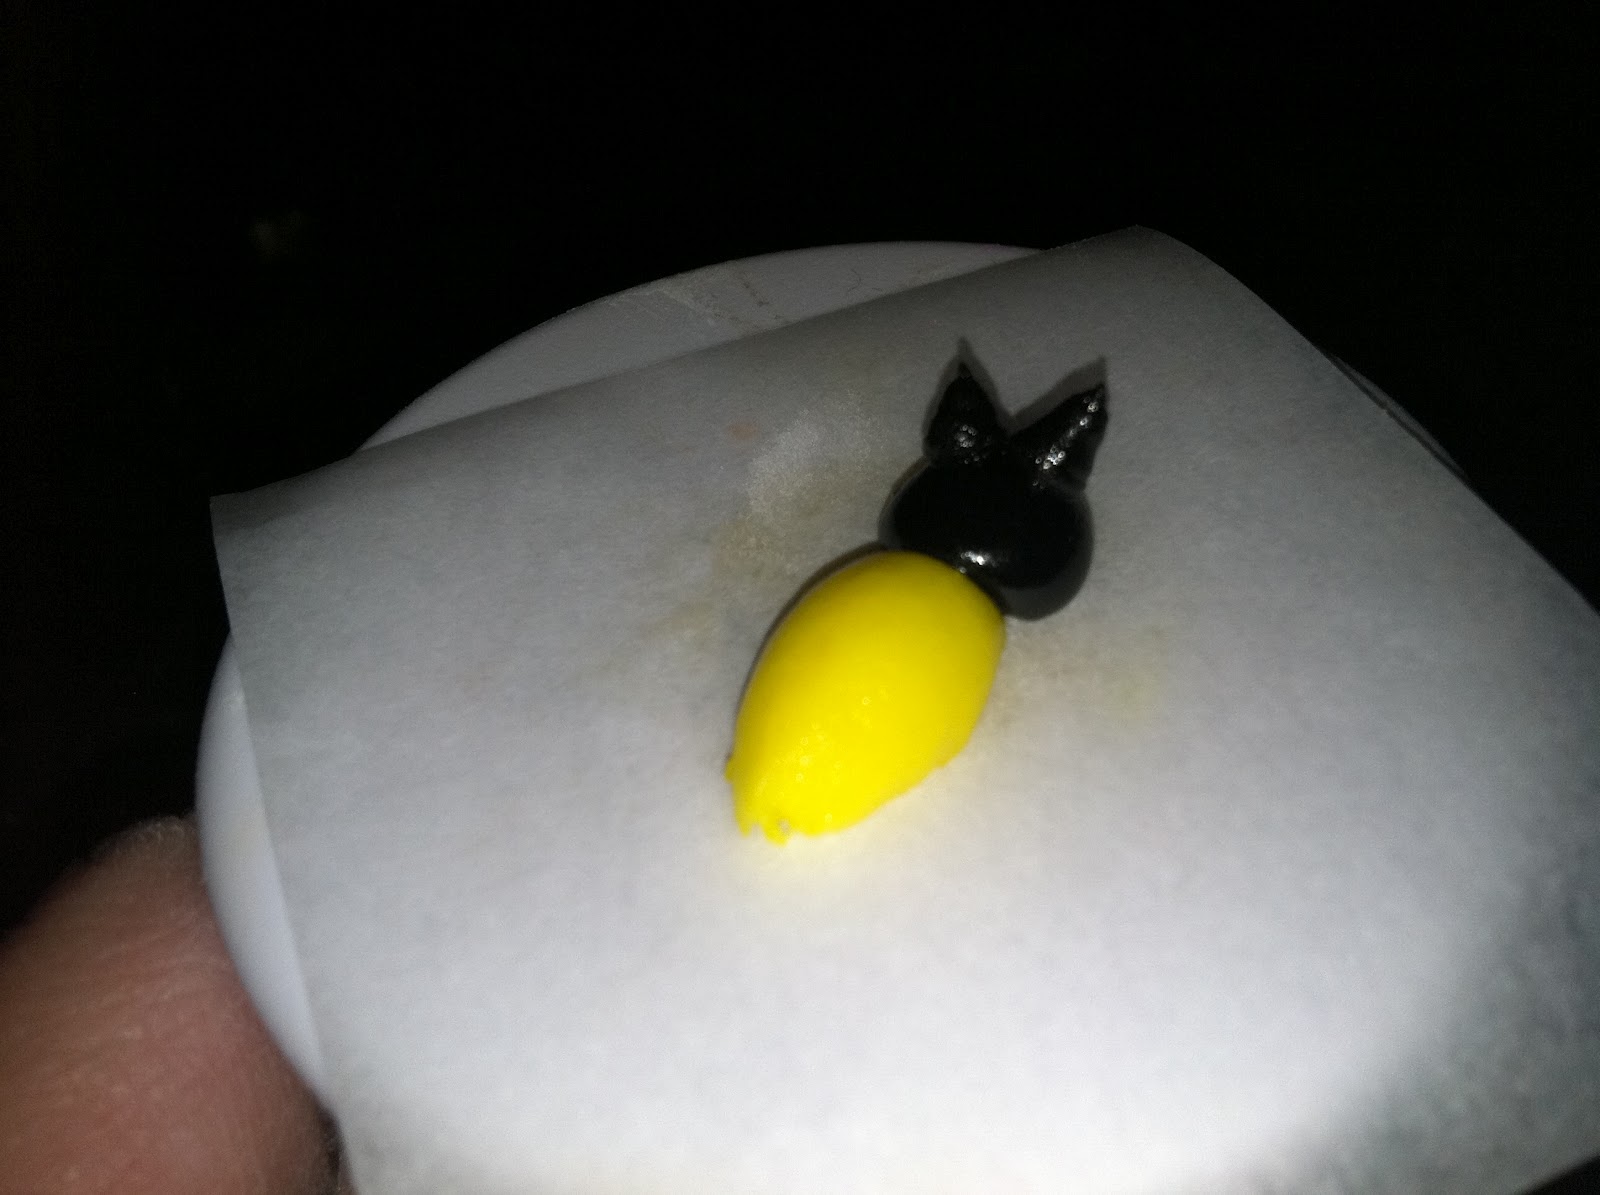
I guess I'm on an insect kick; I can't believe it's taken me this long to embrace all the creepy crawlies. The ant from the other day was so icky, I'm still trying to balance it out with cuter bugs; first ladybugs, and now, bees. All you'll need to pipe a whole swarm of bees is stiff consistency royal icing in yellow, black and white, a glue stick, a flower nail, round tips #1, #2, #4, and #10, petal tip #101, parchment paper squares, a black AmeriColor Gourmet Writer, a Styrofoam block to rest the nail in, and a dusting pouch filled with a 50/50 mix of powdered sugar and cornstarch. 
 Start by sticking a parchment square to the flower nail with a dab from the glue stick.
 Pipe a teardrop-shaped body with the #10 tip. Hold it just above the surface at a 45 degree angle. Squeeze out a ball, then move the tip along a short distance, stop pressure and pull the tip away.
 Use a #10 tip to pipe the head, as well. Hold the tip against the wide part of the body and pipe a ball. If a peak forms as you remove the tip, touch a fingertip to the dusting pouch and tap it down until it's round.
 Next, pipe the eyes with a #4 tip. They'll probably look all pointy…
 …so tap them flat with a dusted fingertip.
 Use the Gourmet Writer to draw the stripes. If the icing isn't completely hardened, the ink will feather. At first I regarded this as a mistake; now I think it makes the bee look sort of fuzzy and bumblebee-like.
 Pipe the legs with the #2 tip. Pipe four on the body and two just behind the head. Hold the tip against the surface, squeeze so that the limb will anchor to the body, then move the tip to the parchment, stop pressure and pull the tip away.
 Pipe the antennae with a #1 tip (or the #2, if you don't mind the antennae being a little bit chunky). Hold the tip against the head, squeeze, and pull the tip straight up and away, stopping pressure almost immediately.
 While the bodies are firming up, pipe some wings with the #101 petal tip. Hold the tip almost flat against the surface, and move it in a tight upside-down "U" motion. Pipe extra to allow for breakage. Let the wings firm up…
…then attach a couple to the bee with dots of icing just behind the head. These would be perfect for decorating any sort of honey cake, garden-themed dessert, cupcakes for a spelling bee, petit fours for a quilting bee, etc. 

Sunday, July 22, 2012

Royal Icing Ladybugs

Yesterday's ant even bugged me a little; it was just SO realistic and icky. So, today I piped a ladybug (which a few folks have been asking for, so here you go). All you need are stiff consistency royal icing in black, white, and red (as you can tell I used hot pink, so scratch that last requirement), parchment paper squares, a flower nail, a glue stick, round tips #12, #2, #8, and #1, and a dusting pouch filled with a 50/50 blend of powdered sugar and cornstarch. Start by piping an egg with the #12 tip, held just above and at a 45 degree angle to a parchment square.
 Round the tip into a true egg shape with a fingertip after touching it to the dusting pouch.
 Make an egg for each ladybug's body.
 After they've firmed up for a while, pipe a #2 line down the center with the black icing. I used Super Black by AmeriColor. I stuck the squares to the flower nail with a dab from the glue stick for this step; I find piping details to be a lot easier when I can hold everything up close to my eyes and not have to lean over the counter. Allow the line to fall out of the tip, sort of like you're piping a drop string, to keep it smooth. When you pull the tip away at the end, tap it flat with your fingertip.
 Switch to the #8 tip and pipe the head. It's basically a ball. Hold the tip almost against the body, squeeze out a ball, and as you pull the tip away, stop pressure. Tap the head into a round shape with your dusted fingertip if a peak remains.
 This part is so fun: the dots. Try to make them relatively symmetrical, if you're being a stickler for accuracy. Use the #2 tip, hold it just above the surface, squeeze out a dot, and pull away.
 Tap the dots flat with a fingertip (unless you want your ladybug to look dangerous, punk, or otherwise evolved).
 Pipe #2 dots for eyes with the white icing in the center of the head, flattening them as well.
 Lastly, pipe the antennae. Use black icing and the #1 tip. Hold the tip against the front of the head, squeeze, and pull away. Stop pressure after a very short distance. Adjust the direction of the antennae with a fingertip if they're heading off in two completely unrealistic directions.
 These could be piped in any color to match any theme. I think they'd be sweet on any sort of dessert for a garden party, or even for Halloween (I think they already look sort of sinister; imagine if they were piped in orange and black!).

Saturday, July 21, 2012

Royal Icing Ants

We have ants running around on the deck that are about the same size as these icing ones. That's why it would have been especially disturbing if I'd used them to decorate the cupcakes I brought to a potluck today. They're about the easiest thing you can imagine to pipe, but the problem is they're extremely fragile; one of the six I piped broke in half and lost its legs when I was setting them up for the final photo. The best way to pipe these critters might be to do the bodies and antennae first, then place them on your cupcake or whatever, then pipe the legs. Anyway, all you'll need are round #5 and #1 tips, stiff consistency black royal icing (I used Super Black Soft Gel Paste by AmeriColor), parchment paper squares, and a dusting pouch filled with a 50/50 mix of powdered sugar and cornstarch. Start by piping the head, which is basically a teardrop. Hold the #5 tip against the surface at a 45 degree angle, squeeze out a ball, and pull the tip away so a peak remains. 
 Next, pipe the thorax (middle). It's pretty much pear- or egg-shaped. Hold the tip just behind the base of the head, squeeze out a ball, and move the tip along a couple of millimeters. Stop pressure and pull the tip away. If a peak remains, tap it smooth with a fingertip after touching the dusting pouch.
 Finally, pipe the abdomen (back end). This segment is similar to the head, but larger. Hold the tip just behind the thorax, squeeze out a ball…
 …and pull the tip away. Really try to get the three segments to connect well, so the ant won't be as inclined to break in half (or thirds).
 Pipe as many creepy little ant bodies as you'll need and allow them to dry.
 When they've firmed up, pipe the antennae with a #1 tip. Hold the tip against the head, squeeze, and pull away, stopping pressure after a short distance. Adjust the antennae with a dusted fingertip, if they look a little too mismatched.
 Next, pipe the legs. It was at this point I realized there's really only room for two ants per parchment paper square once you've piped the legs, so I popped off the center one and stuck it to another square with a dot of icing.
 The ant has 3 legs on each side, all coming off the thorax. Hold the tip against the thorax, squeeze enough to anchor the leg to it, then bring the tip down to the parchment. The less icing on the parchment, the better; they'll be easier to remove when they're dry.
 These will be brilliant for Halloween, as well as for flipping out guests at picnics and potlucks in the summertime!

Friday, July 20, 2012

Royal Icing Cats

I guess I shouldn't be surprised by the large number of requests I've gotten for cats. My apologies for not piping some sooner! They're quite similar to the bunny and the mouse, but with some subtle changes in shape. Start by sticking a parchment paper square to a flower nail with a dab from a glue stick. 
 Fill a piping bag with stiff consistency royal icing in any color you like, fit it with a round #12 tip, and pipe an egg about 1/2" long.
 Don't worry about the egg shape being perfectly smooth. If you vary your pressure about halfway through, you may wind up with an indentation that suggests hind legs. Pipe an egg-shaped body for each cat you plan to make and allow them to firm up for about 15 minutes.
 Switch the tip to a round #10 and pipe the head. Hold the tip at a 45 degree angle against the narrow end of the body, squeeze briefly while moving the tip away, stop pressure, then pull the tip away. A peak will probably remain, like this:
 Touch a fingertip to a dusting pouch filled with a 50/50 mix of cornstarch and powdered sugar and tap the tip down until the head is shaped like a ball.
 Next, gently pinch the sides of the ball with your dusted fingertips to create that classic "cat" shape.
 Switch the tip to a round #4 and pipe a tail. Start at the back and pipe around to the side, rotating the nail as you go to help you pipe smoothly.
 Switch to the oval #55 tip and pipe a couple of paws; they're just short bursts of icing. If you like, you can skip this step. Your cat will look like the hovercat.
 At this point I got bored with the orange and picked up the pink piping bag fitted with a round #1 tip to pipe a nose. Sorry; back to that oval tip #55.
 To pipe the ears, hold the oval tip against the head, squeeze, and pull away. The shape should have a point. If it doesn't, you can give it a gentle pinch with dusted fingertips.
Lastly, give the kitties some dots for eyes with a food-safe pen like an AmeriColor Gourmet Writer. Pipe a whole litter in all different colors! Or maybe dress them up with tiny royal icing bows. 

Wednesday, June 20, 2012

Royal Icing Cactus

I've been meaning to try my hand at piping some desert-inspired decorations, so naturally I started with a cactus. To pipe cacti, you'll need stiff consistency green icing in a bag fitted with a #8 tip and a coupler, white icing in a bag fitted with a round #1 tip (thinner consistency than "stiff" is ideal when using a #1 tip), a dusting pouch filled with a 50/50 blend of powdered sugar and cornstarch, several pre-made drop flowers (unless you have the mad skills needed to pipe flowers directly on the finished cacti), a #2 tip…
…and a piece of parchment paper taped to a cookie sheet. 
 Start by piping a line of icing with the #8 tip. If there's a peak left when you stop the pressure and pull the tip away, touch a fingertip to the dusting pouch and tap it down.
 Pipe the "arms" of the cactus. To pipe the one on the right, I held the tip against the right side of the center line and piped a "J". The arm on the left is overlapping onto the center line, just to give the cactus some depth. Set the cacti to dry for about an hour (you can speed up the drying time by placing them under a desk lamp).
 Pipe some drop flowers and allow them to dry.
 Switch the tip on the green bag to the round #2. Pipe a dot onto the backs of a few flowers…
 …and stick them on. As you've probably imagined, this exact species of cactus exists only in my mind; I might have taken some artistic/scientific liberties with its design.
 Pipe some "spines" with the white icing and the #1 tip. Allow the cacti to dry overnight, then plant them on any desert- or Southwestern-themed cake (or even a cake celebrating water conservation). They'd look great surrounded by brown sugar sand!