Showing posts with label dusting pouch. Show all posts

Friday, July 20, 2012

Royal Icing Cats

I guess I shouldn't be surprised by the large number of requests I've gotten for cats. My apologies for not piping some sooner! They're quite similar to the bunny and the mouse, but with some subtle changes in shape. Start by sticking a parchment paper square to a flower nail with a dab from a glue stick. 
 Fill a piping bag with stiff consistency royal icing in any color you like, fit it with a round #12 tip, and pipe an egg about 1/2" long.
 Don't worry about the egg shape being perfectly smooth. If you vary your pressure about halfway through, you may wind up with an indentation that suggests hind legs. Pipe an egg-shaped body for each cat you plan to make and allow them to firm up for about 15 minutes.
 Switch the tip to a round #10 and pipe the head. Hold the tip at a 45 degree angle against the narrow end of the body, squeeze briefly while moving the tip away, stop pressure, then pull the tip away. A peak will probably remain, like this:
 Touch a fingertip to a dusting pouch filled with a 50/50 mix of cornstarch and powdered sugar and tap the tip down until the head is shaped like a ball.
 Next, gently pinch the sides of the ball with your dusted fingertips to create that classic "cat" shape.
 Switch the tip to a round #4 and pipe a tail. Start at the back and pipe around to the side, rotating the nail as you go to help you pipe smoothly.
 Switch to the oval #55 tip and pipe a couple of paws; they're just short bursts of icing. If you like, you can skip this step. Your cat will look like the hovercat.
 At this point I got bored with the orange and picked up the pink piping bag fitted with a round #1 tip to pipe a nose. Sorry; back to that oval tip #55.
 To pipe the ears, hold the oval tip against the head, squeeze, and pull away. The shape should have a point. If it doesn't, you can give it a gentle pinch with dusted fingertips.
Lastly, give the kitties some dots for eyes with a food-safe pen like an AmeriColor Gourmet Writer. Pipe a whole litter in all different colors! Or maybe dress them up with tiny royal icing bows. 

Thursday, July 12, 2012

Dusting Pouches

 A dusting pouch is one of the most essential tools needed for successfully and accurately piping royal icing figures and flowers. Dusting pouches are nothing more than a circle of porous fabric with a drawstring. 
 Open the pouch wide, and pour in a heaping tablespoon of powdered sugar. 
 Add a heaping tablespoon of cornstarch. 
 I like to mix them up a bit with the handle of the tablespoon; using the spoon itself tends to flick the contents of the pouch right back out. 
Pull the strings tight, and tie the knot as close to the pouch as you can. Store the dusting pouch in a baggie or sealed plastic container so it won’t inadvertently dust all of your supplies. 
 Here’s an example of the sort of thing for which a dusting pouch comes in handy. When piping a figure like the rubber duck, you’ll need to pipe a ball shape for the head. Oftentimes, I find it difficult to pipe a ball directly onto another royal icing shape, especially if the first shape hasn’t thoroughly dried. If, when you pull the tip away, a peak like this remains…
 …touch a fingertip to the dusting pouch and gently tap the peak into the desired ball shape. If your fingertip is amply dusted, the icing will not stick to it. Royal icing can be manipulated with dusted fingertips in all sorts of ways; the tips of petals can be pinched to a point, edges of leaves can be refined…
 …and the bills of penny-sized rubber duckies can be rounded from an unsightly peak to a natural curve. Keep a dusting pouch filled and handy at all times; you’ll always find yourself reaching for it when you’re piping with royal icing.

Wednesday, June 6, 2012

Royal Icing Mouse

It seems like the smaller the subject matter, the larger the number of page views. So, continuing the effort to give the people what they want, here's a teeny-tiny-little mouse. You won't even feel the weight of this creature when you hold it in your hand (which is sort of true for a real mouse, come to think of it). Here's all you'll need to pipe mice (in this case, albino mice)…
…Royal icing in pale pink, white, and red, a glue stick, a flower nail, parchment paper squares, a Styrofoam block (handy to stick the flower nail in when you're switching tips), a dusting pouch filled with a 50/50 mix of powdered sugar and cornstarch, and petal tip #101, round tip #1, round tip #2, and round tip #12. Start by loading the bag of white icing with the #12 tip. You probably won't need the flower nail for this step. Pipe the mouse's body, which is basically a teardrop, on a parchment paper square. Start by piping a ball, and when it forms, start moving the tip in one direction or another. When the shape and size is to your liking, stop pressure and pull the tip away. You may need to touch your thumb and forefinger to the dusting pouch, then use them to gently refine the tapered shape. 
 Here's a whole bunch of mouse bodies. I think that one on the lower right is the mousiest.
 After the mouse bodies have firmed up (leave them for a half hour or so; speed the process up by turning on a desk lamp over them), attach one of them (with the parchment square still intact) to the flower nail with a dab from the glue stick.
 Using the small petal tip #101, pipe two ears. I practiced on my finger a few times, first. Keep the wide end of the tip angled out, and move the tip in a tight, upside down "U" motion. Touch your finger to the dusting pouch, and tap the base of the ear down so it smoothly meets the head.
 Switch to the #2 tip, and pipe a tiny ball for a nose. As you pull the tip away, it may leave a peak, which you can either leave if you like the look of it, or tap down gently with a fingertip.
 Pipe the tail, next. I rotated the nail while I piped to get that nice, smooth curve along the body. To form the tapered tail tip, stop pressure and pull the tip away.
 Finally, pipe the red eyes with a #1 tip. Obviously, you could change all these colors to pipe any breed of mouse you like.
Now, to pipe some royal icing cheese…


Sunday, January 22, 2012

Fondant Leaves and Chocolate Glaze

Finally, the time has come to bake the Stump de Noel cake and assemble the creations of the past few days, including the meringue toadstools, royal icing pine cones, and royal icing pine needles. Bear in mind, even though Williams Sonoma is no longer carrying this unusual cake pan, it can easily be found on eBay. I baked a box mix in it (Chocolate Fudge by Betty Crocker) for 60 minutes at 325 degrees. When I removed it from the oven I let it sit in the pan for 10 minutes, and then flipped it out onto a cake lifter, so the cooling rack wouldn't leave parallel lines on the top of the cake (which has a really cool pattern that looks like the stump's rings). The cake had developed an enormous crown, which would have probably caused the whole thing to crack.
I sliced it off with a large serrated knife, and was blown away by the amount of steam that poured forth; seriously, it was like a tiny volcano on my stovetop:
Here's the crown on the left, the cake on the right. That crown made for some mighty good snacking, let me tell you!
Here's what the cake looked like when I set it right-side up:
The pan came with a wonderful recipe for a glaze, which was simple and delicious. All you need is half a cup of heavy cream, and 4 ounces of chocolate:
I figured a semi-sweet bar would be sufficient, as the cake is plenty sweet on its own. On a carving board, finely mince the bar of chocolate with a sharp, heavy knife:
Put the minced chocolate in a bowl. 
Pour half a cup of the heavy cream into a small saucepan, and simmer over medium heat. 
Pour over the minced chocolate and start stirring. It will go from this…
…to this…
…to this…
…and then this…
…in a matter of moments. Make sure there's a piece of waxed paper under the rack your cooled cake is on, and pour the glaze all over the cake:
It was at about this point I realized I really needed to add a spot of color to this cake to keep it from being too brown and beige. I decided to try making some fondant leaves for the first time. Here's the set up:
That's a 9" rolling pin with purple rings on it to keep the fondant at a consistent thickness, a set of leaf-shaped fondant cutters, a piece of thin, pink foam for forming fondant or gum paste shapes on, a double-ended veining tool (part of the Wilton Gum Paste Tool Set; a bargain at any price when you buy it using a 40% off coupon at Michael's), and a golf ball-sized piece of green 
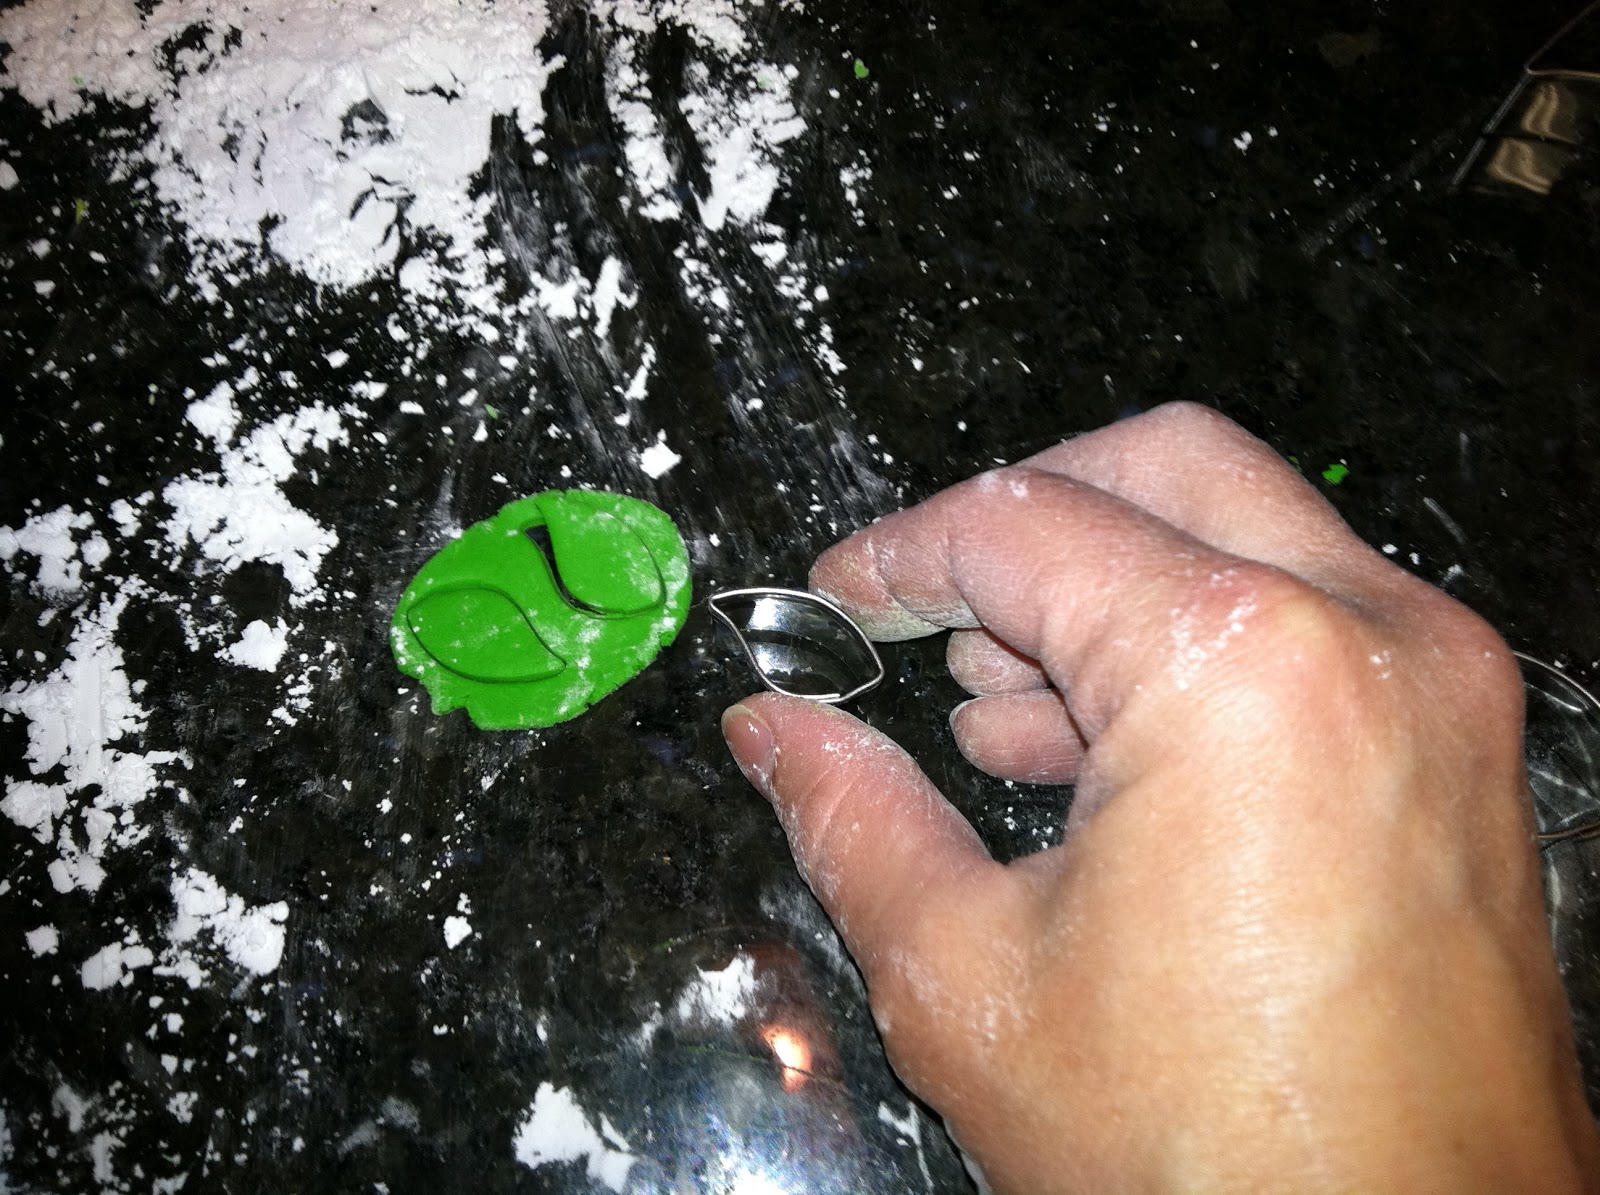
fondant from scratch. I spread some powdered sugar on the work surface, and rolled out the fondant:
Remember, the powdered sugar more or less gets absorbed by the fondant; don't worry if there's an accumulation of it on the fondant's surface. Cut out a number of leaves…
Keep re-rolling the scraps and cutting out more leaves until you're left with a situation like this; I'm always so thankful for those tiny cutters!:
Then, use the veining tool to draw some details on the leaves, like a center line…
…and lines around the edges. Use the piece of thin foam as a work surface; it will have just the right amount of "give":
Put the leaves to dry on flower formers; that will give them a bit of curve:
My leaves stuck a bit; I probably should have dusted the formers with powdered sugar or laid down a piece of plastic wrap first. I was able to pry them up with the tiny palette knife/spatula that came with the Gum Paste Tool Set. Finally, the cake was ready to assemble, which included a last-minute sprinkling of "snow"; powdered sugar in a dusting pouch:
This cake was a real hit with the crowd it was served to; every bit of it was devoured, because every bit of it was edible! I'm so glad I didn't wait until next Christmas to try out this Yule log-inspired pan; it can definitely be tailored for any season of the year.