Showing posts with label rose nail. Show all posts

Saturday, February 4, 2012

Piping a Rose on a Cupcake

 
I got a really swell book for Christmas: Baking With the Cake Boss, by Buddy Valastro. 90%+ of the time I'll blindly accept anything Buddy says as the last word in cake decorating, but there's one concept in this book I just can't get behind, regarding roses on cupcakes: "…you will want to use a rose nail for making roses for both cakes and cupcakes. Piping directly onto cupcakes is best left to the professionals." Really? C'mon now; this is cake decorating, not freakin' rocket surgery! All it takes is a statement like that for me to find a way to defy it, so I think I've got it down and I'd be remiss in not showing it to you posthaste. Here's what you need:
That's it: a cupcake, a pastry bag loaded with medium-consistency icing (softer than toothpaste, but stiff enough to hold its shape) and a round Wilton #12 tip on a coupler, and a Wilton #104 rose tip on standby. If you're piping a whole batch of these, do this first step on all the cakes: with the #12 tip, hold the bag perpendicular to and just above the center of the cupcake. Squeeze firmly; allow the icing to spread out to about the size of a quarter, then start moving the bag away from the cupcake while decreasing pressure. When the shape is more or less that of a Hershey's Kiss, stop pressure and pull the bag away. If the shape is even close, it will probably work. If it's nowhere near close, pluck it off and eat your mistake. Alternately, practice on a piece of parchment or waxed paper until you have it down, and then scrape all your mutant Kisses off with an offset spatula back into the original icing container or the pastry bag. 
The next step will be piping petals, so switch to a Wilton tip #104. I think what Buddy was saying about how to not attempt to pipe roses directly on a cupcake without a nail had something to do with the ease of rotating you get with a nail; it basically is a tiny turntable. To a slightly lesser extent, you can get the same effect with your hand. This is the first position; holding the cake, turn your hand in as tightly as possible:
And this would be the final position, with your hand rotated as far away from you as possible:
So, it's time to start piping petals. Bear in mind, for the next several steps the cake is held in the non-dominant hand, which I couldn't do while holding the bag and the camera, so the cake is on the counter and not in-hand. Switch the tip on the bag to #104, and get familiar with holding it at this angle to the "Kiss." The wide side of the teardrop-shaped tip will be down (which should be logical; you want the edges of the petals to be thinner than the base, right?).The tip should also be angled away from you slightly, and not perpendicular to the "Kiss" (if it was, when you start piping you'd knock it over; the goal is to wrap the first spiral of icing around the "Kiss"). Start with the narrow end of the tip just above the "Kiss"…
…and pipe a continuous spiral around the top of the "Kiss," using the starting-and-ending hand positions pictured above:
Ideally that little hole in the center of the spiral would be looking upwards, but this is close enough and not bad for a first attempt. Guess what: the hardest part is over, and now all you need to do is pipe petals to cover the rest of the "Kiss". The first row consists of 3 overlapping petals (again, use the starting-and-ending hand positions to rotate the cake around while you pipe). The wide base of the tip is touching the "Kiss" and the narrow end is angled slightly outward. There's a very slight upside-down "U" hand motion involved with the piping of each petal, but as you squeeze the shape will form pretty naturally; you won't need to force it into existence with a lot of hand movement:
Here's the next layer of 5 overlapping petals; note the tip is angled slightly more outwards (otherwise your rose would have rather unnatural, parallel rows of petals). It also looks more natural if you manage to not line up each row of petals with the one before it; try to offset each row a little, like tabs in an accordion folder:
 Next, pipe a row of 7 petals, or however many you need to finish covering the "Kiss." After the row of 7, I stopped counting. I think there was one more row that also had 7 at the very base. By the time you get to that final row of petals, the tip will practically be lying flat on the cupcake; do whatever you can to get the petals in there:
To finish this rose off, it's nice to pipe some leaves. I had an Ateco Tip #69 on a bag of green icing lying around, so I piped a few. Push the end of the tip under the rose and start squeezing while you pull out a leaf. when it's the length you want, stop the pressure and pull the bag away. If the leaves' edges look ragged, you can pinch them into a nice leaf shape with your fingers; touch your fingertips to a dusting pouch filled with a 50/50 mix of cornstarch and powdered sugar so they won't stick to the icing (I had to do this with every single leaf in this photo because the icing was very thick and the edges tore and were not pretty):
Well, that's it. In closing, I'd have to say I prefer to pipe roses on a rose nail and then transfer them to the cupcake with a flower lifter, but if all I had handy were my hands, they're a couple of pretty well-made machines that get the job done. 

Monday, January 23, 2012

The Wilton Rose: A Variation


I don't think there's an icing flower that has more online tutorials than The Wilton Rose (including this one on the Wilton site). So, my goal isn't to provide the world with yet another one, but rather to show you a small trick I figured out for making a better looking Wilton Rose. Every time I attempted it, I'd wind up with a squashy, melted puddle of icing, no matter what temperature or consistency I was working with. Case in point:
I roll my own eyes. They look like wads of chewed-up, stepped-on gum; all wrong! And I swear, I followed those directions to the letter, both on my own and in class. It wasn't until I figured out how to make royal icing pine cones that I came up with the idea of piping the base, letting it dry, and then piping the petals. Here's the set-up:
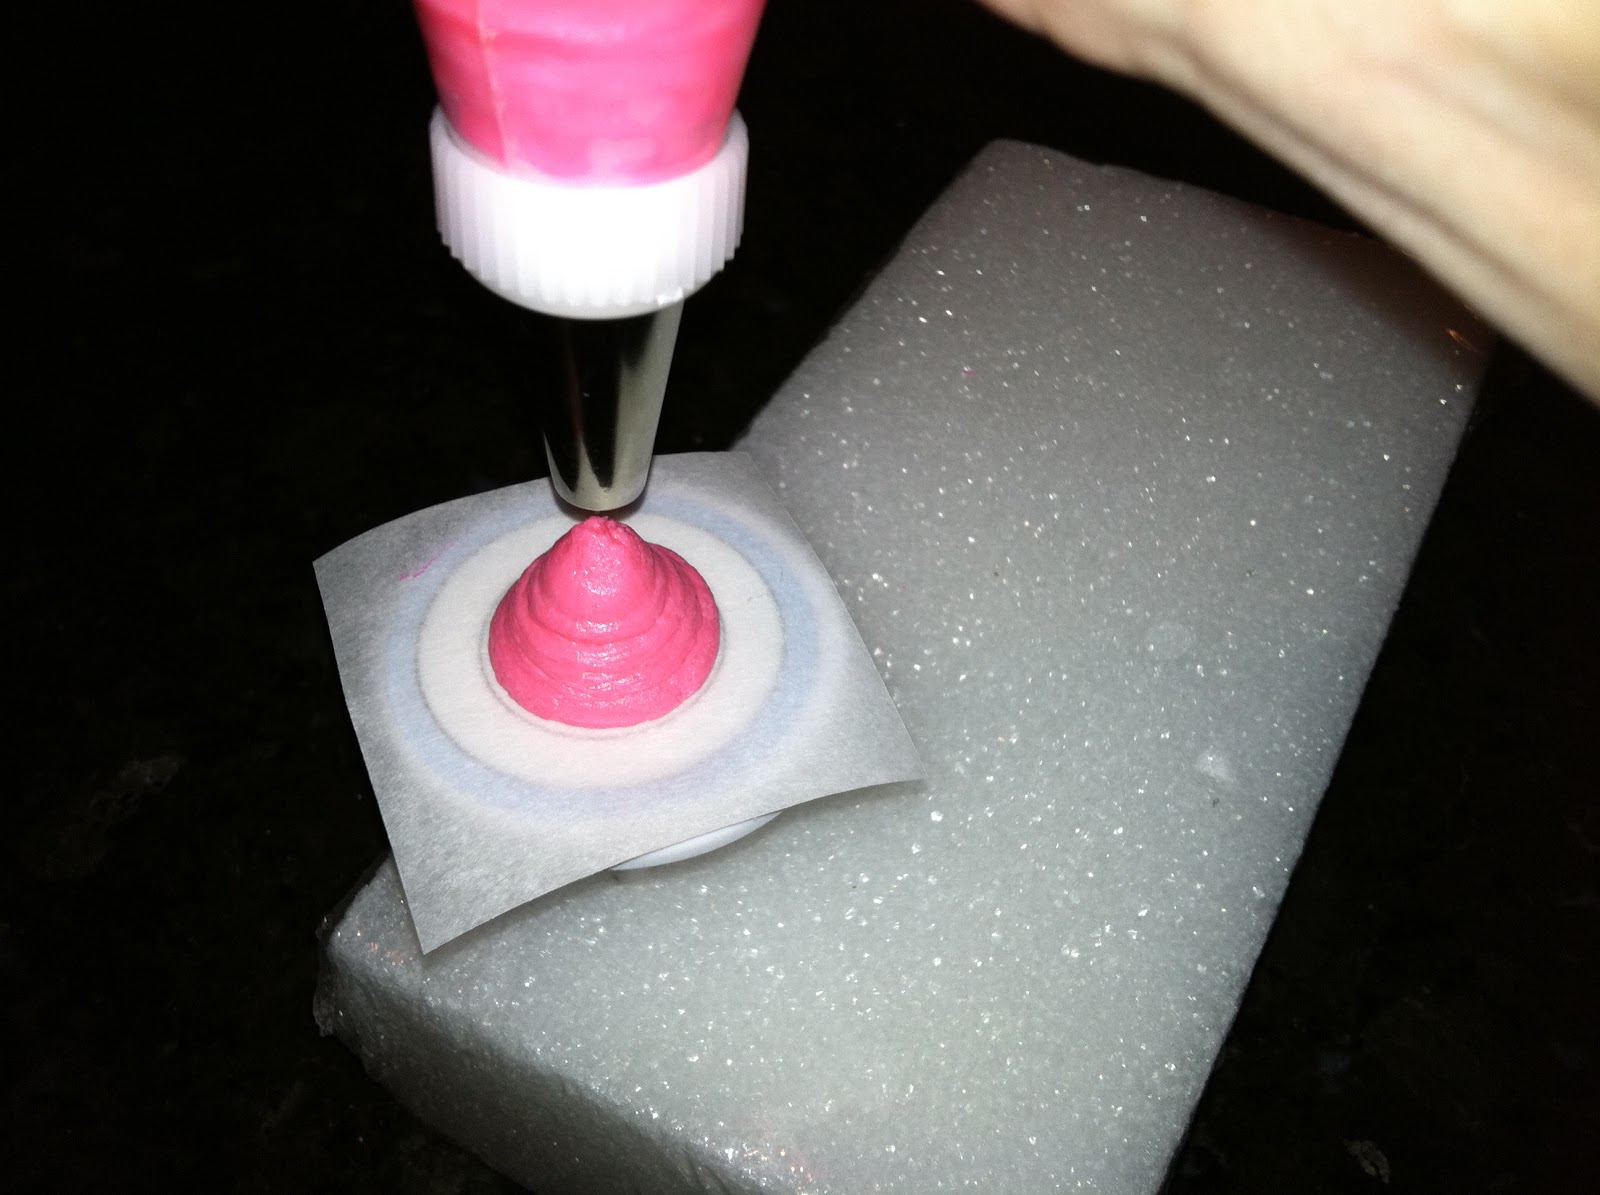
That's a Styrofoam brick, which makes a great third hand when you're hard at work. There's a rose nail stuck into it; the rose nail has a decal on it that provides a guide for how large to pipe the base. To the left are a 2" by 2" piece of parchment paper (you'll need one for each rose), a glue stick (for temporarily attaching the paper to the rose nail, and the medium round tip #12 and the rose petal tip #104. Start by putting a dab from the glue stick on the nail, and attaching a parchment paper square to it:
Load two piping bags with royal icing in whatever color the roses are going to be, or one bag with the round tip and a coupler. Start by piping the base, which is basically a Hershey's Kiss (the official Wilton tutorial linked to earlier will provide you with more complete guidelines regarding angle and pressure):
Slide the paper with the piped base on it gently off the nail and set it aside; tug it gently to release it from the glue. Allow the base to dry about 20 minutes; it will crust over sufficiently. Here are a variety of bases; the best one is in the middle, but remember: they don't need to be perfect…
…because they'll be covered with petals. The center petal is spiraled around the tip of the base, using the #104 tip:
Three overlapping petals are then piped around:
And then five petals:
And then seven:
The difference between these roses and my earlier efforts is pretty dramatic! Incidentally, the icing I used for both attempts at The Wilton Rose came from the same batch, which I made following this recipe. I recommend it wholeheartedly; not only does it work well for piping flowers (and pine cones), I actually think it tastes pretty good!


Friday, January 20, 2012

Royal Icing Pine Cones

I know, I know; it's a bit late to be talking up Yule logs. The thing is, I bought one of Williams Sonoma's fabulous Stump de Noel Bundt pans at the end of the season when the price dropped and I've been dying to use it! There's no way I'm waiting almost a year to press this pan into service, so I'm giving it a test drive now. Yesterday I made meringue toadstools to "garnish" the stump, and today I'm taking piping bag in hand and trying to figure out how to make pine cones.
There are a lot of online tutorials for edible pine cones, but most of them rely on gum paste. In my humble opinion, gum paste isn't so much edible as it is non-poisonous. I'm pretty sure no one's died a horrible death from eating gum paste, but if I found out it's a routine occurrence I wouldn't be surprised. I ate a small amount recently (a 50/50 blend of gum paste and my fondant from scratch), and my first reaction was, "Hmm, not bad. Tastes like fondant. A little slippery." And then I proceeded to endeavor to swallow it. I felt like I was being waterboarded (from what I've read). My gag reflex went into the same mode as when I swallow a piece of gum and make every effort to valiantly choke it back up. So, long story short, I really wanted to make my pine cones as edible as possible, while hopefully making them slightly realistic. I'm hoping in the presence of the meringue toadstools the persistence of imagination will kick in and folks will figure out what they're supposed to be.

First, I pulled together some pine cones for inspiration. These are sugar pine cones, straight from the forest floor of Calaveras County, CA. Note, they are not dark brown; they are more of a peanut butter color. I mixed up about a cup of royal icing and brown paste food coloring, which made half a dozen cones with plenty left over.
I put a tiny dab from a glue stick on a rose nail. Then I stuck a 2" by 2" square of parchment paper to it (I hear you can buy these pre-cut; please resist and make your own). I fitted a piping bag with a coupler (so I could change tips) and a medium round Wilton tip #12, and filled the bag with icing.
I piped a column of icing as high as I dared (just over an inch); starting with the tip touching the center of the nail and squeezing and drawing the tip away at a 90 degree angle to the nail.
I made half a dozen of them, each on its own parchment square, and allowed them to dry for about 20 minutes; long enough to crust over. Any little peaks on top or other "issues" can be smoothed over with a fingertip before they dry hard; they can also be straightened up if they start to lean (like that one on the left, front row).
Then I switched the tip to the Wilton #101 (a small rose tip) and started piping petals. I figured, a rose has petals, and so does a pine cone; why not? I more or less followed the pattern suggested by the Wilton rose. I started with 4 petals, each overlapping the previous. The hand motion is like drawing a tiny upside-down "U." Here's the first petal:
I held the bag at about the 1 o'clock position, if the column is at 12, with the wide end of the opening at the bottom and the narrow end aligned with the top of the column. I piped these 4 petals around the top, leaving the tip of the center column exposed. It had a small peak, which I rounded down with a fingertip.
Then I piped another 5 petals, overlapping the base of the first 3 slightly (and overlapping each other). The trick to piping these petals is to rotate the nail counterclockwise while squeezing the bag and holding it more or less in place, other than a slight up-and-down motion to form each petal. The tip is angled out a little wider now; maybe at 2 o'clock in relation to the center column.
Then I switched to a larger rose tip, #104, and continued to pipe overlapping layers of petals, spiraling all the way down to the base. 
I'm not too worried about any raggedness at the base; real pine cones don't exactly have unblemished foundations, and these are going to be sunk into a brown, forgiving cake. When you're pleased with the outcome, give the parchment paper a gentle tug to break it loose from the dab from the glue stick, and slide the pine cone off the nail. Allow it to dry someplace away from moisture and direct heat. If you're not going to use the pine cones right away you can store them in a cardboard box (their preferred environment) for months. Feel free to give them a bit of a dusting with cocoa powder; that might enhance their dusty, forest-y feel. Of course, a dusting of powdered sugar could suggest snow.
Can you think of other edible, forest-inspired things to add to a Yule log cake? I'd love to hear your ideas in the comments!