Showing posts with label tip #12. Show all posts

Sunday, December 23, 2012

Royal Icing Bunny Slippers

Tonight's post is an homage to "A Christmas Story"; how many of you list that among your favorite holiday films? All you'll need to pipe tiny little bunny slippers just like Ralphie's are stiff consistency royal icing in pink, round tip #12, leaf tip #352, a flower nail, parchment paper squares, a glue stick, a Styrofoam block to rest the nail in, a dusting pouch filled with a 50/50 mix of powdered sugar and cornstarch, round toothpicks, and black food coloring, like AmeriColor's Soft Gel Paste. Start by sticking a parchment square to the flower nail with a dab from the glue stick. 
 Hold the #12 tip just above and at a right angle to the surface. Pipe out a couple of elongated "bean" shapes, curving slightly in the middle and with the ends wider than the center. Touch your fingertip to the dusting pouch and then finesse the icing into shape, if need be. Allow these shapes to firm up for a few minutes.
 Hold the tip at a 45 degree angle and just above and behind one of the ends. Squeeze out a ball of icing, then move the tip along for a few millimeters. Stop pressure and pull the tip away.
 Tap down the peaks with a dusted fingertip. Allow the icing to firm up for a few minutes.
 Hold the #352 tip against the head (with one of the pointy sides facing toward the front of the slipper) and pipe out an ear while moving the tip upward for about half an inch. Stop pressure and pull the tip away. Use a dusted fingertip to adjust the ears so they lop over.
 Pipe the eyes with #3 dots of white icing. Flatten them slightly with a dusted fingertip.
 When the white icing is firm, dab on pupils of black food coloring with the tip of a round toothpick that you've smashed against your countertop.
 Paint on a tiny triangular nose with the other pointy end of the toothpick. Sorry; tomorrow's tutorial won't be for a leg lamp or a Red Ryder BB Gun!

Thursday, December 20, 2012

Royal Icing Loopy Bow

Loopy fondant bows are easy to make, and loopy royal icing bows are even easier! All you'll need is stiff consistency royal icing in any color, oval tip #57, round tip #12, a cookie sheet lined with parchment paper, a flower nail, parchment paper squares, a glue stick, and a Styrofoam block to rest the nail on. Start by taping a sheet of parchment paper to the cookie sheet. 
 Pipe dozens of 1/2" "teardrops" with the tip #57. Allow them to firm up for an hour or two.
They're ready for action when they can be removed easily from the paper by sliding an offset spatula underneath them. 
 
Stick a parchment square to the flower nail with a dab from the glue stick.
 Switch to the #12 tip and pipe a spiral of icing about 1/2" wide and a little over 1/2" tall.
 Quickly, before the icing has  chance to dry, stick as many loops into the icing as you can. Angle them in all different directions. Work from the base up. I was able to fit 6 loops around the base and then tucked in another 8 above.
 Peel away the parchment square when the icing is dry, and use this loopy bow to instantly add more height and festivity to any cupcake, Rice Krispy Treat, brownie, etc!

Friday, December 14, 2012

Royal Icing Christmas Stocking

Tonight is a tribute to one of my favorite Christmas rituals: stuffing Christmas stockings. Everyone from my kid to my cat gets a stocking on Christmas morning. Here's what you'll need: stiff consistency royal icing in any colors you like, a tip #12 for each color (or be prepared to do some washing), a flower nail, a glue stick, parchment paper squares, a Styrofoam block to rest the nail in, and a dusting pouch filled with a 50/50 mix of powdered sugar and cornstarch.   
 Hold the #12 tip just above and at a right angle to the surface. In one motion, pipe a shape like a slightly curvy "L", then reverse the direction when you reach the "toe" and continue back up to the top where you started.
 Touch a fingertip to the dusting pouch and tap the icing flat and smooth.
 Pipe the cuff in a similar fashion; the basic shape is a zero lying on its side. You don't have to pipe the icing as smooth with the cuff; if you pulse the pressure as you pipe you can give the surface a lumpy, "furry" appearance. I sprinkled on some extra powdered sugar; it looks sort of snowy. Alternately, you can switch to a small round tip like a #2 and pipe many short peaks of icing for fur; I may give this a try after the white icing firms up more. You can, of course, decorate the stocking any way you like with edible glitter, pearl dust, stitching, tiny holly leaves, etc. In any event, it makes a cute cupcake topper or decoration for a gingerbread house or cookie.

Wednesday, December 12, 2012

Royal Icing Starlight Mint

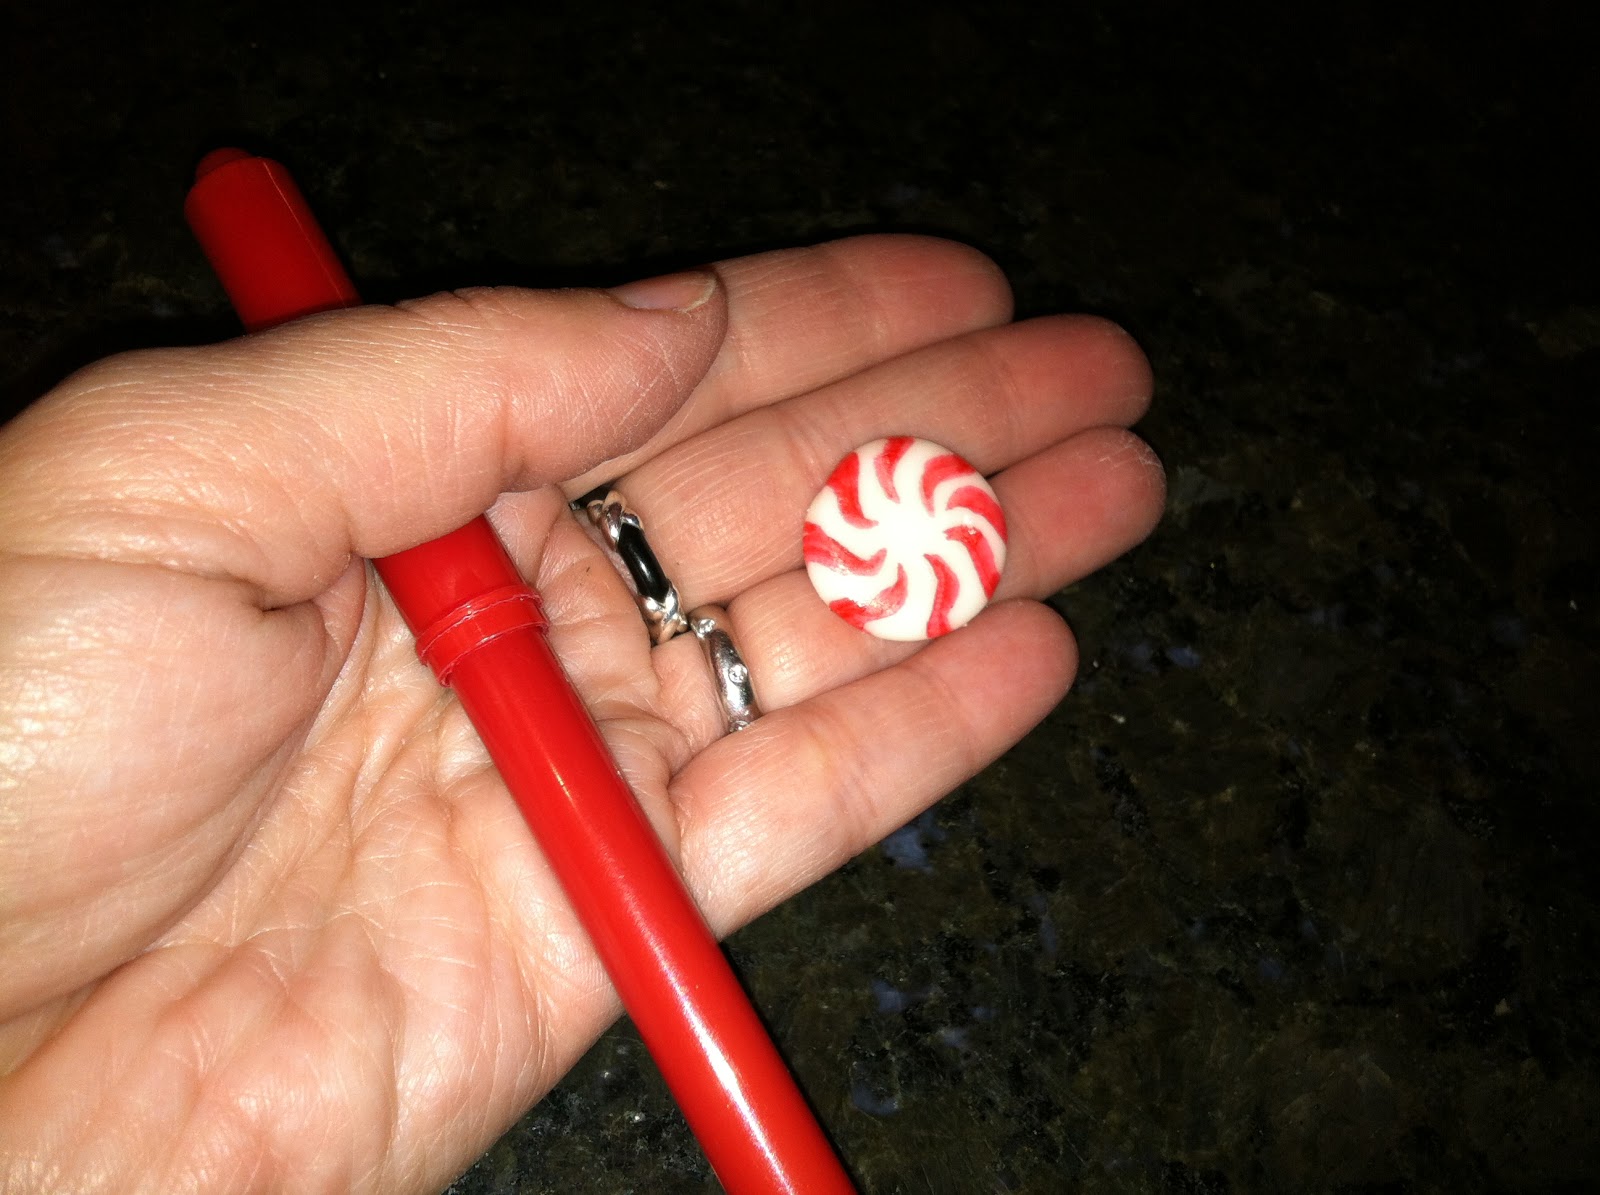
I know it seems odd to pipe Starlight Mints; it's not like they're hard to come by! However, if you use them to decorate gingerbread houses, cupcakes, or whatever, they'll get really sticky. All you'll need to pipe a rock-hard, non-sticky version of them is white stiff consistency royal icing, a round #12 tip, parchment paper squares, a dusting pouch filled with a 50/50 mix of cornstarch and powdered sugar, and a red (or any color) food-safe marker like the AmeriColor Gourmet Writer. Start by holding the #12 tip just above and at a right angle to a parchment square. Squeeze out a dollop of icing…
 …and tap it into a flat, rounded disc with a fingertip after touching it to the dusting pouch. Allow it to harden completely.
 At this point you can do whatever you want with the food-safe markers; you might try using two or more colors. To pipe the classic striped design, draw backwards "S" shapes that are wider at the outer edge.

Saturday, December 8, 2012

Royal Icing Waffle

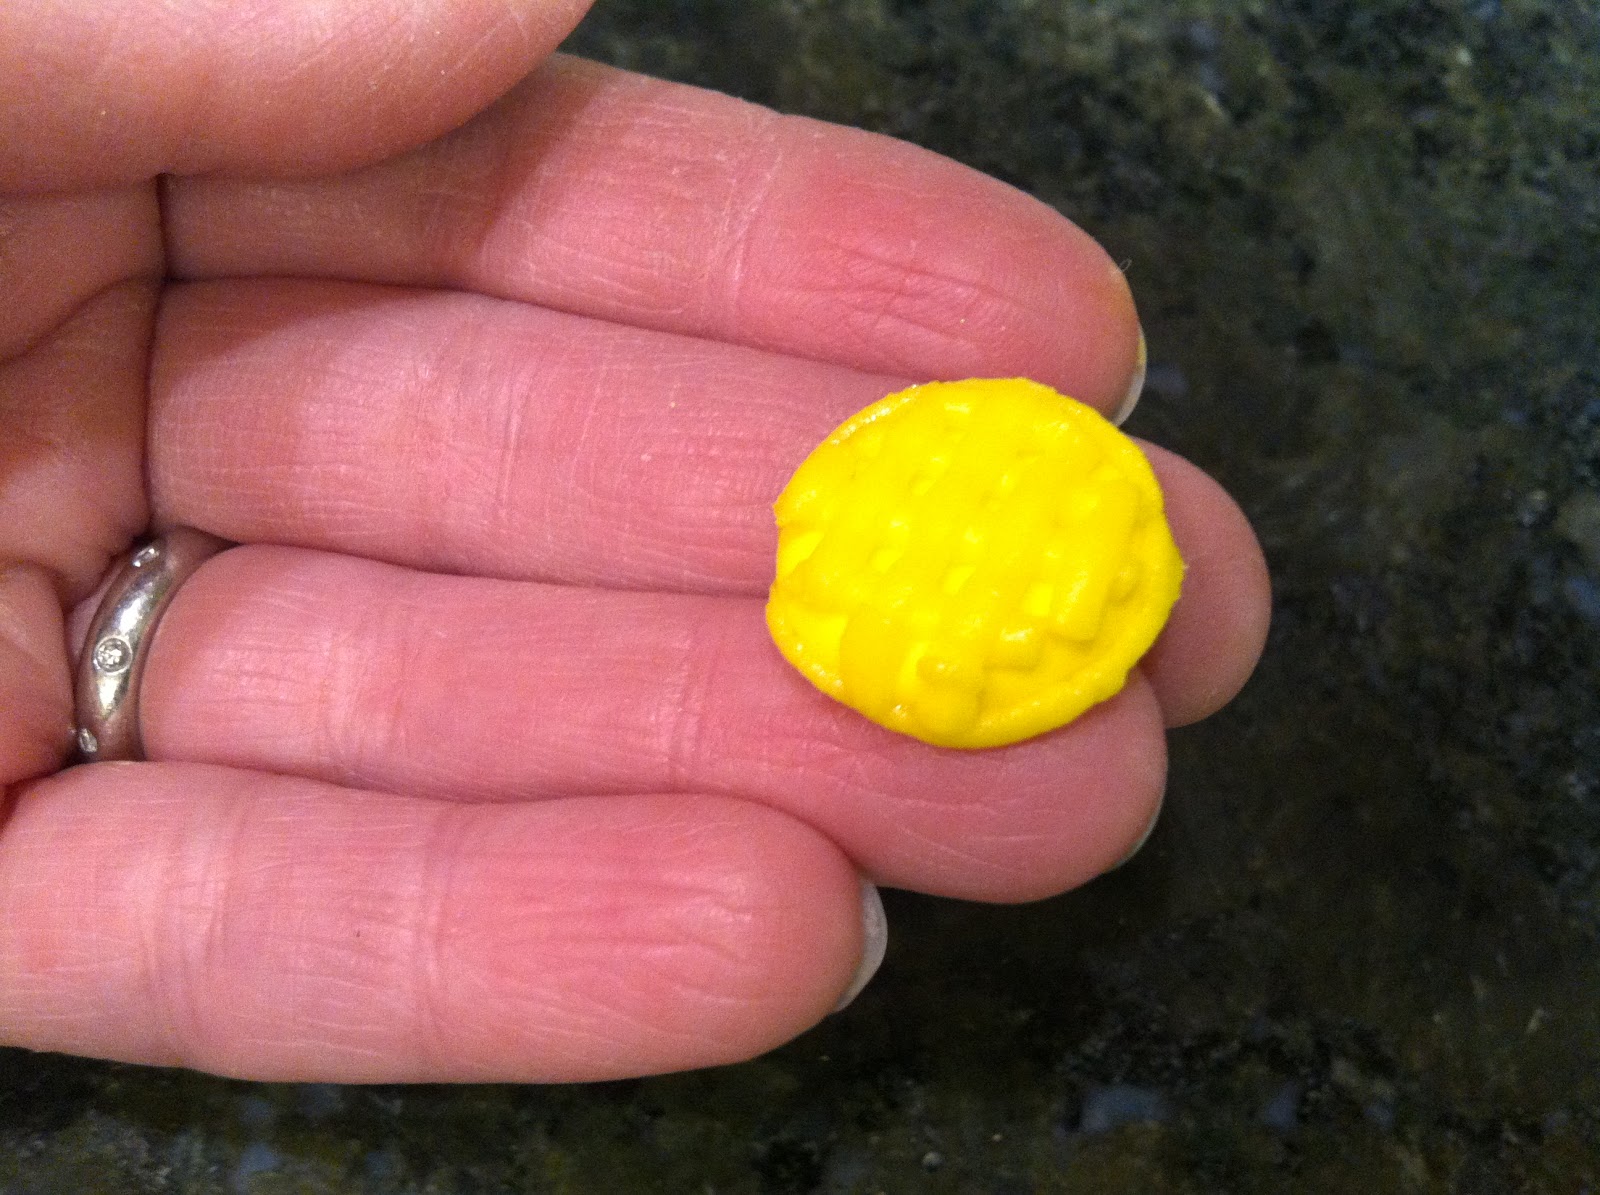
Continuing with the breakfast theme of yesterday's pancakes, today's waffle is another example of something that's cute and fun to do with that last little bit of icing (but it's probably something you'll never need to actually know how to do). You'll need yellow stiff consistency royal icing, round tips #12 and #3, oval tip #55, a flower nail, a glue stick, parchment paper squares, a Styrofoam block to rest the nail in, and a dusting pouch filled with a 50/50 mix of powdered sugar and cornstarch. Start by sticking a parchment square to the flower nail with a dab from the glue stick. 
 Hold the #12 tip at a right angle to and just above the surface and pipe a circle about the size of a nickel. Touch a fingertip to the dusting pouch and flatten the icing into a disc. Allow this shape to dry for a few minutes.
 Switch to the #3 tip and pipe a few lines in one direction, allowing a tip's width between them…
 …and then pipe lines in the other direction. Flatten the lines slightly with a dusted fingertip.
 Switch to the oval #55 tip and pipe a border around the edge, with one of the narrow sides of the tip facing down. Perhaps a tiny waffle would be a good garnish on a maple-flavored dessert like a cake pop or muffin.

Friday, December 7, 2012

Royal Icing Stack of Pancakes

A tiny stack of pancakes is one of those projects you'll probably never need to pipe, but it sure is cute, easy, and sort of looks like what it's supposed to be. All you'll need is stiff consistency royal icing in brown and yellow, a round #12 tip, a flat #44 tip, a flower nail, parchment paper squares, a glue stick, a Styrofoam block to rest the nail in, and a dusting pouch filled with a 50/50 mix of cornstarch and powdered sugar. Start by sticking a parchment square to the flower nail with a dab from the glue stick. 
 Hold the tip at a right angle to and just above the surface. Pipe a swirl about the size of a quarter…
 …and tap it flat with a fingertip after touching it to the dusting pouch.
 Allow it to firm up for a few minutes, and repeat. It looks better if the "pancakes" vary slightly in size.
 Pipe another…
 …and another.
 Finish off with a "pat of butter" (a short shot of yellow icing piped with the flat #44 tip). These would be cute as a garnish on any maple flavored dessert (or somehow featured in a gingerbread house).

Thursday, December 6, 2012

Royal Icing Gingerbread Man

Perhaps this is a good variation on gingerbread cookies for folks who have gluten sensitivity; why not make the whole cookie out of royal icing, not just the decorations? You'll need brown stiff consistency royal icing (along with white and any other colors you like), round tips #12, #10, and #3, a flower nail, a glue stick, parchment paper squares, a Styrofoam block to rest the nail in, and a dusting pouch filled with a 50/50 mix of powdered sugar and cornstarch. Start by sticking a parchment square to the flower nail with a dab from the glue stick. 
 Hold the #12 tip just above and at a right angle to the surface. Pipe a circle for the head, and a "U" shape for the body. Touch a fingertip to the dusting pouch and tap the icing flat and smooth.
 Switch to the #10 tip to pipe the arms and legs. Again, keep the tip at a 90 degree angle and just above the surface. Overlap the limbs onto the body a little bit and tap the surface smooth.
 Allow the icing to dry for several minutes, and decorate it any way you like with whichever size tips you like using. You could pipe a whole family to live in a gingerbread house!

Wednesday, December 5, 2012

Royal Icing Poker Chips

Today's post is sort of my family's version of gelt; we have a poker chip caddy handed down from my grandparents that I stock year-round with seasonal chips and cards. The chips have to be clay or I won't play:
All you'll need to pipe poker chips is stiff consistency royal icing in any colors you like, round tips #8 and #12, flat ribbon tip #44, a flower nail, parchment paper squares, a glue stick, a Styrofoam block to rest the nail in, and a dusting pouch filled with a 50/50 mix of powdered sugar and cornstarch. Start by sticking a parchment square to the flower nail with a dab from the glue stick. 
 Pipe a circle about the size of a quarter with the #12 tip. Hold it just above and at a right angle to the surface while piping.
 Touch a fingertip to the dusting pouch and tap the icing flat. Allow it to firm up for a few minutes.
 Switch to the #8 tip and pipe around the perimeter. Again, keep the tip at a right angle to and just above the surface. Tap the slightly overlapping ends flat to join them where they meet.
 Pipe short shots of a contrasting icing with a flat #44 ribbon tip. These won't make for decent currency in a poker game, but they'd be cute as a garnish on cupcakes served at it.