There's not a lot to piping royal icing eggs, but ideally they truly come out looking like eggs; not ovals. All you'll need is a piping bag filled with stiff consistency royal icing (in any color you want, obviously) and fitted with a round #12 tip, a parchment paper square for each egg, and a dusting pouch filled with a 50/50 mix of powdered sugar and cornstarch.
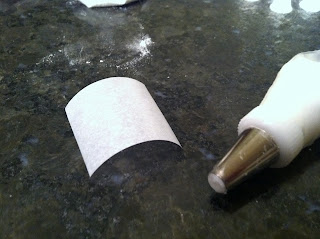
If you cut the parchment paper squares yourself off a roll, they'll have a curve like this:You'll use the gravity generated by that curve to form the egg. Yet another reason to cut your own parchment squares and not buy them pre-cut (such a waste of money). Hold the bag at about the same angle as the curve with the tip just above the paper. Start squeezing, and when the icing ball is about twice the width of the piping tip, start drawing the tip away from it.
On an approximately 1.5" square, I stopped the tip at the midway point.
At this point, stop squeezing and pull the tip away. A peak like this will probably be left behind:
Generously dust your finger by tapping it against the side of the dusting pouch, then tap the peak lightly until until it goes away.
Allow the eggs to dry for a few hours. You can speed up this process by keeping them under a desk lamp (incubating them, if you will).
Always make more than you think you need. You can use only the ones that turned out best, or hide the less-cute ones at the bottom of a pile or around the back side of a cake.


No comments:
Post a Comment