Showing posts with label tip #10. Show all posts

Thursday, December 13, 2012

Royal Icing Spiral Candy

I'm not quite sure what to call this creation; spiral candy seems pretty descriptive. Basically, I was looking for an alternative to hard candy that will eventually become sticky when used to decorate gingerbread houses or cookies; royal icing will stay rock hard. You'll need stiff consistency royal icing in any colors you like, parchment paper squares, a flower nail, a glue stick, a Styrofoam block to rest the nail in, and a dusting pouch filled with a 50/50 mix of powdered sugar and cornstarch. You can use tips in any size depending on how large you want your "candies" to be (I used #10 and #3). Start by sticking a parchment square to the flower nail with a dab from the glue stick. 
 Hold the larger tip just above and at a right angle to the center of the nail. Rotate the nail while steadily piping a spiral. When you get to the end (the size you want), stop pressure and pull the tip away. Touch a fingertip to the dusting pouch and tap down the end to neaten it and taper it into the spiral.
 Allow the icing to firm up for a few minutes, then pipe a spiral with the smaller tip and a contrasting color. When the icing is firm, peel away the parchment and use them to decorate anything you like. Alternately, pipe them in brown with a white spiral and, Voila! Cinnamon buns!

Thursday, December 6, 2012

Royal Icing Gingerbread Man

Perhaps this is a good variation on gingerbread cookies for folks who have gluten sensitivity; why not make the whole cookie out of royal icing, not just the decorations? You'll need brown stiff consistency royal icing (along with white and any other colors you like), round tips #12, #10, and #3, a flower nail, a glue stick, parchment paper squares, a Styrofoam block to rest the nail in, and a dusting pouch filled with a 50/50 mix of powdered sugar and cornstarch. Start by sticking a parchment square to the flower nail with a dab from the glue stick. 
 Hold the #12 tip just above and at a right angle to the surface. Pipe a circle for the head, and a "U" shape for the body. Touch a fingertip to the dusting pouch and tap the icing flat and smooth.
 Switch to the #10 tip to pipe the arms and legs. Again, keep the tip at a 90 degree angle and just above the surface. Overlap the limbs onto the body a little bit and tap the surface smooth.
 Allow the icing to dry for several minutes, and decorate it any way you like with whichever size tips you like using. You could pipe a whole family to live in a gingerbread house!

Wednesday, October 17, 2012

Royal Icing Cauldron

I can honestly say this is one of my favorite projects ever, because it turned out exactly how I pictured it in my head (that doesn't always happen). To pipe a tiny cauldron, you'll need stiff consistency royal icing in black and neon green, round tips #12, #10, and #5, parchment paper squares, and a dusting pouch filled with a 50/50 blend of powdered sugar and cornstarch. Start with the #12 tip on the black icing. Hold the tip just above a parchment square. Squeeze until the icing is about the size of a penny, then pull the tip upward while keeping it buried in the icing. Stop pressure and pull the tip away, leaving a shape comparable to a Hershey's Kiss.
 Touch a fingertip to the dusting pouch and tap down the peak to round it.
 On  a separate square, pipe a bunch of C-shaped handles with the #5 tip. Always make more than you think you need to allow for breakage, variations in size, etc.
 Also use the #5 tip to pipe three or four small feet on the underside of the cauldron, if you like (feet are optional, but SO cute).
 When the cauldron is dry enough to handle, flip it over and pipe a #10 dollop of neon green icing in the center. Tap it flat with a fingertip after touching it to the dusting pouch.
 Pipe the lip of the cauldron with the #5 tip around the edge of the green icing…
 …and stick one of the handles into the icing while it's wet.
 This would definitely be a good accompaniment for the witch hat and the broom on Halloween cupcakes!

Sunday, September 23, 2012

Royal Icing Raccoon

If you've made an excessively large batch of gray icing and are trying to think of ways to get rid of it, look no further than the official state wild animal of Tennessee, the raccoon (also the official garbage-eating pest of my backyard). To pipe raccoons you'll need stiff consistency royal icing in gray and black, parchment paper squares, a flower nail, a glue stick, a Styrofoam brick to rest the nail in, a black food-safe marker like the AmeriColor Gourmet Writer, round tips #12, #10, and #2, oval tip #55, and a dusting pouch filled with a 50/50 mix of powdered sugar and cornstarch. Start by sticking a parchment square to the flower nail with a dab from the glue stick. 
 Attach the #12 tip to the bag of gray icing. Hold it at a 45 degree angle to and just above the surface. Pipe until a ball forms, then move the tip along for about half an inch. Stop pressure and pull the tip away.
 Touch a fingertip to the dusting pouch and gently tap the peak to blunt it.
 Switch to the #55 tip and pipe four short legs, tucked in against the body and extending slightly out in front.
 Switch to the #10 tip to pipe the tail. Hold the tip flat alongside the surface of the nail and just a millimeter or so away from the body. Squeeze, then rotate the nail while piping so the tail is snug against the body. Stop pressure and pull the tip away, leaving the peak.
 Here's another view. You could pipe it so the tail is straight, but appendages like that always worry me because they're more likely to break off.
 Also use the #10 tip to pipe the head. Hold the tip close to the surface, squeeze out a ball, then pull the tip away while stopping pressure.
 Dust your fingertips by touching them to the dusting pouch, then gently pinch the head into more of a wedge shape.
 Here's a side view:
 Switch to the #55 tip to pipe the ears. I also had to re-pipe the legs, which had gotten buried as the icing settled (we're having an especially foggy night here; not the best climate for piping with royal icing).
Allow the icing to dry for about 15 minutes, and then move on to the marker. Start by dabbing in the rings on the tail…
 …and some claws…
 …and some rounded diamonds for the mask.
 Lastly, use the #2 tip to pipe a dot for the nose and two dots for the eyes. If only raccoons were this size, I wouldn't worry every time they show up that they're going to have their way with my cat.

Friday, September 7, 2012

Royal Icing Pelican

Louisiana is "The Pelican State" and is home to some 40,000 brown pelicans (which are unusual in that they plunge from the air into the water to fish). If you're wondering why I piped this "brown" bird with gray icing, it's because they've looked gray in every photo I've found online. In addition to gray stiff consistency royal icing, you'll also need white, brown, and light blue (for their unusual eyes), round tips #12, #10, and #2, oval tip #55, a flower nail, parchment paper squares, a glue stick, a Styrofoam brick to rest the nail in, black food coloring (like Super Black Soft Gel Paste by AmeriColor), round toothpicks, and a dusting pouch filled with a 50/50 mix of powdered sugar and cornstarch. Start by sticking a parchment square to the flower nail with a dab from the glue stick. 
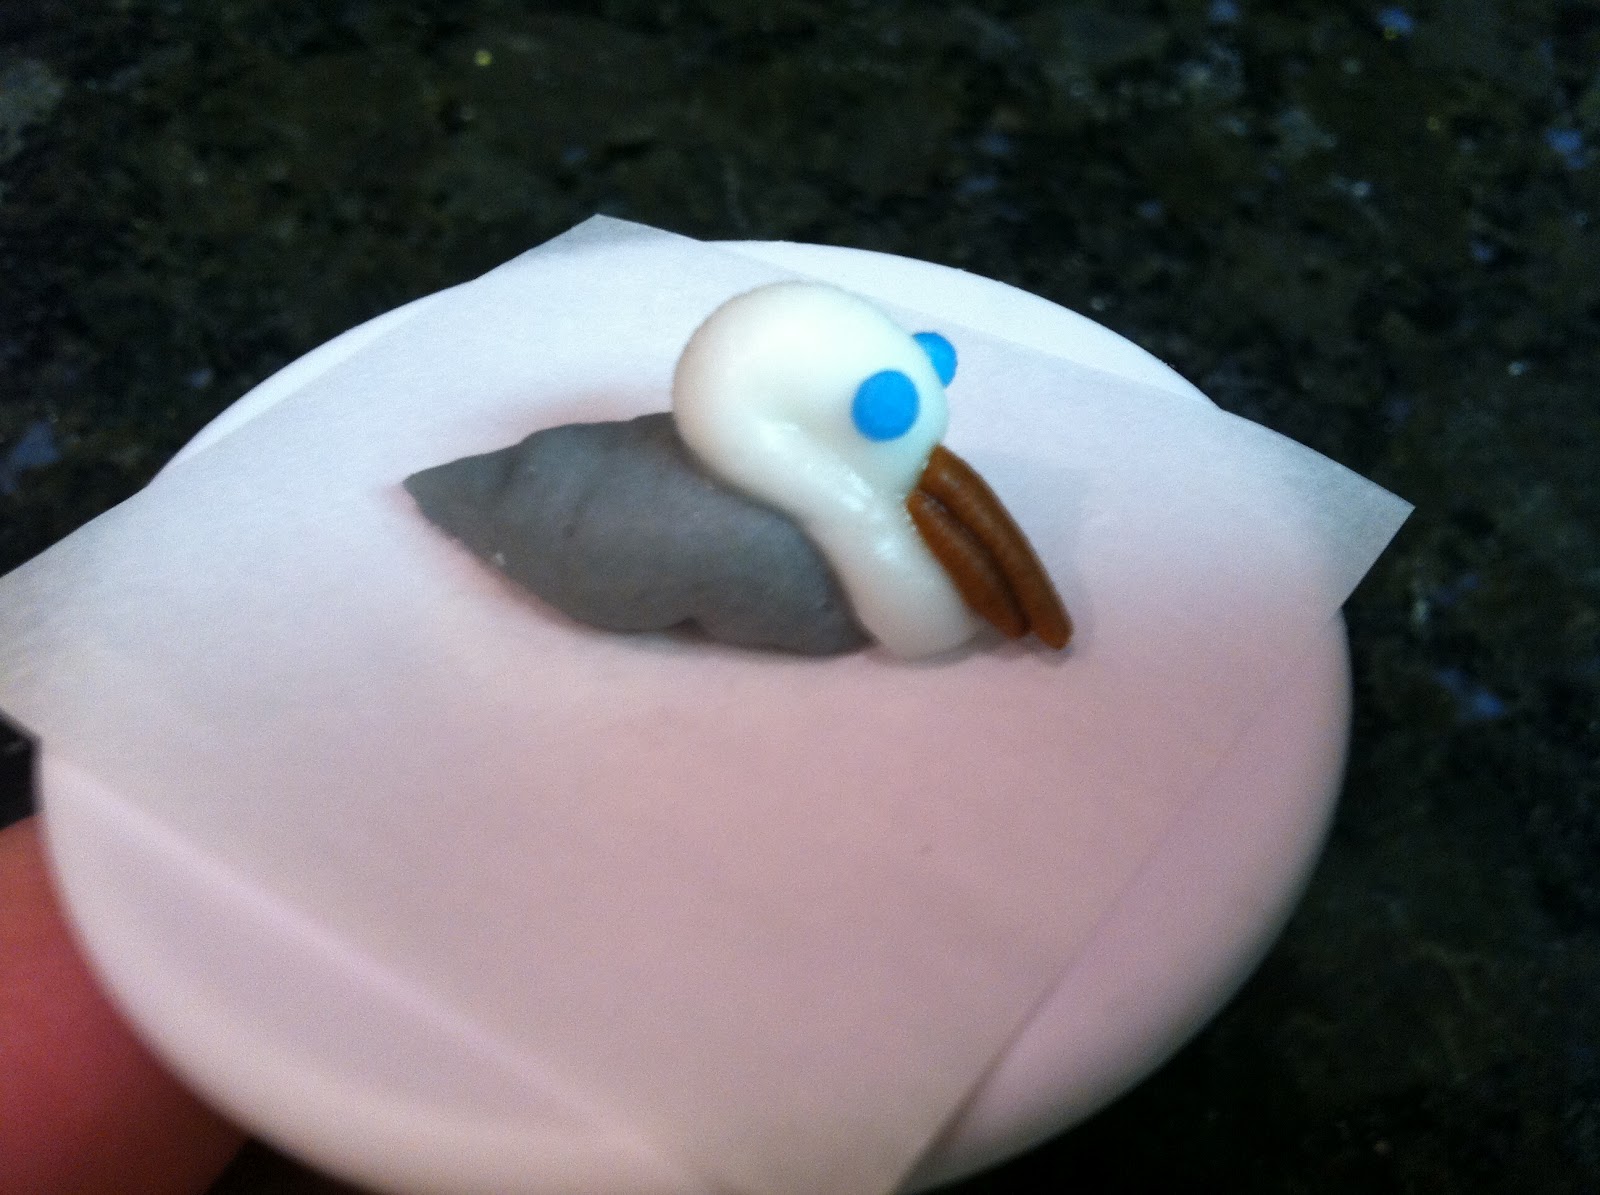
 Attach the #12 tip to the bag of gray icing. Hold it just above the surface, and at a 45 degree angle. Squeeze out a ball of icing, then move the tip along to elongate it into a teardrop. Stop pressure and pull the tip away.
 Attach the #10 tip to the white icing and pipe a shape like a backwards "question mark" for the neck and head, starting from the base and moving up and over. You may need to touch your fingertips to the dusting pouch and then coax the icing into this approximate shape. Allow the icing to firm up for a while.
 Pipe the bill with brown icing and the oval #55 tip. Tuck the tip against the end of the "question mark" and pipe a straight line that ends in a point at the base of the neck.
 Pipe another line on top of this one for the upper half of the bill
 Using the #2 tip and the blue icing, pipe two tiny dots for eyes once the white icing is firm.
 When the blue icing is firm, dip the point of a round toothpick into the food coloring and add two dots for pupils. Pelicans are a big deal in Louisiana; they appear on the state flag, the state seal, the official state painting, and on the bicentennial quarter; they're a good choice for a cupcake topper if you're looking to celebrate this wonderful state! Mardi Gras masks are a good choice, too.

Thursday, August 30, 2012

Royal Icing Gray Squirrel

The gray squirrel is the official Wild Game Animal of the state of Kentucky. Are these things actually a delicacy? I'm no stranger to chipping a tooth on a piece of shot, but it's hard for me to think of these birdfeeder thieves and "game" in the same sentence. Guess I'll have to give them a try…or not. Anyway, to pipe teeny, tiny squirrels that can sit comfortably on a nickel, you'll need stiff consistency gray royal icing, round tips #2, #10, and #12, a flower nail, a Styrofoam block to rest the nail in, a glue stick, parchment paper squares, Super Black soft gel paste by AmeriColor, round toothpicks, and a dusting pouch filled with a 50/50 mix of cornstarch and powdered sugar. Start by sticking a parchment square to the nail with a dab from the glue stick. 
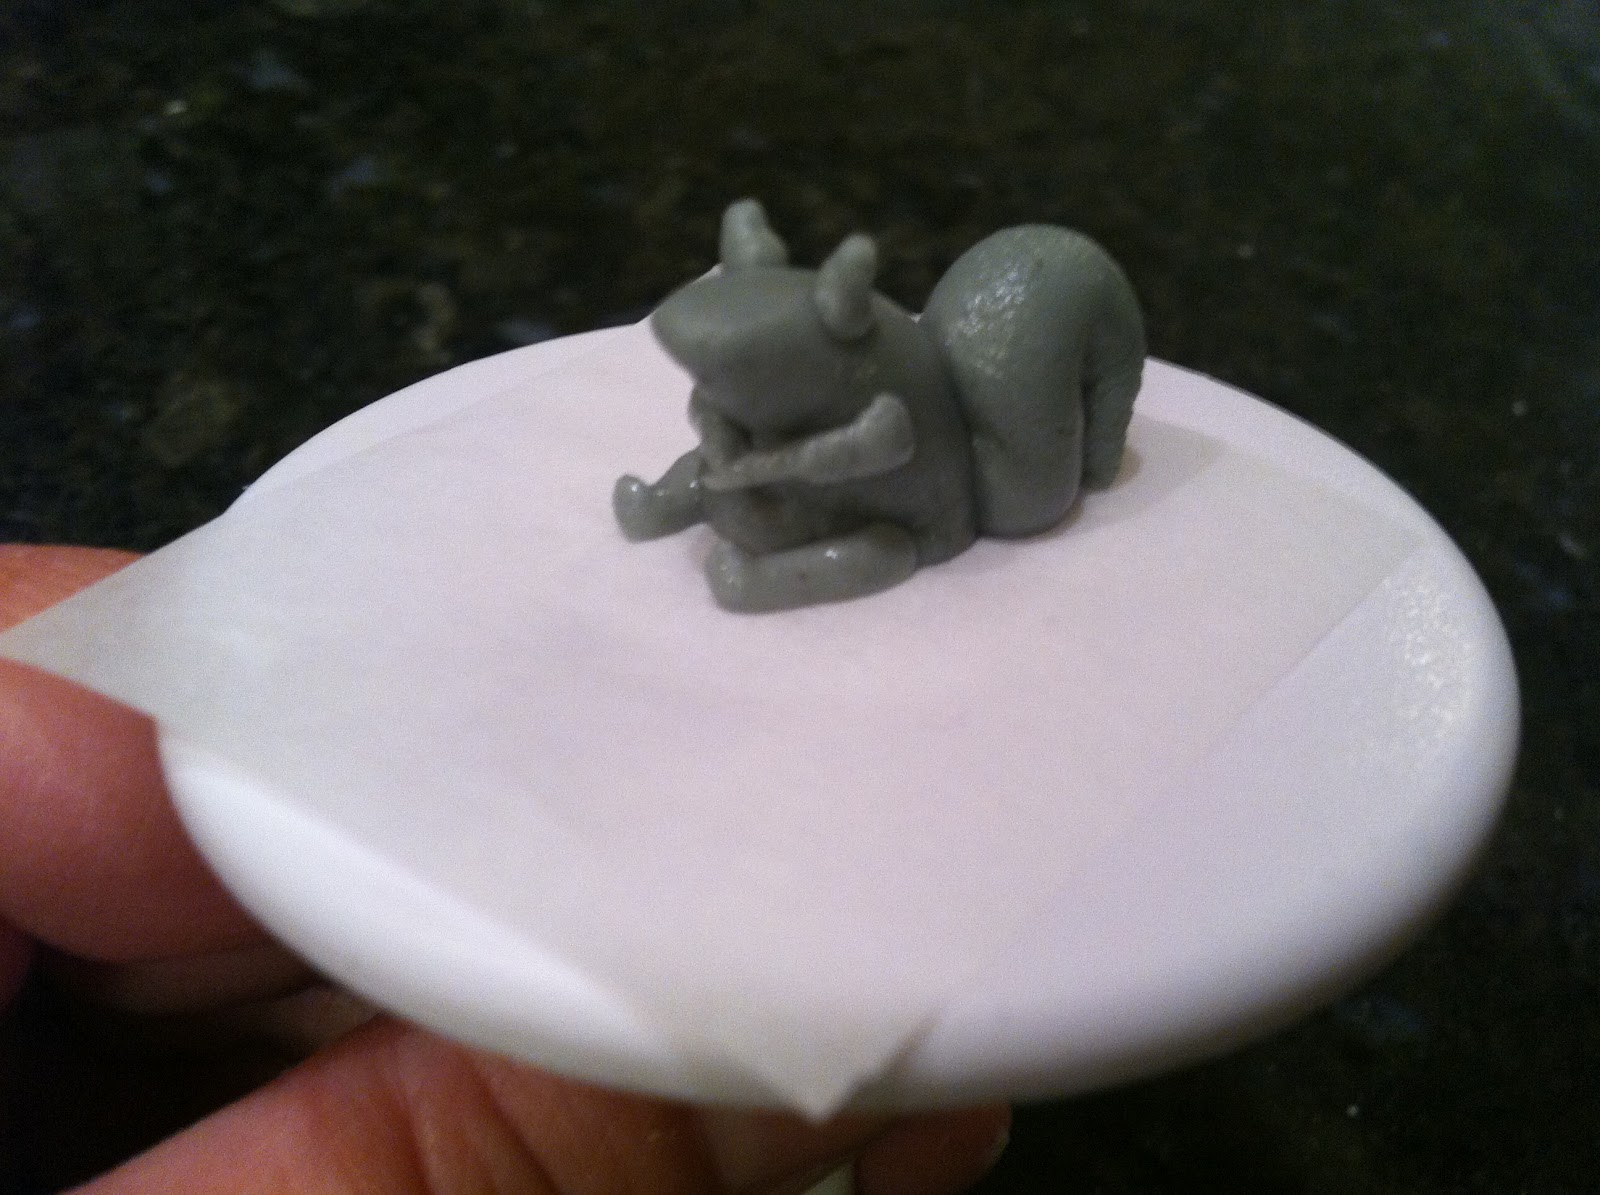
 Pipe the shape that will be the body and head with the #12 tip. Hold it flat against the surface, squeeze, and pull the tip up slowly and then off to the side. Stop pressure and pull the tip away. Touch your fingertips to the dusting pouch and tap the shape until it roughly resembles this one:
 Allow it to firm up for a few minutes, then switch to the #10 tip to pipe the tail. Hold the tip close to the base of the squirrel's, um, posterior, and squeeze while moving the tip up the squirrel's back. When you get to the part where the squirrel's body bends over and tapers into the head, move the tip away while still piping. Stop pressure and pull the tip away after about 1/4".
 Touch your fingertips to the dusting pouch and adjust the tail downwards, so it looks like an upside-down "U."
 Switch to the #3 tip and pipe the ears. They're nothing more than just tiny dabs of icing; adjust them with a dusted fingertip.
 Use the #3 tip to pipe the legs, as well. Start with the hind legs. Tap these short shots of icing gently with a dusted fingertip to firmly adhere them to the body.
 When you pipe the front legs, tap the little "paws" so they touch. When they're dry, you could pipe a tiny brown icing "nut" with a #2 tip if you wanted to.
 When the squirrel's head is dry, paint in the eyes with a toothpick dipped in a product like Super Black soft gel paste by AmeriColor. Squirrels' eyes are more oval than round, so try to smash the tip of the toothpick into more of an oblong shape (or just dab two tiny circles very close together to make one eye and sort of blur them together with the toothpick). The nose is a tiny "v" shape. Park these squirrels on a cupcake alongside some royal icing acorns; they'll go nuts!