Showing posts with label ocean. Show all posts

Monday, July 16, 2012

Royal Icing Oysters

I hope I'm not boring anybody with all these little sea creatures; one seems to inspire another! I piped this tiny oyster with the Ateco tip #98, which is scalloped with grooves on the outer side. 
I stuck a square of parchment paper to a flower nail with a dab from a glue stick. I held the tip against the paper and piped a shell shape by keeping one side of the tip still and moving the other side around in a clockwise motion while vibrating the tip to create ridges. 
 Here's another view of it:
 I piped a neighboring shell next to it, trying to keep them similar in shape:
 I tapped one of them flatter than the other with a fingertip after touching it to a dusting pouch; this will be the side on the bottom:
 After allowing them to dry under a desk lamp for about 45 minutes, I glued a tiny sugar pearl to the center with a dot of icing piped with a round #2 tip
 I piped another ball to act as a "hinge" on the other half of the shell…
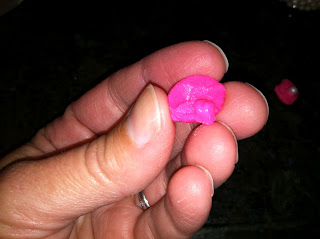
 …and then I assembled the oyster. Obviously I got a little crazy with the color, but that's half the fun!


Sunday, July 15, 2012

Royal Icing Starfish

I'd venture to say the starfish is the easiest royal icing animal you can possibly pipe; it consists of nothing more than stiff consistency royal icing and round tips. I made them in three different sizes using #'s 8, 10 and 12. The tiny dots are piped with a round #2.  Pipe the starfish on a large piece of parchment paper; I cut these to about 4".
Start the first leg by piping a ball, then elongating it in a random sort of fashion. Hold the tip at a 45 degree angle in the center of the parchment, squeeze until a ball forms, then move the tip along as you see fit. End some of the legs with an upturned tip, like this. You can perfect the tips with your fingertips after touching them to a dusting pouch filled with a 50/50 mix of cornstarch and powdered sugar. 
 Pipe each of the five legs by butting the tip up against the base of the leg next to it.
 Make sure to vary the positions of each leg…
 …and don't worry if they aren't all the exact same length.
 Touch a fingertip to the dusting pouch, then tap it against the seams where the legs all join in the center. Do your best to blur the lines while maintaining the overall shape.
 Give the starfish ample time to dry; I placed them on a cookie rack on the stove under the warmth of the hood light (a desk lamp would work well, too).
Pipe little dots all over the starfish, if you like. I used a #2 tip, and made the dots larger in the center, and smaller as I piped dots down the legs. 

Tuesday, June 26, 2012

Royal Icing Octopus

At the risk of being biologically inaccurate, today I piped a hot pink octopus. This little critter would be perfect on top of an ocean-themed cupcake. All you need to pipe octopi are round tips #10, #4 and #2, royal icing in white for the eyes and hot pink (or whatever color you like) for the body and legs, a dusting pouch filled with a 50/50 blend of cornstarch and powdered sugar, a flower nail, parchment squares, a Styrofoam block to rest the nail in, a glue stick, and a black Gourmet Writer by AmeriColor
 Stick a parchment square to the flower nail with a dab from the glue stick.
 Using the round #4 tip, hold the tip perpendicular to the surface and pipe a curlicue for a leg (this one is basically a backwards, upside down "?", sans dot).
 Repeat 7 times; make them all different!
 Allow the legs to firm up for about 10 minutes. Switch to the #10 tip and pipe a ball in the center for the body. If a peak forms when you pull the tip away, touch a fingertip to the dusting pouch and tap the peak down.
 Allow the body to dry for 10 minutes or so, then pipe two tiny #2 or #1 dots for eyes.
When the eyes are dry, add "pupils" to them with the Gourmet Writer. When the octopus is completely dry, peel away the parchment paper, and set him (her?) to swim on an ocean of blue icing. I'll try to pipe more aquatic friends for the octopus soon!