

There are a lot of steps to making the sweet pea; in Wilton's Course 4, Advanced Gum Paste Flowers, they're spread out over a couple of weeks! The setup for the materials should be pretty familiar, if you’ve been reading my other tutorials for the flowers covered in Course 4. You’ll need a gum paste storage board (I have a second one handy for this project; the larger one is primarily used as a work surface), Crisco (in case the gum paste dries out), gum glue adhesive (a pinch of gum paste dissolved in a tablespoon of water), several small brushes, purple shaping foam, needle-nose pliers (the type used in jewelry-making), yellow and green gum paste, a 9” fondant roller, several tools from the 10-piece Wilton Fondant and Gum Paste Set (the knife tool, the ball tool, the veiner, and the palette knife), florist’s tape, 26-guage florist’s wire, a dusting pouch filled with a 50/50 mix of cornstarch and powdered sugar, Goldenrod Color Dust, and several cutters from the Wilton Course 4 student kit: the small blossom, Sweet Pea cutters 1 and 2, and the small calyx.

Start by bending the end of a wire into a hook around the tip of the needle-nose pliers:

Roll out a small amount of yellow gum paste. Use the pink rings on the fondant roller so it’ll be 1/16” thick. Cut out a shape with the small blossom cutter, and roll it into a ball.

Elongate one end of the ball between your thumb and forefinger; the resulting shape should be reminiscent of a teardrop:

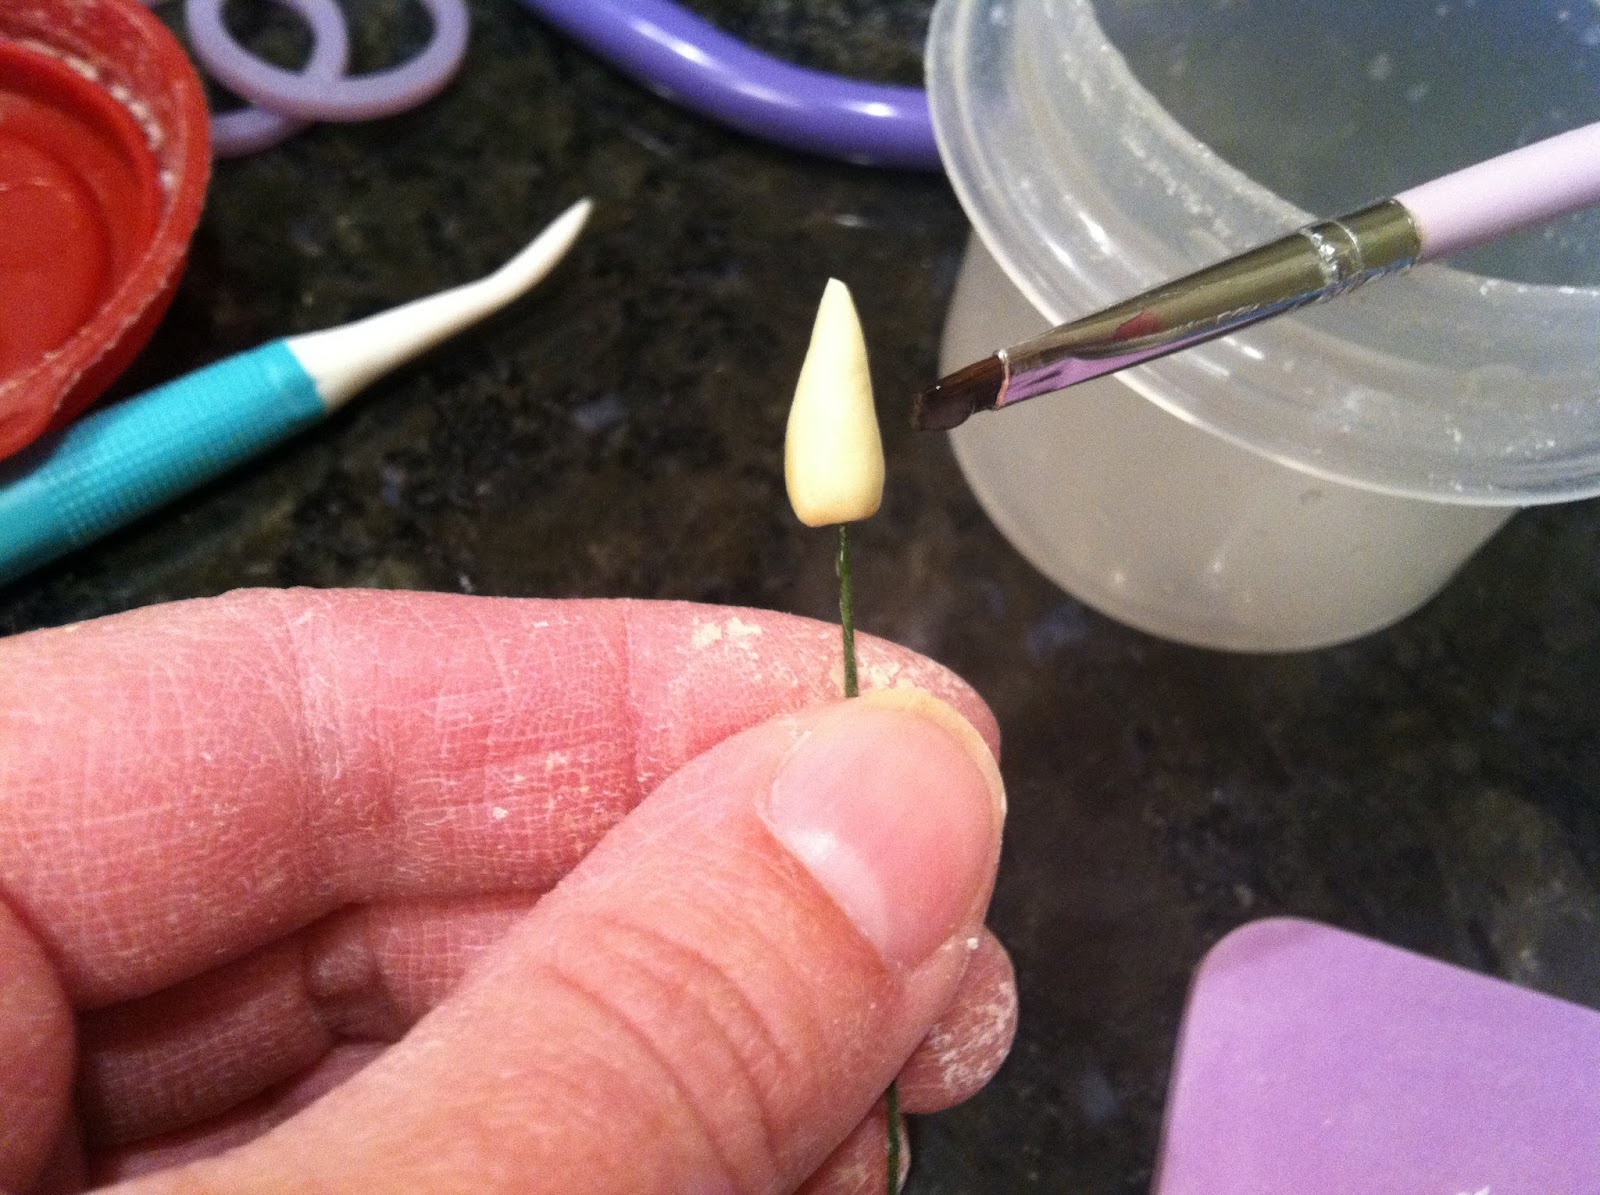
Dip the hook of the wire into the gum glue adhesive…

…and insert it into the base of the teardrop shape. Squeeze the base tightly to the wire.

Using the narrow end of the veining tool, draw a line from the base of the teardrop to the tip. Gently curve the tip back over your finger away from the line. The side with the line will be the front of the flower. Set it aside to dry (or hang it someplace by bending the wire into a hook).


Place the piece with the dividing line in the middle on your purple shaping foam (sweet pea 2). Give the foam a dusting with your dusting pouch, if need be.


Brush the back of the first petal with gum glue adhesive…


To make the calyx (the green base of the flower), roll out a dime-sized ball of gum paste very thin (don’t use rings on the roller) and cut out a piece with the calyx cutter. Tear away the scrap and stick it back in the sealed container with the rest of your green gum paste.

Use your knife tool to trim away the very tips of the calyx; they’re just a bit too long for this flower.


I love it! thanks for shearing :)
ReplyDelete