
Ever on the quest to provide alternatives to environmentally-hostile plastic cupcake decorations, I made some little fondant shamrocks today. I didn't have quite enough fondant to cover a cake for our St. Patrick's Day dinner, but definitely had enough to make some decorations. Today's project was all about working with leftovers from
other projects, so here's what I had on hand: green cupcake papers, shamrock cupcake sprinkles,
Duff Goldman's Electric Green paste color, and
Wilton's White Pearl Dust. I made the shamrocks with
my fondant recipe, rolled the fondant out to about 1/8", cut the shamrocks with a tiny cookie cutter, poured some pearl dust into the palm of my hand, and laid the shamrocks one at a time in the dust, coating them generously. I'm sorry I don't have photos of the whole process; I didn't know I'd be writing about this project for today's post! I think the biggest revelation of today's project is the fact that Pearl Dust doesn't taste bad or have a weird mouthfeel! I was hesitant to eat one of these shamrocks, but when I did I was stunned to find there was no unappetizing, inedible crunchiness. I was also stunned to see that everybody else at the table wolfed down their shamrocks with no complaints, so score one for the Pearl Dust!
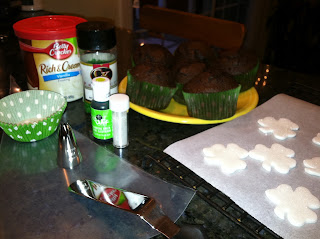
I wanted the dark green cupcake sprinkles to really stand out against the icing, so I didn't use much of the paste color. To ice half a dozen cupcakes, I used about a half of a can of frosting:
I loaded a disposable pastry bag with the Wilton 1M star tip (and no coupler), and piped a classic swirl. Start near an outer edge with the bag at a right angle to the cake, and spiral around about twice toward the center. The spiral should end at the center, at which time you should stop pressure, then pull the bag away perpendicular to the cupcake.
See what I mean about those sprinkles popping? The other bonus to not dying the icing a more intense green is no one at the dinner party looked like they'd just arrived from Mars after eating one of these.
The fondant shamrocks were firm by now; I'd laid them on parchment paper on a baking rack a couple hours prior, and they stiffened up sufficiently.
One last note on the subject of working with what I had on hand; I must say I really like the shamrocks in white! For a moment I thought I should color the fondant green, but let's face it: that's been done. These really came out looking unique and actually rather expensive (which is a hoot, considering they probably cost about a dime each in materials). Definitely making a "note to self" about sparkly white shamrocks for next year's St. Paddy's Day…


No comments:
Post a Comment