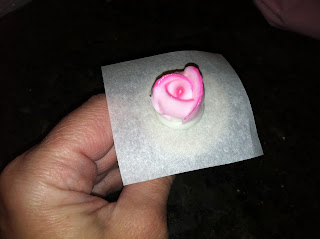
Adding a striped edge to a rose takes no special equipment beyond a second color of icing and the cheapest brush you can buy. Needless to say, you can use any two colors you want to make roses for any occasion (patriotic, Christmas, high school colors, etc.). In this case, I used two shades of pink. I started by mixing up a small amount of the darker shade (I used Deep Pink by AmeriColor):
Then I added a small amount of the deep pink icing to a larger container of white to get a very light shade of pink:The set-up includes a piping bag filled with white (or light pink) royal icing fitted with a round #12 tip, an empty bag fitted with a #104 rose tip, a parchment square for each rose, a rose nail, a Styrofoam block (to act as a third hand), a glue stick, and a brush (preferably one that costs no more than fifty cents).
Start by making the bases. Dab the glue stick to the rose nail and stick a parchment square to it.
Hold the bag with the round #12 tip and pipe a shape similar to a Hershey's Kiss by holding the tip just above the surface, then piping firmly. When the base builds up to about the size of a nickel, start moving the tip up and away from the nail. Stop pressure and pull the tip away. If the shape isn't quite right, either coax it into place with a finger dipped in powdered sugar, or scrape the "Kiss" off and start over.
No two will probably look alike, but they'll all work, more or less.On the empty bag, make sure the narrow end of the rose tip lines up with one of the seams on the bag.
Cuff the bag over, half the length of the bag:
Using your brush, paint a stripe on the seam with the darker pink icing (or whichever color you like). Paint as far down into the end of the bag (or the coupler, if you're using one) as you can, and continue up the seam for a few inches.
Fill the bag with the other color, in this case the lighter pink.
Pipe out a test squeeze, until the stripe appears. Now you can start piping striped roses!
Official instructions on the Wilton site for The Wilton Rose will tell you exactly which angle to hold your bag at for each row of petals. I just wanted to show you a brief example of what happens when you pipe the first wraparound petal (that should completely hide whatever color the base is)…
…and then the next row of three petals……then five…
…and finally seven.
The possibilities really are limitless! Halloween roses, anyone?


Wow! It's really amazing how easy is to make the roses when you have some guidelines! Thank you for sharing them with us!
ReplyDeleteThank you, Rose! My friend calls these "lipstick roses"; pretty accurate!
ReplyDeleteThank you
ReplyDelete