When I first bought the massive Wilton Ultimate Decorating Set, there was one tool I couldn't begin to imagine the function of:
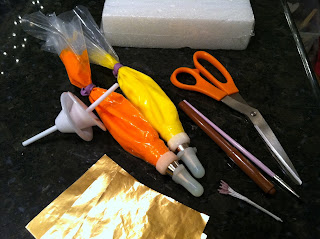
It wasn't until I was in the Course 2: Flowers and Cake Design class that I learned the above is a 2-piece lily nail. The piece on the left is the top, the piece on the right is the bottom. To make tiger lilies, you'll need the following…
…the lily nail, foil squares (you could use aluminum foil, but I like the thin foil sold in the candy section; it conforms well to the inside of the nail), scissors, brown stamens (sadly, the one inedible part of this project, but they could be left out or plucked out), a small brush, a brown food-safe marker, a Styrofoam block (your third hand), orange royal icing in a bag with a #69 leaf tip (this tip is made by Ateco; Wilton makes something similar), and yellow royal icing in a bag with a #14 star tip. Start by pressing the foil snugly over the top of the lily nail:
Cover it with the bottom half of the nail…And wrap the excess foil around the bottom half's edge.
Remove the top half and this is what you're left with:
Start by piping a triad of petals. Put the tip of the orange bag in the center, and squeeze gently as you slowly draw the tip up to the edge, decreasing pressure as you go. Don't squeeze too hard at the beginning, or the "cup" of the flower will fill up with icing that will take FOREVER to dry.
Pipe three more petals in between these three for a total of six. Set the lily in a hole in the Styrofoam block to begin drying.
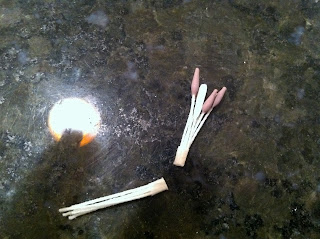
Note that the bunch of stamens is wrapped in the center with tape.
Cut the bunch of stamens in half right in the center of the tape. Discard the lower half (or come up with a clever way to recycle them).
When the flower has had a chance to firm up a bit, pipe a small yellow star in the center:
Use your brush to gently turn the star into the yellow center of the flower by stroking it up the petals.
Insert the bunch of stamens into the center, and allow it to dry. Gently untuck the foil from the edges of the lily nail's bottom half, and set the flower aside to dry in a warm, dry place (I usually leave icing flowers that are still firming up on my stovetop under the hood's overhead light; I'd move them if I was operating the stove, of course). These flowers need to be made far in advance, because the drying time can take several days. You don't want to peel the foil away too soon! Needless to say, these can be made in any color imaginable to coordinate to your cake or event. If you'd like to see a tiger lily made out of gum paste, click here.


No comments:
Post a Comment