Wednesday, November 21, 2012

Royal Icing Turkey Leg

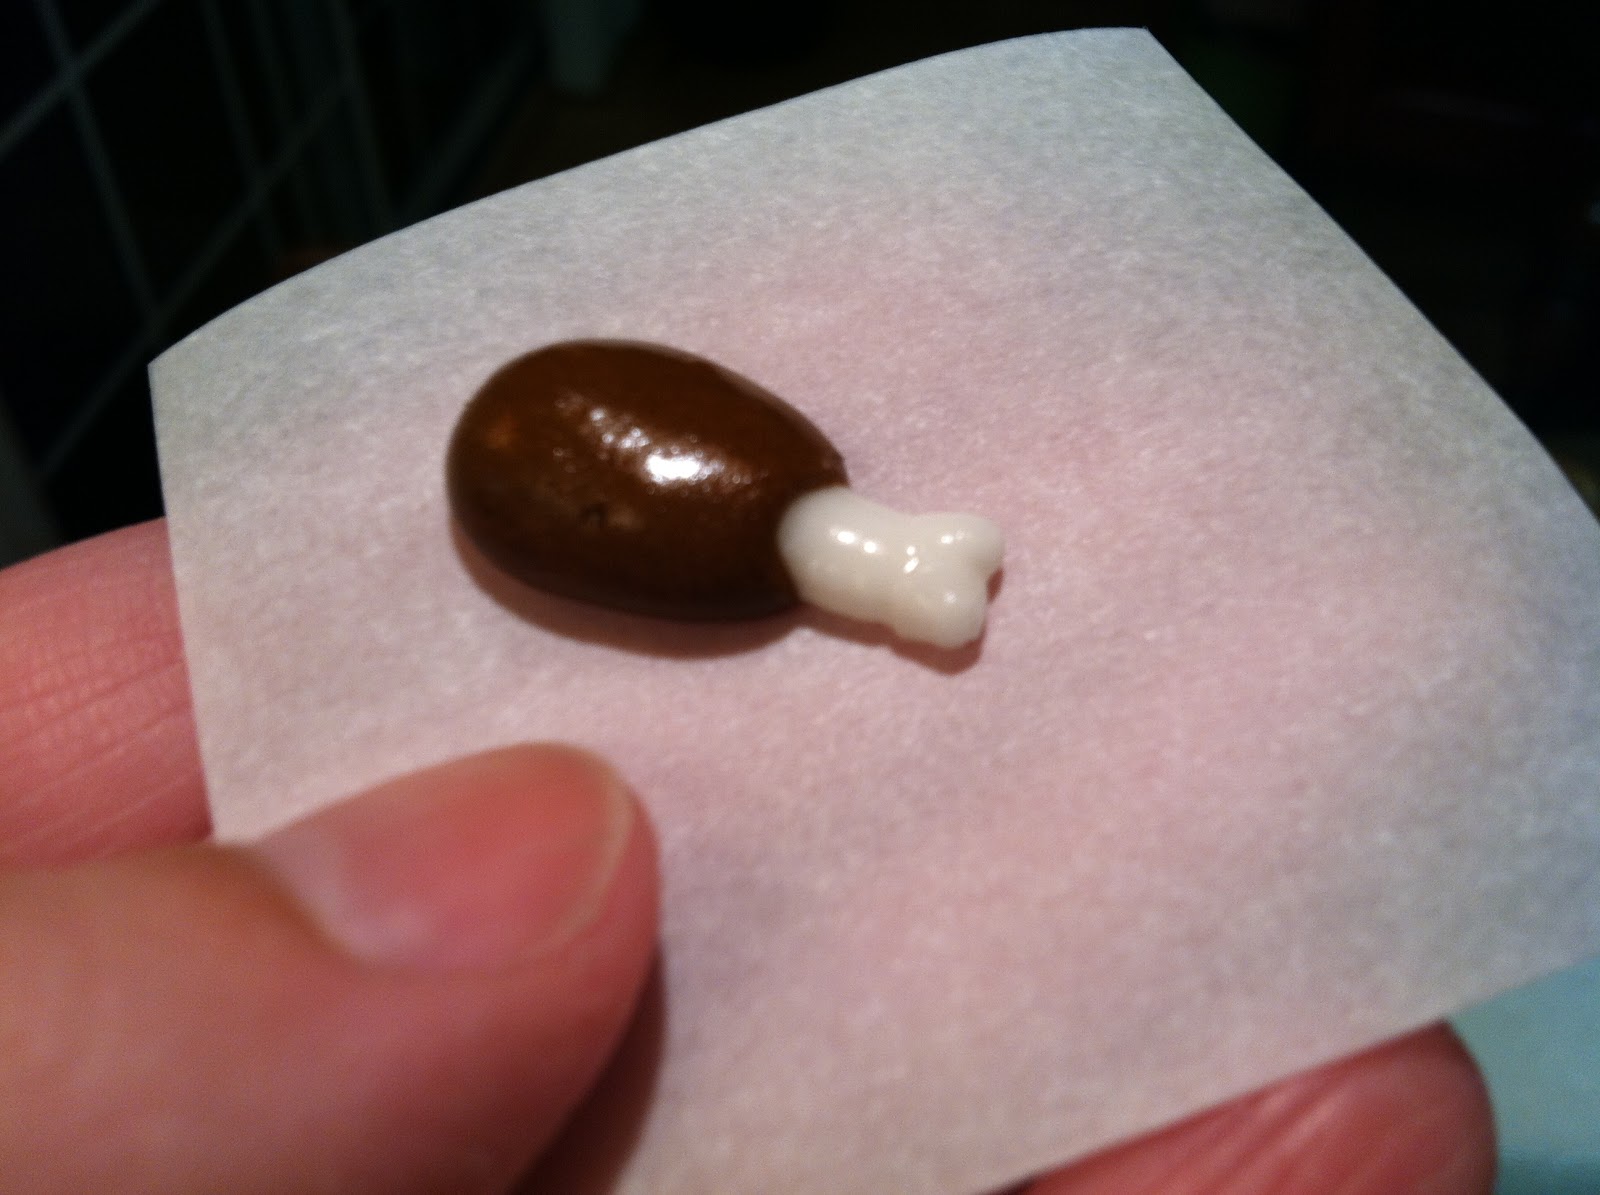
It's one of those rare days that I'm making real, actual food in the kitchen, so today's post is extra short and sweet. If, for some bizarre reason, you find yourself in the situation where you need to pipe tiny turkey legs, you're in luck! They're the easiest thing in the world (way easier than any other thing you might be likely to cook for Thanksgiving, anyway). All you'll need is stiff consistency royal icing in brown and white (I'm using colors more suitable for a cartoon turkey leg than the real thing, of course), round tips #12 and #5, a flower nail, parchment paper squares, a glue stick, a Styrofoam block to rest the nail in, and a dusting pouch filled with a 50/50 blend of cornstarch and powdered sugar. Start by sticking a parchment square to the flower nail with a dab from the glue stick. 
 Hold the #12 tip just above and at a 45 degree angle to the surface. Pipe a ball of brown icing, then move the tip along for a few millimeters while decreasing pressure. Stop pressure and pull the tip away. Touch a fingertip to the dusting pouch and tap down the peak, if one remains. Essentially, you're left with a shape like a bean or an egg.
 Stick the #5 tip into the icing at the narrow end so the tip disappears a millimeter or so in. Squeeze while moving the tip along for a few millimeters. Stop pressure and pull the tip away. Pipe two tiny balls at the end of the leg bone, tapping down any peaks with a dusted fingertip if need be. These would be sweet on any miniature cupcakes, petits fours, or even cubes of fudge for Thanksgiving.

Tuesday, November 20, 2012

Royal Icing Mustache for Movember

Today's post is a tribute to all the guys growing mustaches in November to commemorate Movember, an annual, international effort to raise awareness of prostate cancer. This post is also, of course, a tribute to all the guys having to deal firsthand with this dreadful disease. I swear, once this tiny icing mustache is dry enough tp peel off the parchment, I'll post a shot of me with it stuck to my face. All you'll need to pipe iconic handlebar mustaches to decorate cupcakes, brownies, cake pops, whatever, for Movember are stiff consistency royal icing in any color (but black is particularly fetching), a round #10 tip, a flower nail, parchment paper squares, a Styrofoam block to rest the nail in, a glue sick, and a dusting pouch filled with a 50/50 mix of cornstarch and powdered sugar. Start by sticking a parchment square to the flower nail with a dab from the glue stick. 
Hold the tip just above and at a right angle to the surface. Squeeze while moving the tip in an S shape. Increase pressure during the first curve, and decrease pressure as you continue through the second curve. 
I found it easier to make the sides even by piping the other side upside down. Rotate the nail, and pipe the other half. Overlap the second half slightly, and gently tap down the center with a fingertip after touching it to the dusting pouch. You could probably stick a toothpick into the icing when it's wet to serve as a handle or cupcake pick (I haven't actually tried this myself, but there's really no reason it wouldn't work if it's properly embedded and the icing is allowed to dry completely). 

Monday, November 19, 2012

Royal Icing Caffeine Molecules

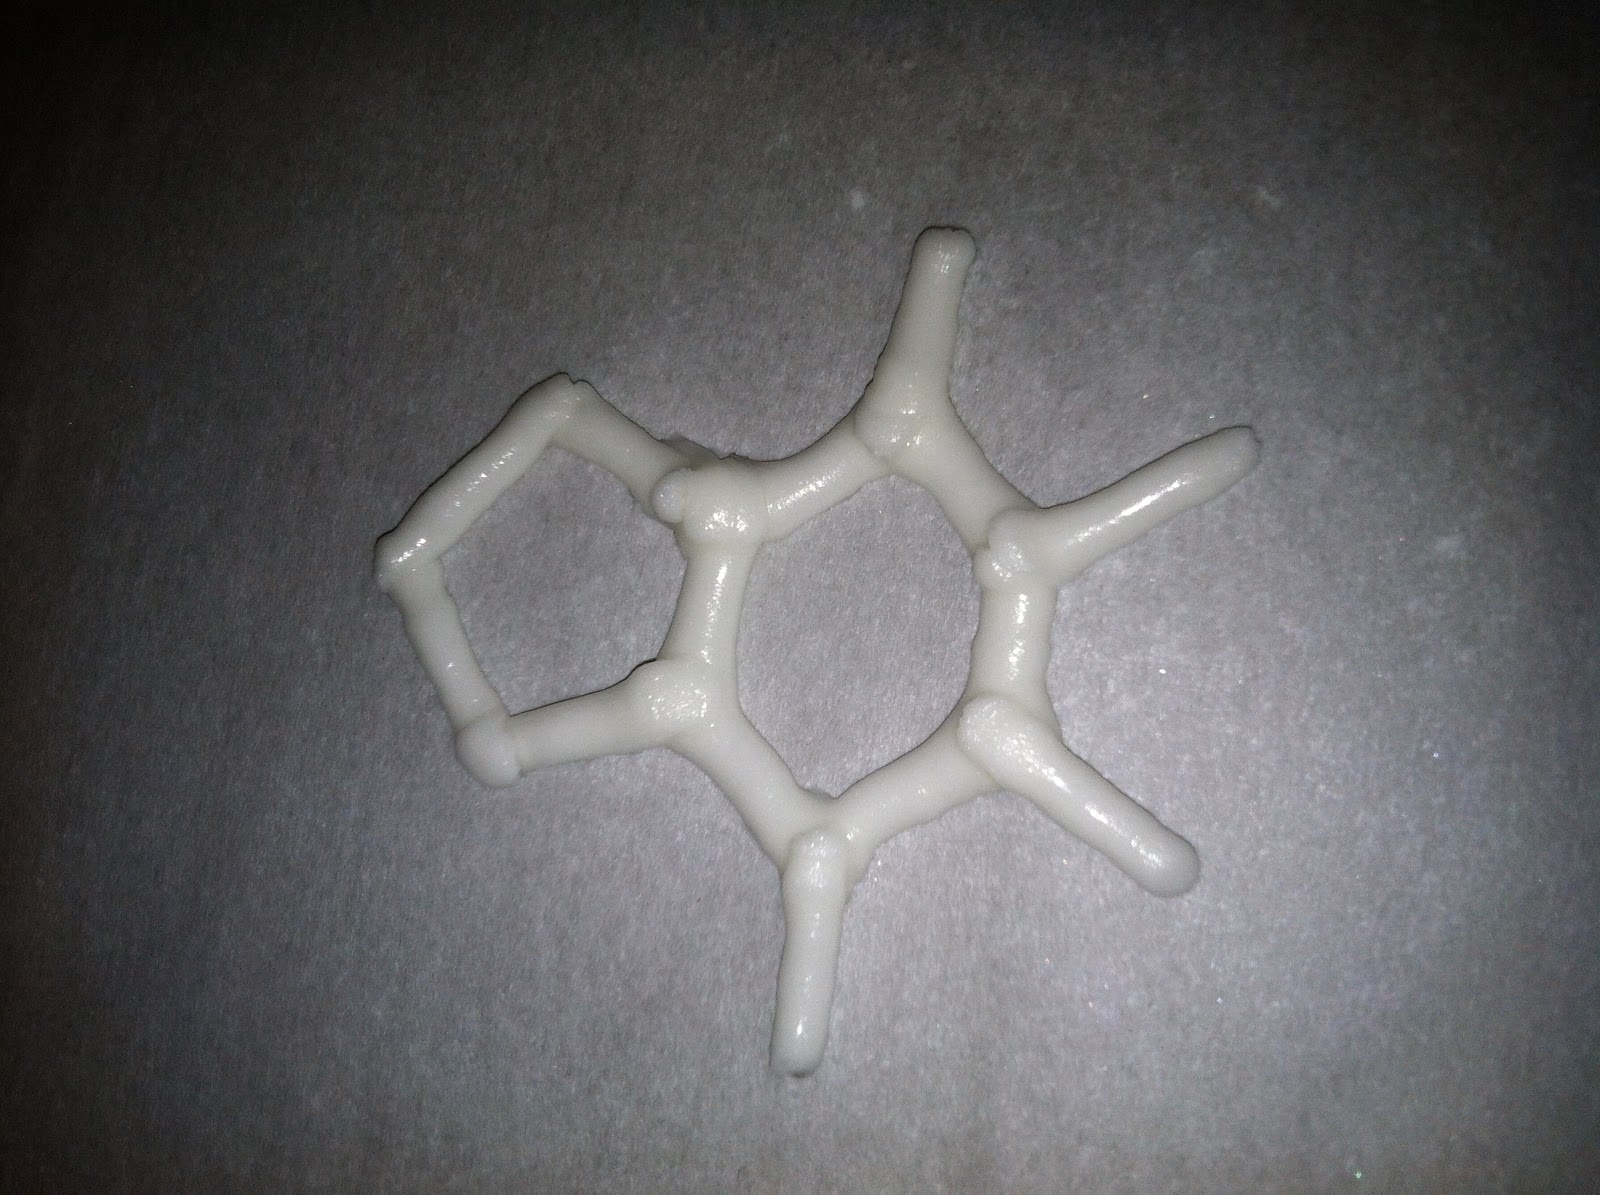
The holidays are coming, and to me that means one thing: consuming enough caffeine to see me through, starting with a long, Thanksgiving Day drive. To pipe this symbol that will have all but your geekiest friends asking what the heck it is, you'll need stiff consistency white royal icing, a #5 round tip, a dusting pouch filled with a 50/50 mix of powdered sugar and cornstarch, a soft brush and edible white glitter. Start by taping a sheet of parchment paper to a baking sheet. 
 Hold the #5 tip at a 45 degree angle to and just above the surface, and pipe a hexagon. Stop pressure after every line to form distinct corners. You may wish to trace a template placed underneath the parchment, so your lines will be straighter and more equal than mine.
 Pipe a short line radiating out from each corner.
 Pipe two more lines connecting two of these lines to form the neighboring pentagon.
 Finally, pipe the balls that will approximate the atoms. Touch a fingertip to the dusting pouch and tap down any peaks that remain.
 Allow the icing to firm up for a while, then dust it all over with edible glitter like Wilton's Pearl Dust; according to Wikipedia, caffeine is described as "white crystalline" so glitter isn't totally out of place. When the icing is dry, slide the molecules right off the parchment (I sometimes attempt to slide a parchment square underneath; if it slides in easily, the icing is dry). Use these molecules to decorate any coffee flavored dessert, or even coffee cake. You could even park one in the foam on a cappuccino or mocha right before serving it.

Sunday, November 18, 2012

Royal Icing Hostess Cupcakes

What a blow to nostalgia many folks were dealt with the recent demise of Hostess products. I'm quite certain Hostess Cupcakes were most Americans' first introduction to piping! To create tiny little cupcakes with that iconic Hostess curlicue, you'll need stiff consistency royal icing in brown and white, round tips #12 and #2, a flower nail, a Styrofoam block to rest the nail in, parchment paper squares, a glue stick, and a dusting pouch filled with a 50/50 mix of powdered sugar and cornstarch. Start by sticking a parchment square to the flower nail with a dab from the glue stick. 
 Hold the #12 tip at a right angle to and just above the surface. Squeeze out a ball of icing, then stop pressure and pull the tip away. Touch a fingertip to the dusting pouch and tap the bottom flat. Allow it to dry thoroughly.
 Peel away the parchment paper and get ready to pipe on the side that used to be faced down.
 Use the #2 tip to pipe the curlicue (I think I held the tip at about a 45 degree angle). I suppose these would be most appropriate as toppers on cream-filled cupcakes or petits fours (and always in pairs).

Saturday, November 17, 2012

Royal Icing Origami Crane

Tonight's post is a little tricky because it requires the stiffest consistency royal icing imaginable to make all the little parts stand up correctly (otherwise they all flatten out and look like a pile of mush; that's what happened first. I would have posted a photo of my failure, but I destroyed the evidence). You'll need round tip #10, leaf tip #352, oval tip #57, a flower nail, a glue stick, parchment paper squares, a Styrofoam block to rest the nail in, and a dusting pouch filled with a 50/50 mix of powdered sugar and cornstarch. Start by sticking a parchment square to the nail with a dab from the glue stick. 
 Hold the #10 tip just above and at a right angle to the surface. Squeeze out a ball for the body, moving the tip upwards for just under half an inch as you go. Stop pressure and pull the tip away. Touch a fingertip to the dusting pouch and tap down the peak that remains.
 Switch to the #57 tip and pipe the neck and head. Hold the tip almost straight up, pipe so the icing anchors to the body, pull the tip upwards while piping, then stop pressure and pull the tip away after about half an inch. The head might just curve over like this, otherwise coax it gently with a dusted fingertip. If it stands up straight…
 …consider making it the tail, which is the next step.
 Switch to the #352 leaf tip to pipe the wings. Bury the tip in the body at a 45 degree angle, squeeze briefly while moving the tip outward, then stop pressure and pull the tip away. Coax the wings upward, if need be, with a dusted fingertip. This post is dedicated to my friends at The Paper Crane in Half Moon Bay, one of the only reasons to visit Main Street.

Friday, November 16, 2012

Royal Icing Snowflakes

Today's post is inspired by one of my favorite crafts: frosted pumpkins. I used to paint and glitter real pumpkins every year, but it was absolutely heartbreaking to throw them out at the end of the season (so a few years ago I switched to Funkins). 
To pipe snowflakes that you can use to add a 3D quality to cupcakes or whatever, you'll need white stiff consistency royal icing, parchment paper, a cookie sheet, scissors, tape, small round or oval tips, a dusting pouch filled with a 50/50 mix of powdered sugar and cornstarch, a fluffy brush, and edible glitter like Pearl Dust. Start by taping parchment paper to a cookie sheet (cut the leftover paper into squares for other piping projects). 
 I used a #5 round tip to pipe this snowflake. Hold the tip just above the surface and at a 45 degree angle. Pipe a single line about 1.5" long.
 Pipe an "X" over the line. You can center it, or pipe it closer to one end or another, or pipe the lines in different lengths for a retro look. Touch a fingertip to the dusting pouch and gently tap down the center where the lines intersect.
 Pipe an "X" over every line toward the tip.
 Allow the icing to firm up for a few minutes, then fluff glitter all over it. When the icing is completely dry, it should slide right off your parchment and (hopefully) right onto a very festive dessert. A little side note: unless the Internet has a worldwide meltdown in the next 24 hours, my blog will receive its 100,000th visit today. I want to thank everyone who has ever read one post or all of them for visiting my blog! You motivate me more than I can say.

Thursday, November 15, 2012

Royal Icing Sock Monkey

I was looking at some weird little sock monkey craft my daughter brought home from school, and all I could think of was "Royal icing. I got this." All you need to pipe goofy little sock monkey faces is stiff consistency royal icing in brown, white, black and red, round tips #12, #3, and #2, oval tip #55, and star tip #199. You'll also need a flower nail, a Styrofoam block to rest the nail in, a glue stick, parchment paper squares, and a dusting pouch filled with a 50/50 mix of powdered sugar and cornstarch. Start by sticking a parchment square to the flower nail with a dab from the glue stick. 
 Attach the #12 tip to the brown icing. Hold it at a right angle and just above the surface. Squeeze steadily while piping an oval, then fill it in, then pipe a circle on either side.
 Touch a fingertip to the dusting pouch and tap the icing flat. Believe it or not, the pile of icing above will become the shape below. Allow it to dry for a few minutes.
 Also using the #12 tip, pipe an oval for the face. Fill it in, and tap it flat, just like the shape above.
 I used an oval #55 tip to pipe the hat, but you could probably be quite successful with any small, round tip.
 Pipe the eyes with the #3 tip; they should look like little buttons. Pipe down any peaks that form when you pull away the tip with a fingertip you've touched to the dusting pouch.
 Attach the #199 tip to the red icing and pipe the puffball on the hat…
 …then switch to a small tip like the #2 to pipe the mouth. I'm not sure this was the best tip to use, but it's easier to manipulate than a tip like the oval #55. When the icing is dry I'll draw in a couple of nostrils with a food-safe marker and post another pic!