Showing posts with label Thanksgiving. Show all posts

Wednesday, November 21, 2012

Royal Icing Turkey Leg

It's one of those rare days that I'm making real, actual food in the kitchen, so today's post is extra short and sweet. If, for some bizarre reason, you find yourself in the situation where you need to pipe tiny turkey legs, you're in luck! They're the easiest thing in the world (way easier than any other thing you might be likely to cook for Thanksgiving, anyway). All you'll need is stiff consistency royal icing in brown and white (I'm using colors more suitable for a cartoon turkey leg than the real thing, of course), round tips #12 and #5, a flower nail, parchment paper squares, a glue stick, a Styrofoam block to rest the nail in, and a dusting pouch filled with a 50/50 blend of cornstarch and powdered sugar. Start by sticking a parchment square to the flower nail with a dab from the glue stick. 
 Hold the #12 tip just above and at a 45 degree angle to the surface. Pipe a ball of brown icing, then move the tip along for a few millimeters while decreasing pressure. Stop pressure and pull the tip away. Touch a fingertip to the dusting pouch and tap down the peak, if one remains. Essentially, you're left with a shape like a bean or an egg.
 Stick the #5 tip into the icing at the narrow end so the tip disappears a millimeter or so in. Squeeze while moving the tip along for a few millimeters. Stop pressure and pull the tip away. Pipe two tiny balls at the end of the leg bone, tapping down any peaks with a dusted fingertip if need be. These would be sweet on any miniature cupcakes, petits fours, or even cubes of fudge for Thanksgiving.

Wednesday, November 14, 2012

Royal Icing Shock of Wheat

Here's an alternative to all the usual autumn icons (pumpkins, leaves, etc): a shock of wheat. All you'll need is yellow stiff consistency royal icing, oval tip #55, round tip #2, a flower nail, a Styrofoam brick to rest the nail in, a glue stick, parchment paper squares, and a dusting pouch filled with a 50/50 blend of cornstarch and powdered sugar. Start by sticking a parchment square to the flower nail with a dab from the glue stick. 
 Use the #2 tip to pipe a cluster of lines about 1.5" long. Curve the outer lines inward in the middle to give the cluster a "waist."
 Pipe a few lines across the middle to "bind" the cluster at its narrowest point.
 Switch to the #55 tip and pipe the heads of wheat. Pulse the tip in and out to create texture. When the icing is dry, peel away the parchment square, and use this to decorate any tiny dessert (especially one containing wheat!).

Monday, November 12, 2012

Royal Icing Eagle Feather

After yesterday's pilgrim hat, I thought I'd better think of something at least representative of the Native American headdress (if not the whole thing): the eagle feather. All you'll need to pipe very tiny eagle feathers are stiff consistency royal icing in black and white, round tip #3, petal tip #101, a flower nail, a glue stick, a Styrofoam block to rest the nail in, parchment paper squares, and a dusting pouch filled with a 50/50 mix of powdered sugar and cornstarch. Start by sticking a parchment square to the flower nail with a dab from the glue stick. 
 Pipe a slightly curving line of white icing with the #3 tip. As the icing comes out of the tip, pinch it into a point with fingertips you've touched to the dusting pouch.
 Switch to the #101 tip and pipe half of the feather from about half an inch away from the pointy end until about 1/3" from the tip. Hold the wide end almost against the center line and the narrow end facing outward. Pulse the tip as you go to create the ridges of the feather. Stop and pull the tip away.
 Repeat on the other side, again with the narrow side facing outward.
 Use the #101 tip to pipe the end with black icing (hopefully you have two #101's or you'll have to rinse the one out you piped the white icing with). Pulse the tip in the same way to create the ridges while moving the tip in a tight upside-down "U" formation to create the tip. This would look sweet on any dessert served at a black-and-white themed tea, as well as for Thanksgiving.

Sunday, November 11, 2012

Royal Icing Pilgrim Hat

I thought about waiting until closer to Thanksgiving to post this one, but I wanted to give you a chance to pipe a whole bunch of pilgrim hats if you're so inclined (the last thing you want to be worried about when the turkey is supposed to be taking center stage is whether or not you have the fixin's for black icing). All you'll need to pipe pint-sized pilgrim hats is round tips #12 and #2, black and yellow stiff consistency royal icing, a flower nail, a Styrofoam block to rest the nail in, a glue stick, parchment squares, and a dusting pouch filled with a 50/50 mix of cornstarch and powdered sugar. Start by sticking a parchment square to the flower nail with a dab from the glue stick. 
 Attach the #12 tip. Hold it just above and at a right angle to the surface. Pipe a circle (the brim of the hat), and tap the icing flat with a fingertip after touching it to the dusting pouch. The shape should be about the size of a nickel. Allow it to firm up for a few minutes.
 Also with the #12 tip, pipe the crown of the hat. Hold the tip at a right angle to and just above the center. Squeeze while drawing the tip up a little less than half an inch. Stop pressure and pull the tip away. A peak will remain. Touch a fingertip to the dusting pouch and tap it into a shape as close to the iconic pilgrim hat as you can (a sloping cylinder with a flat top).
 Allow the icing to firm up for a few minutes, then switch to the #2 tip on the yellow bag. Pipe a small square with a crossbar over one of the vertical lines. Tap down any peaks with a dusted fingertip. Use these to decorate any Thanksgiving desserts, such as petits fours or even individual slices of pumpkin pie.

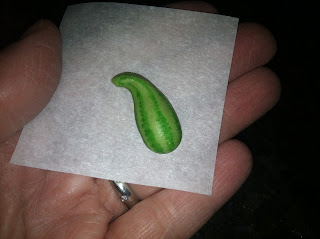
Royal Icing Decorative Gourd Version 2


Thursday, November 8, 2012

Royal Icing Peapod

I was reading about the first Thanksgiving and was surprised to find that peas were supposedly on the menu; they don't get nearly the amount of historical credit that pumpkins and maize do. All you need to pipe a sweet little peapod are stiff consistency royal icing (I used Avocado by AmeriColor; a color I haven't used since I made those gum paste artichokes), round tip #12, leaf tip #69, tip #61 by Bakery Crafts (a teardrop shaped tip used primarily for piping violets), a flower nail, a Styrofoam block to rest the nail in, parchment paper squares, a glue stick, and a dusting pouch filled with a 50/50 mix of powdered sugar and cornstarch. Start by sticking a parchment square to the flower nail with a dab from the glue stick. 
 Hold the tip at a right angle and against the surface, and pipe a gently curved shape to form half of the peapod.
Here's another view of it. 
 Repeat to form the other half.
 Pipe as many peas in whichever size you wish. I was able to fit three peas with tip #12. Hold the tip just above and at a right angle to the center line, squeeze briefly, and pull up and away while stopping pressure.
 Touch a fingertip to the dusting pouch and tap the peaks down into balls.
 You could stop here or add a leaf or two if you like; make sure they're firmly anchored to the pod. I used a #69 leaf tip. I think these would be sweet cupcake toppers for a baby shower in anticipation of multiple births; tiny faces could be drawn on with food-safe markers like AmeriColor Gourmet Writers, and the peas could be piped in whatever skin tone you like.

Sunday, November 4, 2012

Royal Icing Decorative Gourds

This might be the first of a number of decorative gourd recreations; they're easy, cute, there's a million varieties of them (well, at least dozens), and they'd look great in a cornucopia of other symbols of the season on a cake (or even a pie!). All you'll need to pipe the yellow, bumpy variety of decorative gourd is stiff consistency royal icing, round tips #12 and #2, a flower nail, a Styrofoam block to rest the nail in, parchment paper squares, a glue stick, and a dusting pouch filled with a 50/50 mix of powdered sugar and cornstarch. Start by sticking a parchment square to the flower nail with a dab from the glue stick. 
 Hold the #12 tip at a 45 degree angle to and just above the surface. Squeeze hard to pipe a ball, then decrease pressure and move the tip along for a few millimeters before stopping pressure and pulling the tip away. If a peak remains, touch a fingertip to the dusting pouch and tap it down. Allow the icing to dry for a few minutes.
 Switch to the #2 tip and pipe a scattering of dots, single and in clusters. Tap down any peaks with a dusted fingertip. If you happen to know the proper name for this particular gourd, please send me a message because I couldn't figure it out!