Showing posts with label Wilton tip #101. Show all posts

Friday, March 9, 2012

Royal Icing Daisies

The Girl Scouts of the United States of America's 100th Birthday is just around the corner (it's being celebrated the whole year, but the official birthday is March 12th). It's been a while since I posted about piping daisies directly on cupcakes, so I thought I'd better post another method of piping daisies, the Girl Scouts' official flower, in honor of founder Juliette "Daisy" Gordon Low.
Start by assembling everything you'll need: white and yellow medium consistency royal icing (put a small rose tip #101 on the white bag, a round tip #8 on the yellow), a mortar and pestle, yellow Cake Sparkles by Wilton, a non-toxic glue stick, a flower nail, 2" by 2" squares of parchment paper (one for each daisy you're planning to make), a small glass bowl, a dusting pouch filled with a 50/50 mix of powdered sugar and cornstarch, and a Styrofoam block (to act as a third hand when you need to set the flower nail down someplace). 
Attach a parchment paper square to the flower nail with a dab from the glue stick. 
Make a tiny dot of icing in the middle, just to help your daisy stay centered. This dot will be totally hidden in the end; it can be any color. 
Using the white bag, pipe a petal from the edge of the flower nail to the dot. Hold the bag at about a 45 degree angle. When you get to the center, stop the pressure and pull the tip away. 
Pipe three more petals. One option is to pipe all your petals one after the other adjacent to each other. I prefer to pipe petals at 12, 3, 6 and 9 and then pipe petals in between them.  
Pipe 4 more petals in between the first 4. 
Fill in all the gaps until you have a grand total of 16 petals. 
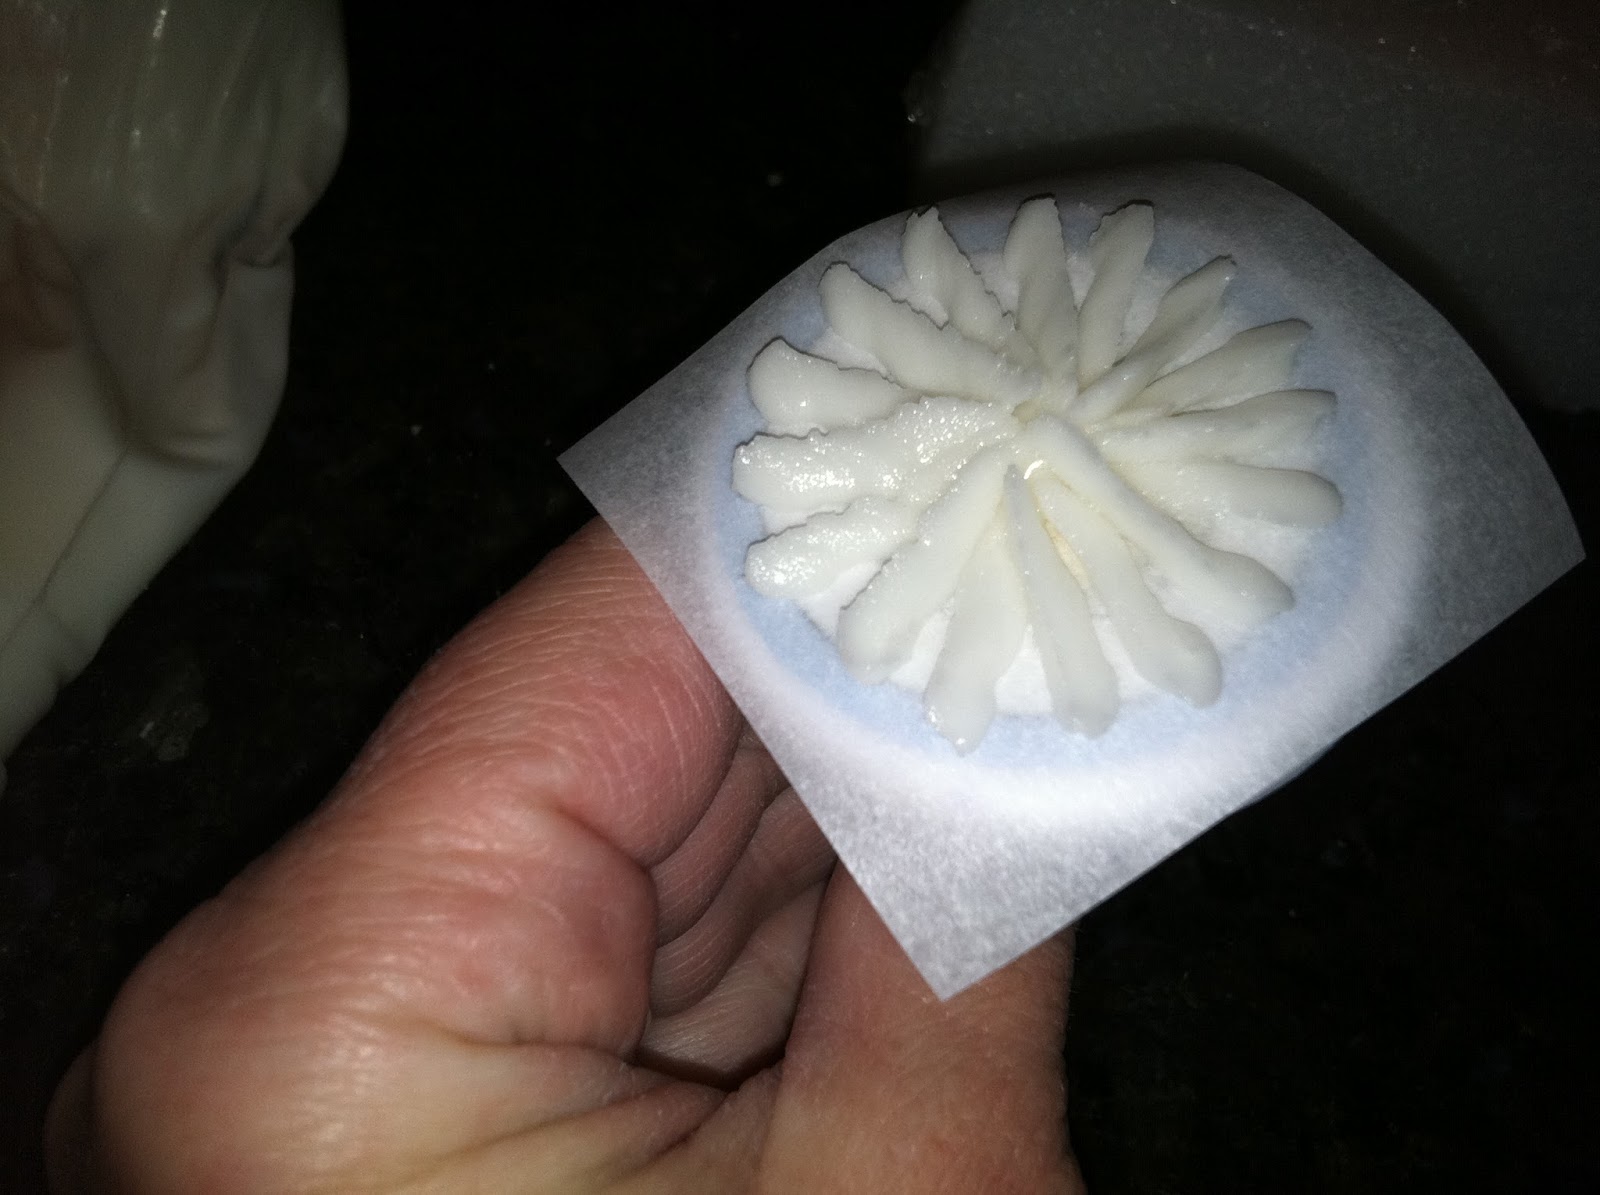
Touch a fingertip to the dusting pouch, and tap down the center; it's likely to be thicker than the rest of the flower, with all those petals ending at it. Pipe all the white daisy bases you're going to need before moving on to the next steps; it's best if they've hardened somewhat before you do the final steps.
Grind up a pinch of yellow Cake Sparkles into dust with a mortar and pestle.
 Alternately, you could use yellow sugar, but ground-up Cake Sparkles have a really cool glittery quality. Transfer them to a small glass bowl; they'll be easier to pinch out of the bowl when you need them.
 Hold the bag containing yellow icing at a 90 degree angle to the center of the flower and pipe out a ball.
 Touch the dusting pouch with a fingertip, and then use it in a tapping motion to flatten the ball.
 Moisten your fingertip slightly with water and touch it to the Cake Sparkles.
 Gently touch the daisy's center and leave the sparkles behind. Once the daisy has dried, it should peel right off the parchment paper. Use it to decorate cupcakes, cookies, or in any way imaginable on a cake; especially a cake for the Girl Scouts' 100th Birthday!

Friday, March 2, 2012

Piping Dogwood Flowers in Royal Icing

I love dogwood flowers, perhaps because they aren't easy to come by. There's a dogwood tree in my yard that's almost half a century old that started to produce blooms only a few years ago! Dogwood flowers are easy to make using gum paste; all sorts of cutters and impression mats are available. However, I really wanted to try to figure out how to pipe them with royal icing; I definitely plan to incorporate them next time I make a stump cake. I think I came up with a pretty accurate representation of them. Here's the setup; a Styrofoam block (to act as a third hand for holding the flower nail), a non-toxic glue stick, dark pink Color Dust, a small brush, parchment paper squares, a flower nail, a dusting pouch filled with a 50/50 mix of powdered sugar and cornstarch, 3" flower forming cups, a pastry bag filled with royal icing and fitted with a Wilton #101 rose tip, and a pastry bag filled with yellow royal icing and fitted with the Wilton #233 tip:
Dab some glue on the flower nail and stick down a parchment paper square. 
 Holding the rose tip almost flat against the surface with the narrow end of the tip pointing outward and the wide end in the center, pipe a long heart shape all the way to the edge of the nail. Keep the pressure pretty steady and firm the whole time. If you somehow wind up with a hole in the middle of this petal, touch one of your fingers to the dusting pouch and tap the icing down around the hole.
 Make the second petal opposite to the first. Attempt to make them somewhat symmetrical; all the petals will be the same size. If a large accumulation occurs in the center, it can be tapped down with your dusted finger.
 Here's the third petal…
 …and the fourth.
 Slide the parchment paper off the nail (breaking the seal with the glue), and place it on the flower forming cup to dry with a subtle concave shape:
 After the flower has had a chance to firm up for a bit, pipe the yellow center with Tip #233. Hold the tip just above the center and squeeze out a center consisting of very short strands; squeeze, stop the pressure, lift the tip away. Move the tip over the width of one of the strands, and squeeze out a second set.
 This way the center won't be a perfectly spaced, unnatural looking cluster of dots.
 When the petals have dried completely, dust the edges with the pink dust. As you dust each petal, you can shake off the excess away from the rest of the flower.
 Here are all four petals, dusted. Incidentally, this step is optional; the flowers in my yard don't have pink edges. I like how the dogwood flower turned out; it even has the lines running the length of the petals. I plan to figure out how to make more flowers that aren't based on something I learned in a Wilton class soon!