Showing posts with label Wilton Color Dust. Show all posts

Wednesday, March 21, 2012

Forming Fondant With Makin's Push Molds

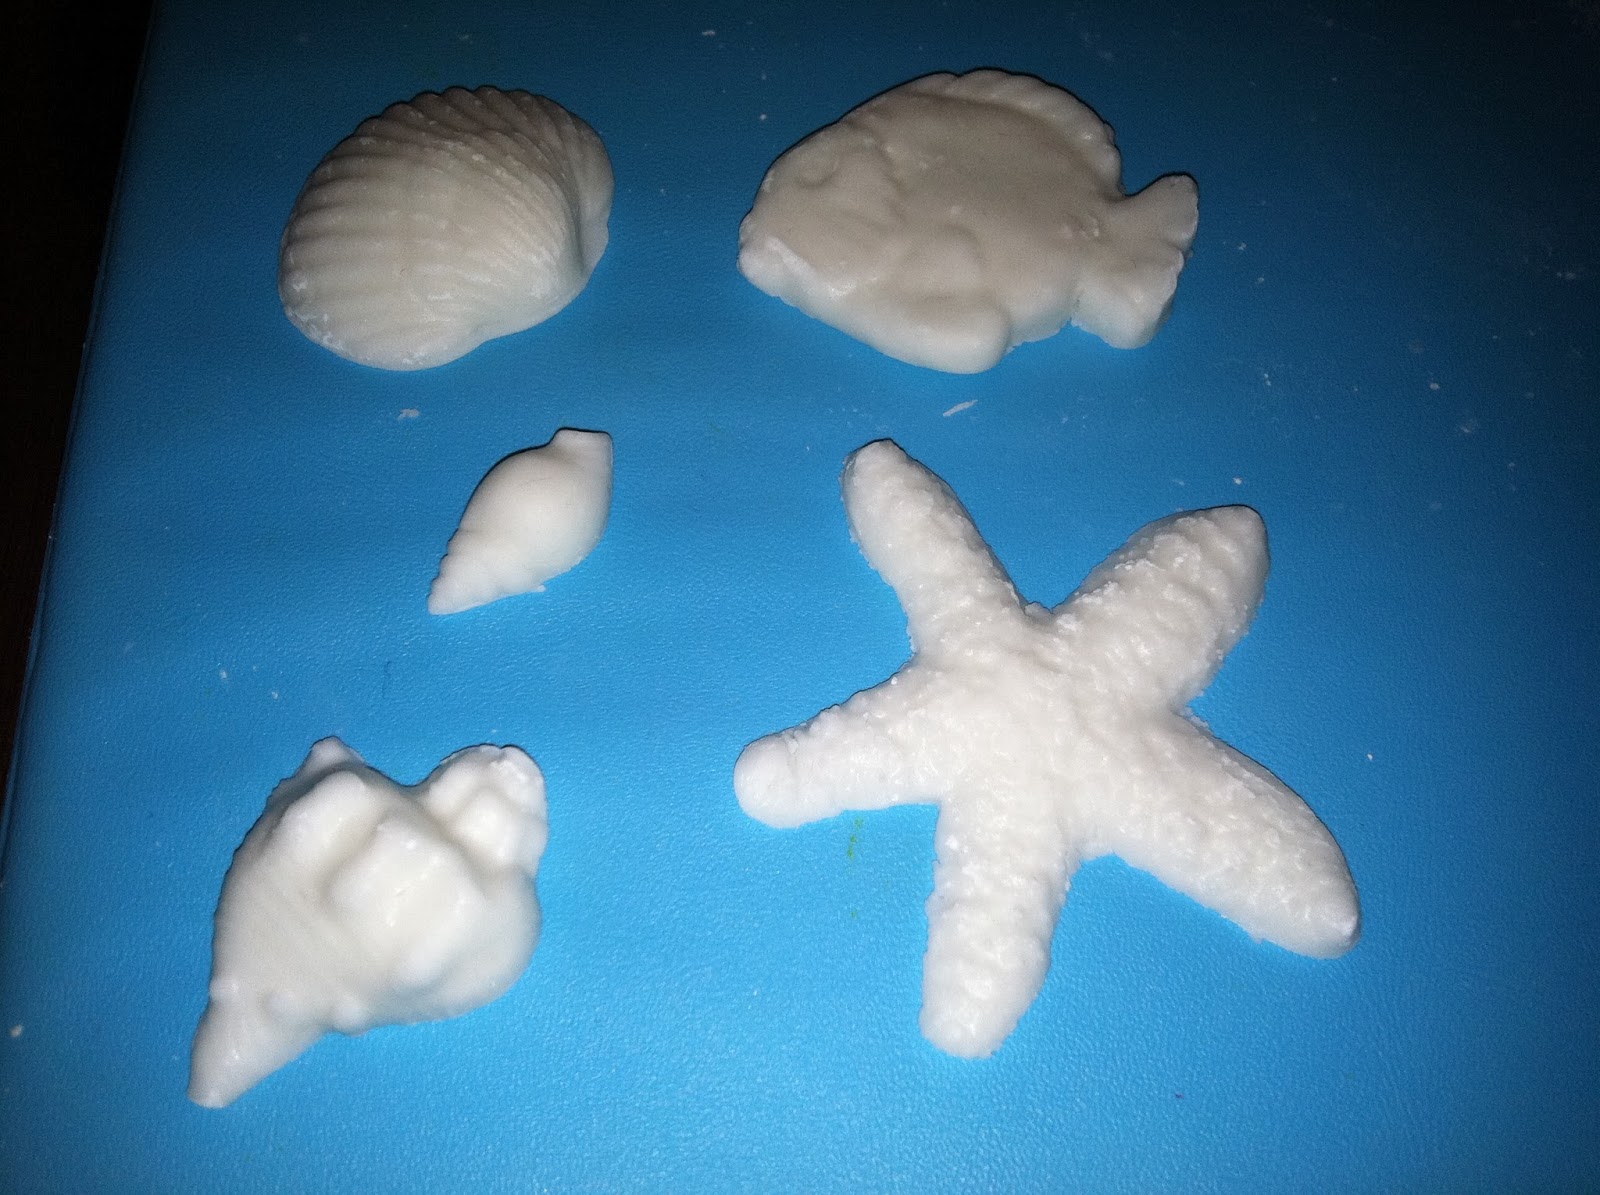
I have a favorite new discovery: Makin's Push Molds. According to the packaging, they're intended for use with clay, but I recently found them near the gum paste department of Sugar 'N Spice in Daly City. As much as I love gum paste, I'd prefer to make cute little things like this out of something more delectable. I had a small amount of a recent batch of fondant left over, so I gave it a try. Other than fondant, all you really need is a mold, a dusting pouch filled with a 50/50 mix of powdered sugar and cornstarch, and a gum paste storage board (the flip side of which makes a great work surface). 
Start by dusting the cavity on the mold you're going to use.
Roll a ball of fondant the approximate size of the mold (you can always add more or less if it doesn't fit; just pry out the first attempt, adjust the size, re-dust, and try again).
Press the fondant into the mold.
Flip the mold over; you can see right through to any overages that should be wiped away.
To make the underside of the mold really flat you might want to press it flat against the storage board.
Push the mold and the piece should pop right out.
Some shapes will deform during the "pressing out" step (especially those that are thicker). For these I dusted the cavity extra generously, molded quickly, and slapped the mold against the counter; the shape popped right out. Allow them to rest on the storage board to dry (or on a piece of parchment paper on a cake cooling rack).
When the shapes are dry, you can dust them with Color Dust
…and maybe also a layer of Pearl Dust
 …or just straight Pearl Dust.
 You could also color the fondant, marble it, draw on the pieces with food-safe markers, paint them with paste food coloring dissolved in a tiny amount of clear vanilla extract; you're limited only by your imagination!

Sunday, March 18, 2012

Stargazer Lily Bud

The stargazer lily from Wilton's Course 4: Advanced Gum Paste Flowers is pretty spectacular on its own, but there's one thing you can add to make it that much more real: a bud. It takes just a few minutes to make with materials you'll already have out from making the lily, including…
 …florist's tape, 20-gauge florist's wire, needle-nose pliers (the ones used in jewelry-making), gum glue adhesive (a pinch of gum paste dissolved in a tablespoon of water), Color Dust in Deep Pink and Lime Green, a small brush for each color, a dusting pouch filled with a 50/50 blend of cornstarch and powdered sugar, white gum paste (under a plastic cup, which has a greenhouse effect), a gum paste storage board to use as the work area, the knife tool from Wilton's 10-piece Fondant & Gum Paste tool set, and Crisco (to knead into the gum paste, if it gets too dry). You'll also need a Styrofoam block and maybe a ruler. Start by bending one end of a wire into a hook around the end of the needle-nose pliers:
 Roll a 1" ball of gum paste. I found it handy to have a ruler for this and some subsequent steps, but you might not need one.
 Dust the backside of the storage board, and roll the ball into a log, tapered at one end. I achieved this by concentrating my rolling toward one end:
 The final shape should be about 2.5" long.
 Dip the hook end of the wire in the gum glue adhesive…
 …and insert it about 1.5" to 2" into the base:
 Draw three deep grooves that run the length of the bud from the base to the tip with the knife tool:
 Stick the wires into the Styrofoam block and allow the buds to firm up.
Wrap the wire with florist's tape. Cut off about 6" of tape, pull an inch or so gently at one end to activate the adhesive, and start wrapping the wire at an angle…
 …an inch or so down the stem. Once the tape starts to catch and stick to itself…
 …slide it up snugly, just under the bud. Wrap the remainder of the stem and snip off any excess tape.
 You'll want a different brush for each color. Start with a wider brush to do the faint pink blush down the center of each section. I barely touched the bristles to the Dark Pink dust, shook most of it off, then lightly swept it on in long strokes almost the length of the bud:
 I used a narrow, angled brush to dust the grooves with Lime Green from the tip down to the base.
 I used the same brush to concentrate a little more color at the base, brushing from the wire up the sides of the bud about half an inch.
 Use florist's tape to wrap the bud to the stargazer lily's stem, right in line with the leaves. Believe it or not, more steps exist to make this flower look even more real; I'll try to post them someday…

Friday, March 2, 2012

Piping Dogwood Flowers in Royal Icing

I love dogwood flowers, perhaps because they aren't easy to come by. There's a dogwood tree in my yard that's almost half a century old that started to produce blooms only a few years ago! Dogwood flowers are easy to make using gum paste; all sorts of cutters and impression mats are available. However, I really wanted to try to figure out how to pipe them with royal icing; I definitely plan to incorporate them next time I make a stump cake. I think I came up with a pretty accurate representation of them. Here's the setup; a Styrofoam block (to act as a third hand for holding the flower nail), a non-toxic glue stick, dark pink Color Dust, a small brush, parchment paper squares, a flower nail, a dusting pouch filled with a 50/50 mix of powdered sugar and cornstarch, 3" flower forming cups, a pastry bag filled with royal icing and fitted with a Wilton #101 rose tip, and a pastry bag filled with yellow royal icing and fitted with the Wilton #233 tip:
Dab some glue on the flower nail and stick down a parchment paper square. 
 Holding the rose tip almost flat against the surface with the narrow end of the tip pointing outward and the wide end in the center, pipe a long heart shape all the way to the edge of the nail. Keep the pressure pretty steady and firm the whole time. If you somehow wind up with a hole in the middle of this petal, touch one of your fingers to the dusting pouch and tap the icing down around the hole.
 Make the second petal opposite to the first. Attempt to make them somewhat symmetrical; all the petals will be the same size. If a large accumulation occurs in the center, it can be tapped down with your dusted finger.
 Here's the third petal…
 …and the fourth.
 Slide the parchment paper off the nail (breaking the seal with the glue), and place it on the flower forming cup to dry with a subtle concave shape:
 After the flower has had a chance to firm up for a bit, pipe the yellow center with Tip #233. Hold the tip just above the center and squeeze out a center consisting of very short strands; squeeze, stop the pressure, lift the tip away. Move the tip over the width of one of the strands, and squeeze out a second set.
 This way the center won't be a perfectly spaced, unnatural looking cluster of dots.
 When the petals have dried completely, dust the edges with the pink dust. As you dust each petal, you can shake off the excess away from the rest of the flower.
 Here are all four petals, dusted. Incidentally, this step is optional; the flowers in my yard don't have pink edges. I like how the dogwood flower turned out; it even has the lines running the length of the petals. I plan to figure out how to make more flowers that aren't based on something I learned in a Wilton class soon!