As you can imagine, brush embroidery (also known as brushed embroidery) on cake pops is pretty much the same thing as on a standard cake, but you have (presumably) significantly less real estate to work on. This also means you can knock these pops out pretty quickly, once you hit your stride. Here's what you'll need…
…cake pops (any shape; I used round, but I think flat might be a better choice), a Styrofoam block to stick the pops in to dry, royal icing in any color in bags fitted with round #2 tips (you could also use melted candy), a cup of water, paper towels, a practice board (if you want to try your hand at brush embroidery someplace other than on the pop itself), and a brush like this:
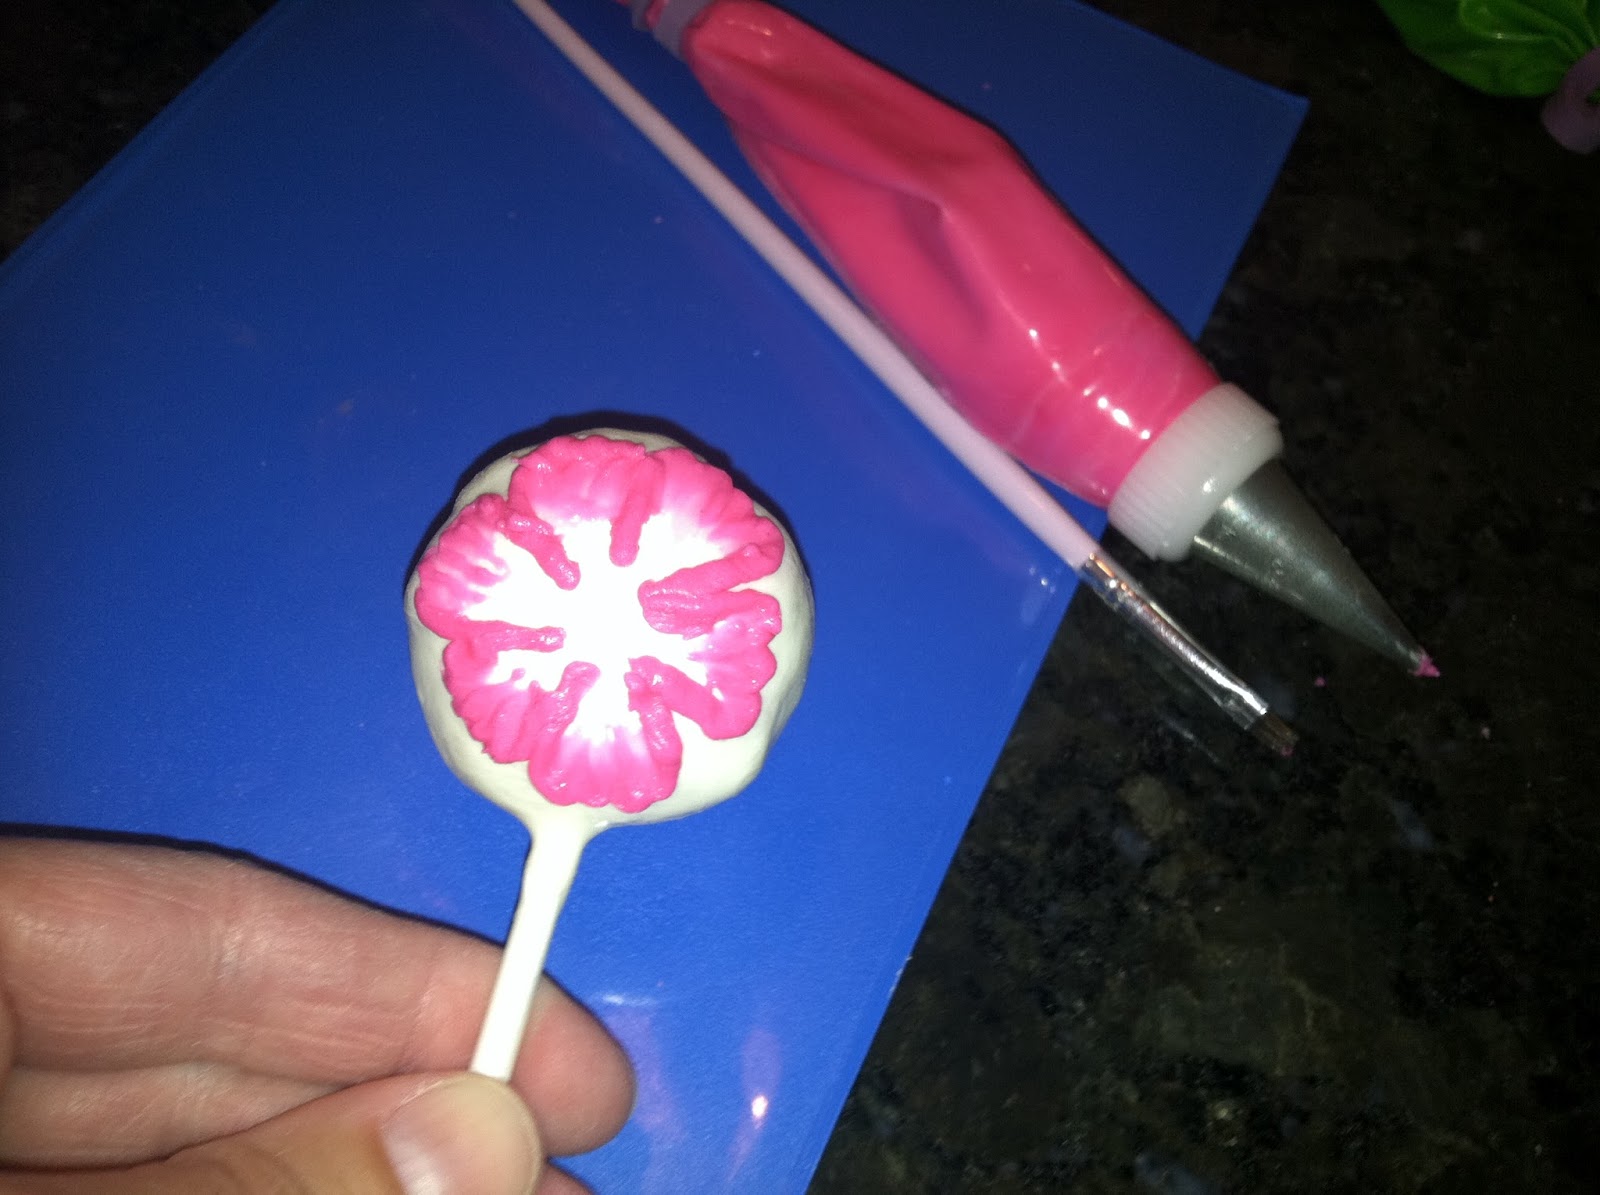
That's the short, squared-off brush from Wilton's 3-brush set. It has just the right amount of stiffness to successfully do brush embroidery. Get the brush ready to go before you start piping; dip it in the water, and blot most of it off on the paper towel. Do this before piping each petal. To pipe a basic flower, start by piping the outline of a petal…
…and gently drag the icing from the outline in toward the center. Experiment with the wide and narrow sides of the brush tip to see what you like best.
To make a flower with six petals, I like to pipe three of them first, more or less evenly spaced. Remember, work petal by petal; once the icing has started to dry the brush embroidery technique won't work. When you clean off and moisten the brush in between petals, make sure it isn't dripping; the excess water will bead up on the chocolate's surface and drive you bonkers. Wipe the brush almost dry on the paper towel.
Then, I piped another three in between these first three. The spacing in between the petals isn't perfect, but 1) neither are real flowers, 2) the end result will look truly hand-drawn and not knocked-out of a cookie cutter, and 3) that gap will lend itself to a design element shortly.
You may want to pipe a center. This is a tightly-piped cluster of #2 dots.
That gap between petals is the perfect place to pipe a stem. I vibrated the tip in and out as I piped to make the stem appear "stitched."
I added a leaf, which was too small to truly do the embroidery technique on, but I was able to soften the outline with the brush a bit, and to gently blend the leaf into the stem.
Lastly, I piped a few yellow stamens in the center.
And there you have it; one of an infinite number of ways to do brush embroidery on a cake pop!


No comments:
Post a Comment