Showing posts with label AmeriColor. Show all posts

Saturday, October 6, 2012

Coloring Stiff Consistency Royal Icing

The other day I posted directions for making stiff consistency royal icing, and now I'm going to show you how to color it without excessively lessening its thickness. This time of year around Halloween I find myself needing two of the more challenging colors to create, black and red. I highly recommend AmeriColor Soft Gel Paste in Super Red and Super Black. You can tell they get a lot of use, because the words on the labels are mostly worn off. 
This is a photo of the icing I made the other day. I held it like this for about half a minute; it's not going anywhere. Some might think this is TOO thick to be considered stiff consistency, but I always make it a little thicker than I want it because it will become creamier when the color gel is added to it. If you're wondering what the solution for creamier stiff consistency royal icing is when the color you want is white, just add a few drops of water or a tiny amount of piping gel. I truly mean a few drops; I like to run my hand under the tap and then flick a drop or three off my fingertips. Don't use a squirt bottle or whatever; those tend to gout out way more water than you're anticipating.  
 The first step is to prepare a piping bag with a tip and a coupler (if you're using one) so you'll have someplace to put the icing immediately after you've colored it. Remember, royal icing starts drying hard and fast the second you take the lid off the container; it always needs to be covered. Scoop out just a little more than you think you might need with an offset spatula.
Scrape it off into a small container…
 …and add a squirt or two of whichever color Soft Gel Paste you're using. If you're going for a pastel shade, unscrew the cap and use a toothpick to remove a few drops (don't double-dip the toothpick; use a new one every time you need to add another drop). You may need to add a drop or two of water to the icing, if you're using a very small amount of color.
 Blend the color in with the offset spatula; try not to whip the icing up too much. The color is looking very orange in this shot, but I can assure you, it's blood red. Notice how much creamier it's looking now than in the above shot, where it almost had the appearance of stucco.
 Cuff the pastry bag over your hand, and insert the spatula as far as you can. Scrape the icing off the spatula by sliding the spatula out against one of your fingers, as I'm doing with my index finger in this photo. You want the icing to be as close to the end as possible, and not all over the inside of the bag. Use a bag tie and a tip cover, and your bag is ready to go.
 The process is, of course, the same for making black icing. I always think I haven't added enough color when I'm making black; it looks charcoal gray to me at first no matter how much I use. However, I've noticed that almost all shades tend to deepen in short order; this pure black icing appeared deep gray all the way until I loaded it into the bag. Experiment with small amounts like this until you find the right shades for whatever project you're working on (in this case, probably eventually eyeballs).

Friday, August 10, 2012

Royal Icing Corgi

I've never really attempted to pipe a specific breed of animal before, but I'm going to give Queen Elizabeth II's favorite a go: corgis! They're actually fairly minimalist; you don't even need to pipe a tail. You'll need a flower nail, a glue stick, parchment paper squares, a dusting pouch filled with a 50/50 blend of cornstarch and powdered sugar, AmeriColor Soft Gel Paste in Super Black, toothpicks, a Styrofoam block to rest the nail in, round tips #12 and #10, oval tip #57, and corgi-colored stiff consistency royal icing. I used AmeriColor Orange with a small amount of Lemon Yellow to brighten it up. 
Start by sticking a parchment square to the flower nail with a dab from the glue stick. 
 Hold the #12 tip just above and at a 45 degree angle to the surface. Pipe a ball, then move the tip along to form the elongated body. Stop pressure and pull the tip away.
 Liberally dust your fingertips by touching them to the dusting pouch, then pinch the narrow end of the body into a tapered, wedge shape for the chest.
 Switch to the oval #57 tip and pipe the legs, which are just 4 short lines of icing. Neaten them with a dusted fingertip if need be.
 After allowing the body to dry for a while (a process that can be speeded up by placing the bodies under a desk lamp), switch to the #10 tip and pipe the head. It's basically a teardrop. Hold the tip just above and at a 45 degree angle to the body, squeeze out a ball, then move the tip away outward and upward while stopping pressure after a short while. Tap the nose with a fingertip until it's more blunt than pointy.
Allow the head to firm up for a while, then pipe the ears with the #57 oval tip. Hold the tip against the head, squeeze briefly, then stop pressure and pull the tip away. Dust your fingertips, flatten then ears slightly, and define the pointed tips if they need it. 
Dip toothpicks in AmeriColor Super Black to create the nose and eyes. I used the small end of a flat toothpick for the nose, and the pointy end of a round toothpick to gently dab in the eyes. 
You should probably make a lot of corgis at once; I read that Queen Elizabeth has 16 of them, so they must do well in packs. 


Saturday, July 21, 2012

Royal Icing Ants

We have ants running around on the deck that are about the same size as these icing ones. That's why it would have been especially disturbing if I'd used them to decorate the cupcakes I brought to a potluck today. They're about the easiest thing you can imagine to pipe, but the problem is they're extremely fragile; one of the six I piped broke in half and lost its legs when I was setting them up for the final photo. The best way to pipe these critters might be to do the bodies and antennae first, then place them on your cupcake or whatever, then pipe the legs. Anyway, all you'll need are round #5 and #1 tips, stiff consistency black royal icing (I used Super Black Soft Gel Paste by AmeriColor), parchment paper squares, and a dusting pouch filled with a 50/50 mix of powdered sugar and cornstarch. Start by piping the head, which is basically a teardrop. Hold the #5 tip against the surface at a 45 degree angle, squeeze out a ball, and pull the tip away so a peak remains. 
 Next, pipe the thorax (middle). It's pretty much pear- or egg-shaped. Hold the tip just behind the base of the head, squeeze out a ball, and move the tip along a couple of millimeters. Stop pressure and pull the tip away. If a peak remains, tap it smooth with a fingertip after touching the dusting pouch.
 Finally, pipe the abdomen (back end). This segment is similar to the head, but larger. Hold the tip just behind the thorax, squeeze out a ball…
 …and pull the tip away. Really try to get the three segments to connect well, so the ant won't be as inclined to break in half (or thirds).
 Pipe as many creepy little ant bodies as you'll need and allow them to dry.
 When they've firmed up, pipe the antennae with a #1 tip. Hold the tip against the head, squeeze, and pull away, stopping pressure after a short distance. Adjust the antennae with a dusted fingertip, if they look a little too mismatched.
 Next, pipe the legs. It was at this point I realized there's really only room for two ants per parchment paper square once you've piped the legs, so I popped off the center one and stuck it to another square with a dot of icing.
 The ant has 3 legs on each side, all coming off the thorax. Hold the tip against the thorax, squeeze enough to anchor the leg to it, then bring the tip down to the parchment. The less icing on the parchment, the better; they'll be easier to remove when they're dry.
 These will be brilliant for Halloween, as well as for flipping out guests at picnics and potlucks in the summertime!

Saturday, June 9, 2012

Royal Icing Turtle

This is my first attempt at piping an animal with a little more height. It's not quite a giraffe, but the turtle is definitely jacked up a bit because it's made from two parts stacked on top of each other. All you’ll need to pipe turtles are parchment paper squares, a dusting pouch filled with a 50/50 blend of cornstarch and powdered sugar, a piping bag filled with stiff consistency royal icing and fitted with a round #12 tip, a round #3 tip, a #5 tip, and a black Gourmet Writer by AmeriColor. Start by piping a ball with the #12 tip. Hold the tip just above a parchment paper square, squeeze firmly, and when the icing resembles a nickel-sized gumball, pull the tip away.

If a peak remains, tap a fingertip against the dusting pouch, and tap it down. 

 Now you’ll want to make the shape more oval than round, and with a higher ridge in the middle.

 Tap your finger against the dusting pouch, and using the first inch or so of your finger tap along the sides of the ball until it starts to look more like a turtle’s shell.  
 Set the shells aside to dry, and pipe the bodies. Hold the #12 tip just above the surface of another parchment paper square, and squeeze while moving the tip along for about 3/4" to form an oval. Stop pressure, pull the tip away, and tap down any remaining peak.
 Switch to the #3 tip and pipe some tails. Touch the tip to one end of the oval, squeeze briefly, and pull away while rapidly stopping and decreasing pressure to form the tail.
 Switch to the #5 tip and pipe the head. It's similar to the tail, but pull the tip upwards so your turtle will be peering skyward. As you stop pressure and pull the tip away, a peak will probably form. You'll want to tap it flat with a fingertip.
 Allow the turtle's body to dry.
 When the icing is firm enough, draw some tiny dots with the Gourmet Writer for eyes.
 Squeeze some icing in the center of the body, and place the shell on it. As you can see, I dressed this shell up with some flattened #5 dots; simply pipe the dots, then flatten them with a fingertip. I'm sure you can come up with all sorts of whimsical (and not necessarily natural) color combinations!


Friday, June 8, 2012

Royal Icing Hedgehog

Ever since reading Miss Jaster's Garden, I've been fascinated by hedgehogs. I know I'll probably never have one lurking in my garden, so piping them out of royal icing will have to do for now. As with many other royal icing critters, all that's needed are a Styrofoam block, parchment paper squares, a flower nail, a glue stick, a black Gourmet Writer by AmeriColor (or black royal icing and a round #1 tip to pipe the features), a piping bag filled with stiff consistency brown royal icing and fitted with a round #12 tip, a dusting pouch filled with a 50/50 mix of powdered sugar and cornstarch, and a round #3 tip. 
 Start by sticking a parchment square to the flower nail with a dab from the glue stick.
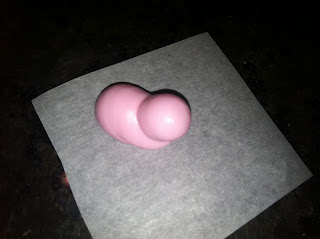
 Pipe the body with the #12 tip. Start by piping a ball, then as the ball forms pull the tip to one side and decrease pressure. Draw the tip sharply upwards as you stop the pressure altogether to form the upturned nose. Allow the body to dry for 20 minutes or so.
 Switch to the #3 tip to pipe the quills, ears, and feet. I started piping the quills at the back. Hold the tip against the body’s surface, squeeze to anchor the icing, then pull away as you decrease and stop the pressure. Don't worry if the quills aren't perfect; hedgehogs aren't perfect, either. If you do pipe one that doesn't look quite right, touch your fingertips to the dusting pouch and pluck it off.
After piping quills for a while, I thought I should pipe the ears, so I'd know when to stop piping quills. The ears are nothing more than balls (also piped with the #2 tip) that I flattened with a dusted fingertip.
I continued piping quills up to the edge of the ears, and then piped a couple of little tip #2 feet (pretty much just short little quill-like shapes).
I used the black Gourmet Writer to draw dots for the eyes and nose. This is definitely a royal icing animal I would be hesitant to serve up; not only is it too cute to eat, biting into it would probably be a rather painful experience.

Thursday, June 7, 2012

Royal Icing Bunnies

I wish I would have thought about piping bunnies last Easter! Oh well; I guess I'm planning ahead for next year. For now they can be company for the mice. To pipe a bunch of bunnies you'll need stiff consistency royal icing in white, deep pink, and light pink (or whatever color you want the bunnies to be), a dusting pouch filled with a 50/50 blend of powdered sugar and cornstarch, a parchment paper square for each bunny, round tips #12, #1, and #4, and oval tips #57 and #55 (by Ateco), and a black Gourmet Writer by AmeriColor
Using the #12 tip, pipe an egg for the body. If a peak remains like this when you stop the pressure and pull the tip away, touch a fingertip to the dusting pouch and tap the peak down. Allow the body to firm up for about 15 minutes, so it doesn't collapse under the weight of the…
 …head. Pipe a ball, and tap the peak down.
 It should be smooth and round. You could gently taper it with your fingertips, if you like; that would probably make it look more like a real rabbit.
 Switch the tip to the larger oval (#57) and pipe some ears, when the heads have had a chance to firm up. Some of the bunnies wound up being lops, and some are whatever the opposite of lops are.
 Switch to the small oval # 55, and pipe some hind legs. These are pretty minimalist, but I think anyone looking at them will get the idea that they're legs. Again, tap out any peaks left by the tip that look out of place.
Use the same tip to pipe some tiny little forelegs, as well. 
 Switch to the white icing and pipe some little #4 ball tails.
 For the faces, I piped #1 dot noses with deep pink icing so the nose would have some depth, and then drew in their eyes with the tip of a Gourmet Writer. The final step is to build a house out of fondant and recreate scenes from the woefully-ignored creature feature "Night of the Lepus."