Showing posts with label tip #8. Show all posts

Wednesday, December 5, 2012

Royal Icing Poker Chips

Today's post is sort of my family's version of gelt; we have a poker chip caddy handed down from my grandparents that I stock year-round with seasonal chips and cards. The chips have to be clay or I won't play:
All you'll need to pipe poker chips is stiff consistency royal icing in any colors you like, round tips #8 and #12, flat ribbon tip #44, a flower nail, parchment paper squares, a glue stick, a Styrofoam block to rest the nail in, and a dusting pouch filled with a 50/50 mix of powdered sugar and cornstarch. Start by sticking a parchment square to the flower nail with a dab from the glue stick. 
 Pipe a circle about the size of a quarter with the #12 tip. Hold it just above and at a right angle to the surface while piping.
 Touch a fingertip to the dusting pouch and tap the icing flat. Allow it to firm up for a few minutes.
 Switch to the #8 tip and pipe around the perimeter. Again, keep the tip at a right angle to and just above the surface. Tap the slightly overlapping ends flat to join them where they meet.
 Pipe short shots of a contrasting icing with a flat #44 ribbon tip. These won't make for decent currency in a poker game, but they'd be cute as a garnish on cupcakes served at it.

Monday, December 3, 2012

Royal Icing Christmas Light Bulb

This is a good case of piping what I know. I grew up on the classic C7 and C9 Christmas lights, and never warmed up to any other variety (especially those cool-burning environmentally-friendly lights that look like the inside of a refrigerator; they may save the earth, but they're the antithesis of festive!). All you'll need to pipe tiny little classic Christmas lights are stiff consistency royal icing in yellow, black, and whatever color you like, round tips #12, #8, and #2, a glue stick, a flower nail, a Styrofoam block to rest the nail in, parchment paper squares, and a dusting pouch filled with a 50/50 mix of cornstarch and powdered sugar. Start by sticking a parchment square to the flower nail with a dab from the glue stick. 
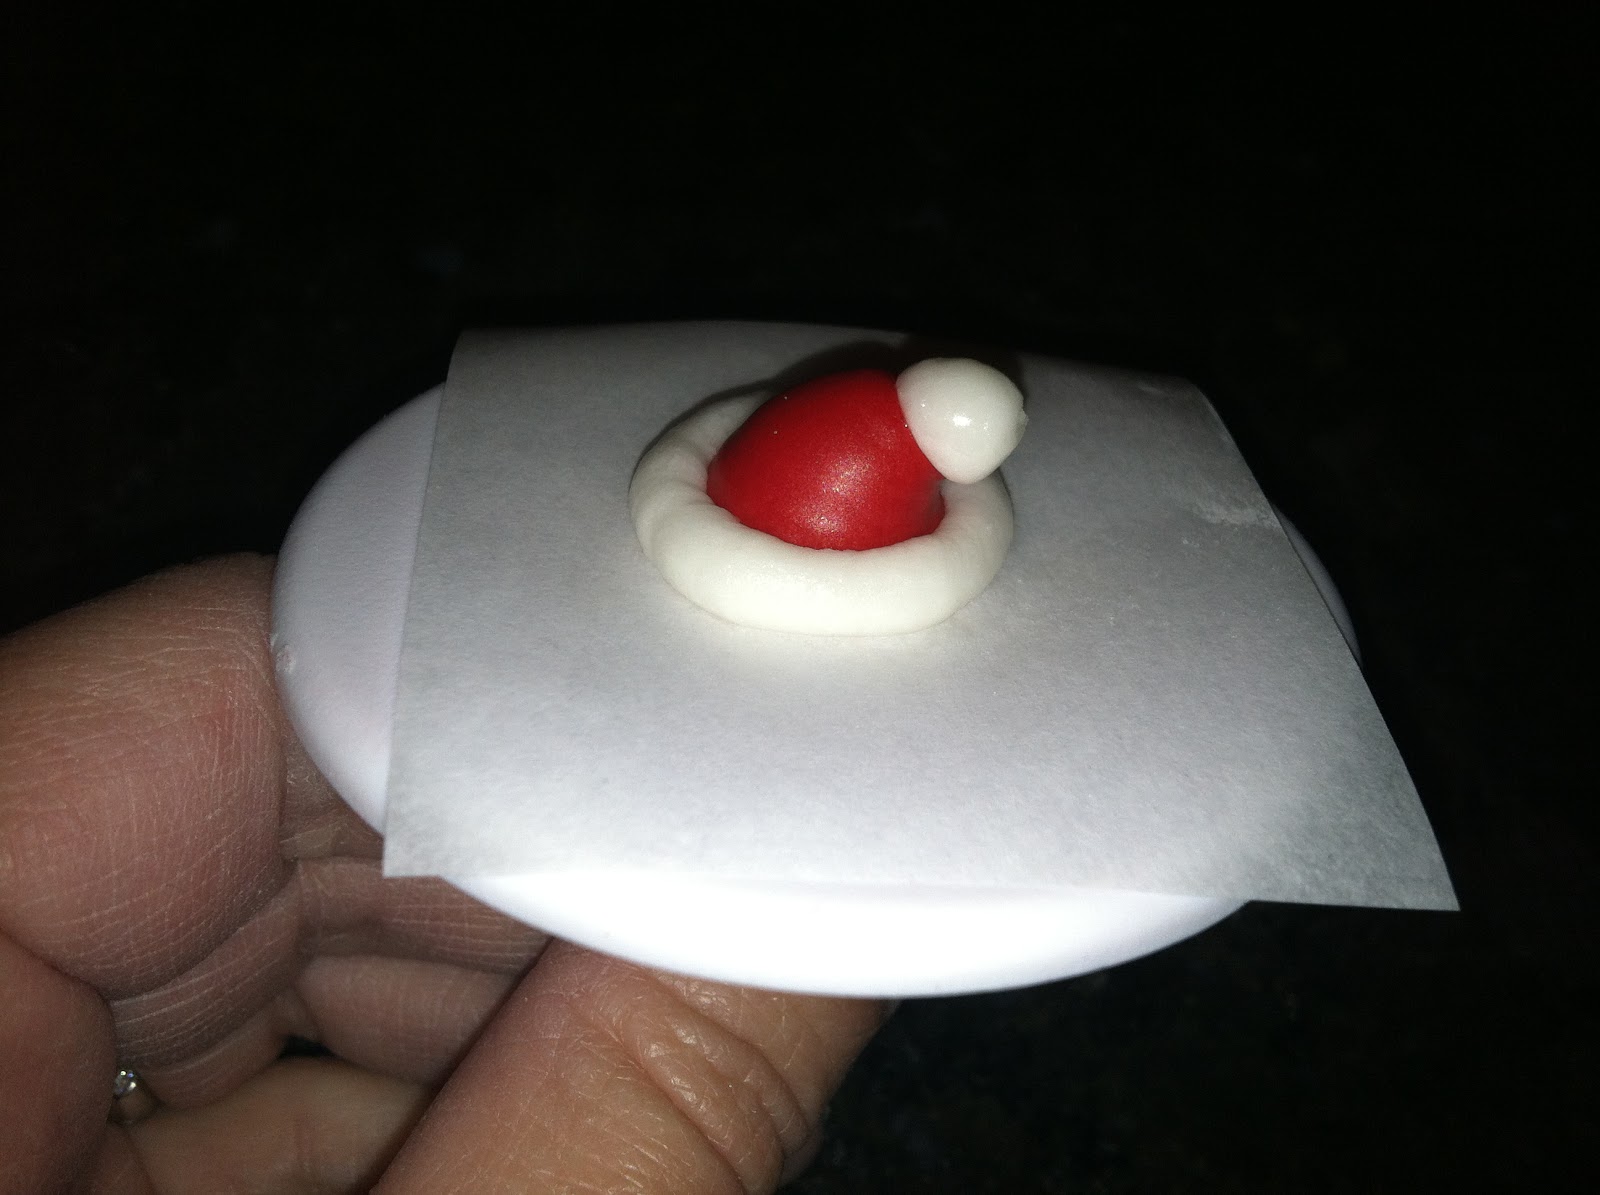
 Hold the #12 tip almost flat alongside the surface and squeeze out a ball of icing. Move the tip along while decreasing pressure for a little more than half an inch. Stop pressure and pull the tip away.
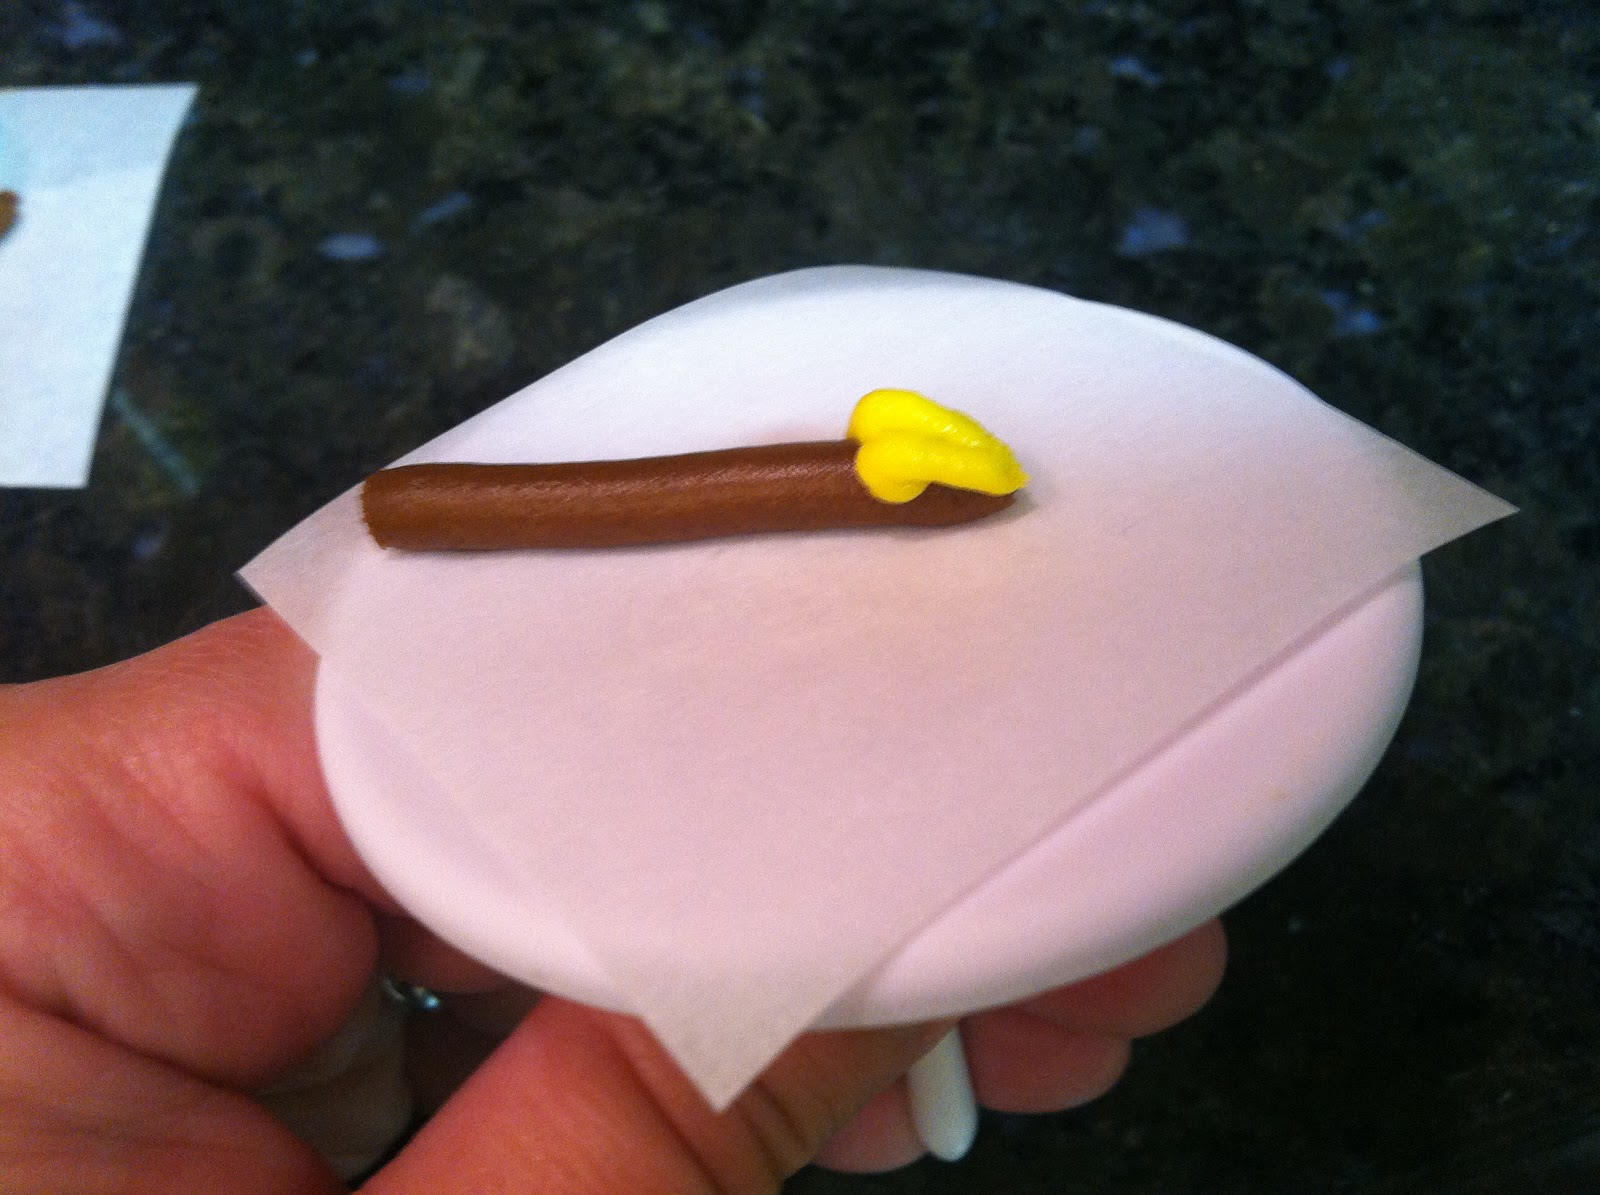
 Pipe the base with the #8 tip on the yellow icing. Hold the tip against the wide end of the bulb, squeeze briefly, move the tip along, then stop pressure and pull the tip away. I tried to create "threads" by pulsing the tip in and out but they sort of melted together.
 Pipe a tiny black dot with the #2 tip, then flatten it with a fingertip after touching it to the dusting pouch. These would be cute peeking out from under the eaves on a gingerbread house!

Tuesday, November 27, 2012

Royal Icing Mittens

Here's a cute accompaniment for yesterday's Santa hat; in fact, it uses the same icing colors and tips (round #12 and #8). You'll also need parchment paper squares, a flower nail, a glue stick, a Styrofoam block to rest the nail in, and a dusting pouch filled with a 50/50 blend of powdered sugar and cornstarch. Start by sticking a parchment square to the flower nail with a dab from the glue stick. 
 Hold the #12 tip just above and at a right angle to the surface. Squeeze while moving the tip along for about half an inch. Stop pressure and pull the tip away. This is the thumb.
 This time, move the tip in an upside-down "U" motion. Touch a fingertip to the dusting pouch and tap the line in the center to smooth out the icing.
 Repeat, if you'd like to do a pair of mittens. Why not?
 Pipe the cuffs in a contrasting color with the #8 tip. Pulse the tip while you pipe (move your hand back and forth subtly and rapidly) to give it some texture; it almost passes for "fluffy"!

Monday, November 26, 2012

Royal Icing Santa Hat

A royal icing Santa hat would be cute on cupcakes or petits fours, but I think it would be especially useful as a topper on a Santa Claus cake pop. You'll need stiff consistency royal icing in red and white, round tips #12 and #8, a flower nail, a Styrofoam block to rest the nail in, parchment paper squares, a glue stick, and a dusting pouch filled with a 50/50 blend of cornstarch and powdered sugar. Start by sticking a parchment square to the flower nail with a dab from the glue stick. 
 Attach the #12 tip to the red icing. Hold the tip at a 90 degree angle to and just above the surface. Squeeze while drawing the tip up for about 3/4". Stop pressure and pull the tip away. Touch a fingertip to the dusting pouch and gently nudge the peak of the icing over to one side. Allow this shape, the base of the hat, to dry for about 15 minutes.
 Attach the #8 tip to the white icing and pipe the brim of the hat. Pulse your hand slightly to give it some texture. Touch a fingertip to the dusting pouch and tap the area where the two ends meet to blend them, if need be.
 Pipe a ball at the pointed end of the hat shape with the #8 tip. Hold the tip a few millimeters away from the surface, squeeze out a ball, stop pressure and pull the tip away. Shape the icing with dusted fingertips into as close to a ball as you can. These hats would instantly turn any cake pop animal into a Christmas version of itself!

Sunday, November 25, 2012

Royal Icing Candy Cane

Perhaps you're wondering, why pipe candy canes? It's easy enough to buy them by the dozen ANYWHERE (during December, anyway). However, candy canes have an annoying knack of becoming sticky and gummy in short order as a decoration on gingerbread houses (in humid climates, anyway), and their flavor isn't always appropriate if you use them to decorate cupcakes. All you'll need to pipe candy canes are two round #8 tips, stiff consistency royal icing in red and white, parchment paper squares, a flower nail, a Styrofoam block to rest the nail in, a glue stick, and a dusting pouch filled with a 50/50 mix of powdered sugar and cornstarch. Start by sticking a parchment square to the flower nail with a dab from the glue stick. Alternately, you can tape a sheet of parchment paper to a baking sheet, especially if you're piping canes on a larger scale. 
 Start by piping a small "S." Hold the tip at about a 45 degree angle.
 The next few photos just show the process repeating…
 …and repeating…
 …and repeating.
 You'll need to alter the shape a bit as you curve the cane over to one side or the other.
 The shape you pipe, though, is still essentially going to be an "S."
 Here it is, almost done…
 …and here it is completed, finished off with a dab of contrasting color at both ends. Touch a fingertip to the dusting pouch to tap down any peaks of icing that remain. You could use this technique to pipe all sorts of candy cane-striped things; wreaths, hearts, straight sticks for fence posts for a gingerbread house, etc.

Friday, October 19, 2012

Royal Icing Treat Bag

This tiny treat bag would probably not hold even one M&M, but it would look very cute on cupcakes or petits fours (in any color you like, of course). You'll need stiff consistency royal icing, round tips #8 and #5, a glue stick, a flower nail, a Styrofoam block to rest the nail in, parchment paper squares, food-safe markers like AmeriColor Gourmet Writers, and a dusting pouch filled with a 50/50 mix of powdered sugar and cornstarch. Start by sticking a parchment square to the flower nail with a dab from the glue stick. Alternately, you can pipe the icing on the squares directly on your countertop. 
 Hold the tip just above the surface and pipe a tight "U" shape.
 Touch a fingertip to the dusting pouch and tap the surface and the sides flat into a rectangle.
 You might prefer to use an offset spatula; tap it against the dusting pouch, then against the sides of the rectangle. Allow the icing to firm up for an hour or so.
Pipe the handles with the #5 tip and allow them to dry. Always pipe more than you need to allow for breakage. These are actually leftover from when I made royal icing cauldrons
When the handles are firm enough to, um, handle, glue one on the bag with two dots of icing piped from the #5 tip. 

 Use the food-safe markers to decorate the bag any way you like!

Wednesday, October 10, 2012

Royal Icing Broom

Here's a good companion for the royal icing witch hat: a tiny little broom. You could pipe it in more Halloween-y colors, or something more traditional. You'll need round tips #8 and #3, stiff consistency royal icing for the handle and medium consistency royal icing for the head, a flower nail, a Styrofoam block to rest the nail in, parchment paper squares, and a glue stick. Start by sticking a parchment square to the nail with a dab from the glue stick. 
 Using the #8 tip, pipe a broom handle about 1.5" long.
 With the #3 tip, pipe the top of the broom head. To give it those rounded shoulders, move the tip as though you're piping "quotation marks" or commas (,).
 Pipe two layers of them to bulk up the top of the broom.
Pipe at least two layers of bristles, also with the #3 tip, to form the head. You can fan them out to the sides more if you like, but the bristles should all be touching so they'll be less likely to break.
 Pipe one final line across to bind it all together; this could be of a contrasting color. Set the broom aside to dry, then peel away the parchment. How cute would this be piped completely in black?

Sunday, October 7, 2012

Royal Icing Bones

I saw some icing bones adorning Halloween cupcakes in a bakery today…and I must say, any similarity to those squirts of icing and bones was purely coincidental. They looked more like blobs of toothpaste! The main thing that made them so unbelievable was the huge, obnoxious peaks that were left each time the tip was pulled away; truly a rookie mistake. All you need to pipe bones that are at least tidy (if not a little bit more realistic) are stiff consistency white royal icing, a flower nail, a Styrofoam brick to rest the nail in, parchment paper squares, a glue stick, and a dusting pouch filled with a 50/50 blend of powdered sugar and cornstarch. Use a round tip in any size; larger tips will make larger bones that take longer to dry. I used a tip #8. Start by sticking a parchment square to the flower nail with a dab from the glue stick. 
 Pipe a line of icing about 1" long while holding the tip just above and at a 45 degree angle to the surface.
Overlapping one end of the line, pipe a shape similar to a check mark, like a lopsided "V". When you pull the tip away, a peak will probably remain. Touch a fingertip to the dusting pouch and gently tap it down. 
 That little bit of asymmetry should keep them from looking like Milk-Bones (as astutely noted by my husband). Repeat the lopsided "V" on the other end, and set the bones aside to dry (dessicate?) before peeling away the parchment and using them to decorate some cute, ghoulish dessert.