Showing posts with label tip #70. Show all posts

Sunday, December 9, 2012

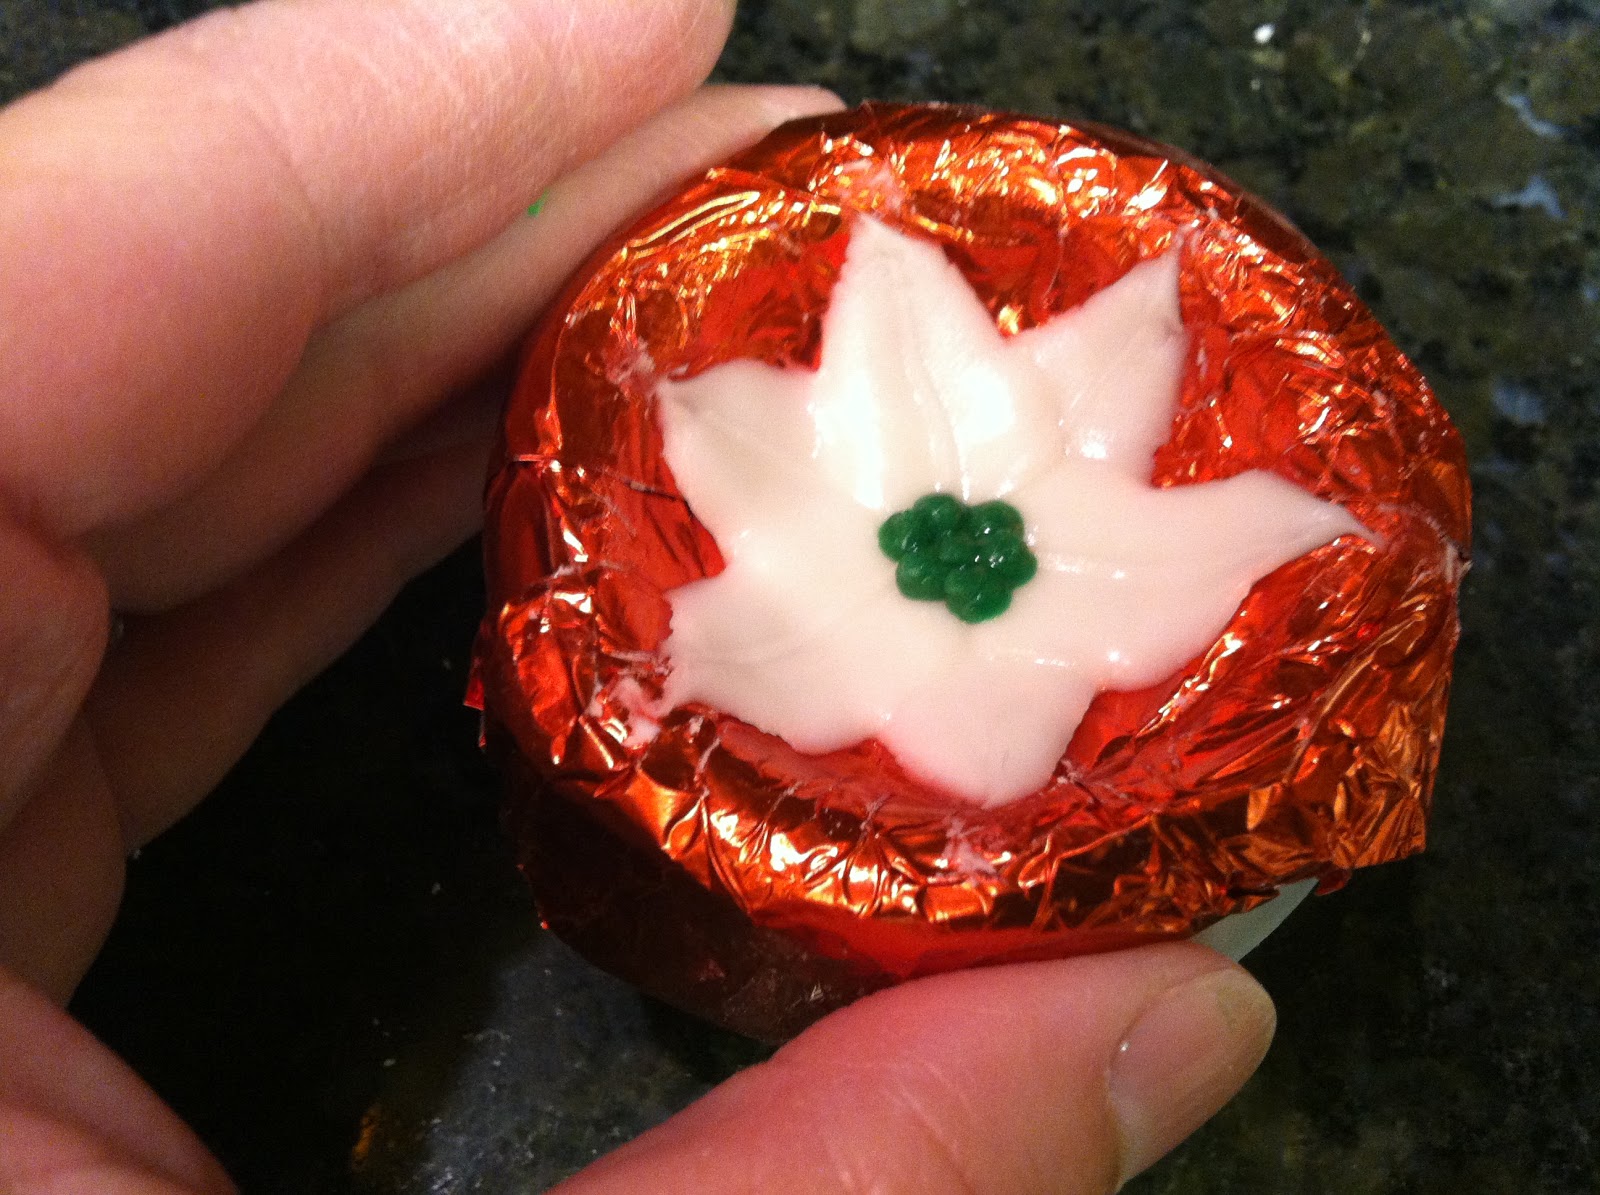
Royal Icing Poinsettia

Poinsettias are very easy to pipe, but they take a long time to dry; make sure to plan ahead if you're going to use them to decorate a cake for Christmas! You'll need stiff consistency royal icing in green, yellow, red or white, leaf tip #70, round tips #2 and #3, and a dusting pouch filled with a 50/50 mix of powdered sugar and cornstarch. You'll also need a small flower forming cup and a square of candy foil for each poinsettia. 
 Line the cup with the foil and tuck it around underneath.
 Attach the #70 tip to the white or red icing. Hold the tip in the center and squeeze out a petal.Touch your fingertips to the dusting pouch and taper the tip of the petal.
 Repeat several times to make the flower. I like to start by piping three equilateral petals. Try not to pipe an excessive amount of icing in the center or it will take a week to dry, depending on your climate.
 Six petals or so is a good number.
 Pipe a cluster of green dots in the center with the #3 tip.
 Allow the green dots to dry for a few minutes, then top each one with a dot of yellow piped from the #2 tip. You can gently remove the flower on the foil from the cup so you can use the cup to pipe more flowers. Set the foil with the flower on it aside in a warm, dry location. Don't peel away the foil until the icing is completely dry.

Saturday, November 24, 2012

Royal Icing Holly and Berries

If you have leftover red and green icing from making wreaths, why not pipe some holly? All you'll need is leaf tip #70, round tip #3, a flower nail, a Styrofoam block to rest the nail in, a glue stick, parchment paper squares, round toothpicks, and a dusting pouch filled with a 50/50 mix of powdered sugar and cornstarch. Start by sticking a parchment square to the flower nail with a dab from the glue stick. 
 Attach the leaf tip to the bag of green icing. Lay the tip almost flat against the surface and pipe for about 1". Stop pressure and pull the tip away. Touch your fingertips to the dusting pouch and define the end of the leaf into a point.
 Press a round toothpick into the icing all the way around the edge of the leaf (except the tip), drawing it outwards as you pull it away.
 Pipe a cluster of red berries with the #3 tip. Hold the tip just above the surface, squeeze out a ball, and pull the tip away. Repeat, repeat. Tap down any peaks that remain with a dusted fingertip. These holly leaves would look great as a garnish on any dessert for Christmas.

Friday, August 31, 2012

Royal Icing Columbine

The white and lavender Rocky Mountain columbine is the official state flower of Colorado. I have a boatload of fuchsia icing, so I did another version which has essentially the same shape but is more of a deep pink. Columbines are rather large; they smell beautiful, attract hummingbirds and bees, and make great cut flowers. I recommend using a large flower nail and large parchment paper squares to really do them justice. You'll also need a glue stick, a Styrofoam block to rest the nail in, a dusting pouch filled with a 50/50 mix of powdered sugar and cornstarch, leaf tip #70, petal tip #104, round tip #3, and stiff consistency royal icing in white, yellow, and fuchsia. Start by sticking a parchment square to the flower nail with a dab from the glue stick. 
 First, pipe five equal petals with the fuchsia icing and the leaf tip #70. Hold the tip in the middle and almost flat against the surface. Squeeze faster than the pace at which you move the tip to create ruffles. Stop pressure and pull the tip away. Touch your fingertips to the dusting pouch and pinch the end to taper it (unless it ends neatly on its own).
 Repeat for a total of five petals. Touch a fingertip to the dusting pouch and slightly flatten the center. Allow this part of the flower to firm up for a while.
 Using the #104 petal tip, pipe five petals that straddle the "V"-shaped gaps between each of the first layer of petals. Hold the tip with the wide side in toward the center and the narrow side facing out. Move the tip in a "U" motion for each petal, angling the narrow end upward as you pipe to give this layer a lot of depth. Allow it to dry for a while.
 Pipe a cluster of #3 pull-up dots for the stamens in the center. Hold the tip flat against the surface, squeeze, pull up briefly, then stop pressure and pull the tip away.
Allow this cluster to dry for a while, then add dots to the ends by squeezing out a little ball of icing and then touching the tip to (or gently wiping it against) each stamen. I think a hummingbird might be just as drawn to these as the real deal!