Showing posts with label 4th of July. Show all posts

Thursday, July 5, 2012

Striped Meringue Stars

I sure have been throwing a lot of royal icing at you lately, huh? It's high time I piped something a bit softer, so here you go: striped meringue stars. The colors are in honor of the 4th of July (which we're planning to celebrate the following weekend since it fell mid-week), but you could pipe these in any color for any occasion. You'll need a large open star tip, like the Ateco #825…
…and, for this color scheme, Royal Blue and Super Red Soft Gel Paste by AmeriColor
The ingredients are easy. Set out six egg whites until they reach room temperature (separate the eggs when they're cold). 
Beat the six egg whites in a stand mixer until they are very stiff and dry, like this:
 Keep beating them and add a cup plus 2 tablespoons of granulated sugar, 1/4 teaspoon Cream of Tartar, and 1/4 teaspoon salt. Stop the mixer occasionally to scrape the sides of the bowl. Add 3 teaspoons of clear vanilla extract (or any flavors you like), and 6 more tablespoons of sugar. Keep beating until the consistency is very thick and smooth, like this:
Preheat the oven to 250 degrees, and lay out parchment paper on three large cookie sheets. You can temporarily anchor down the corners with bottles of AmeriColor if you like:
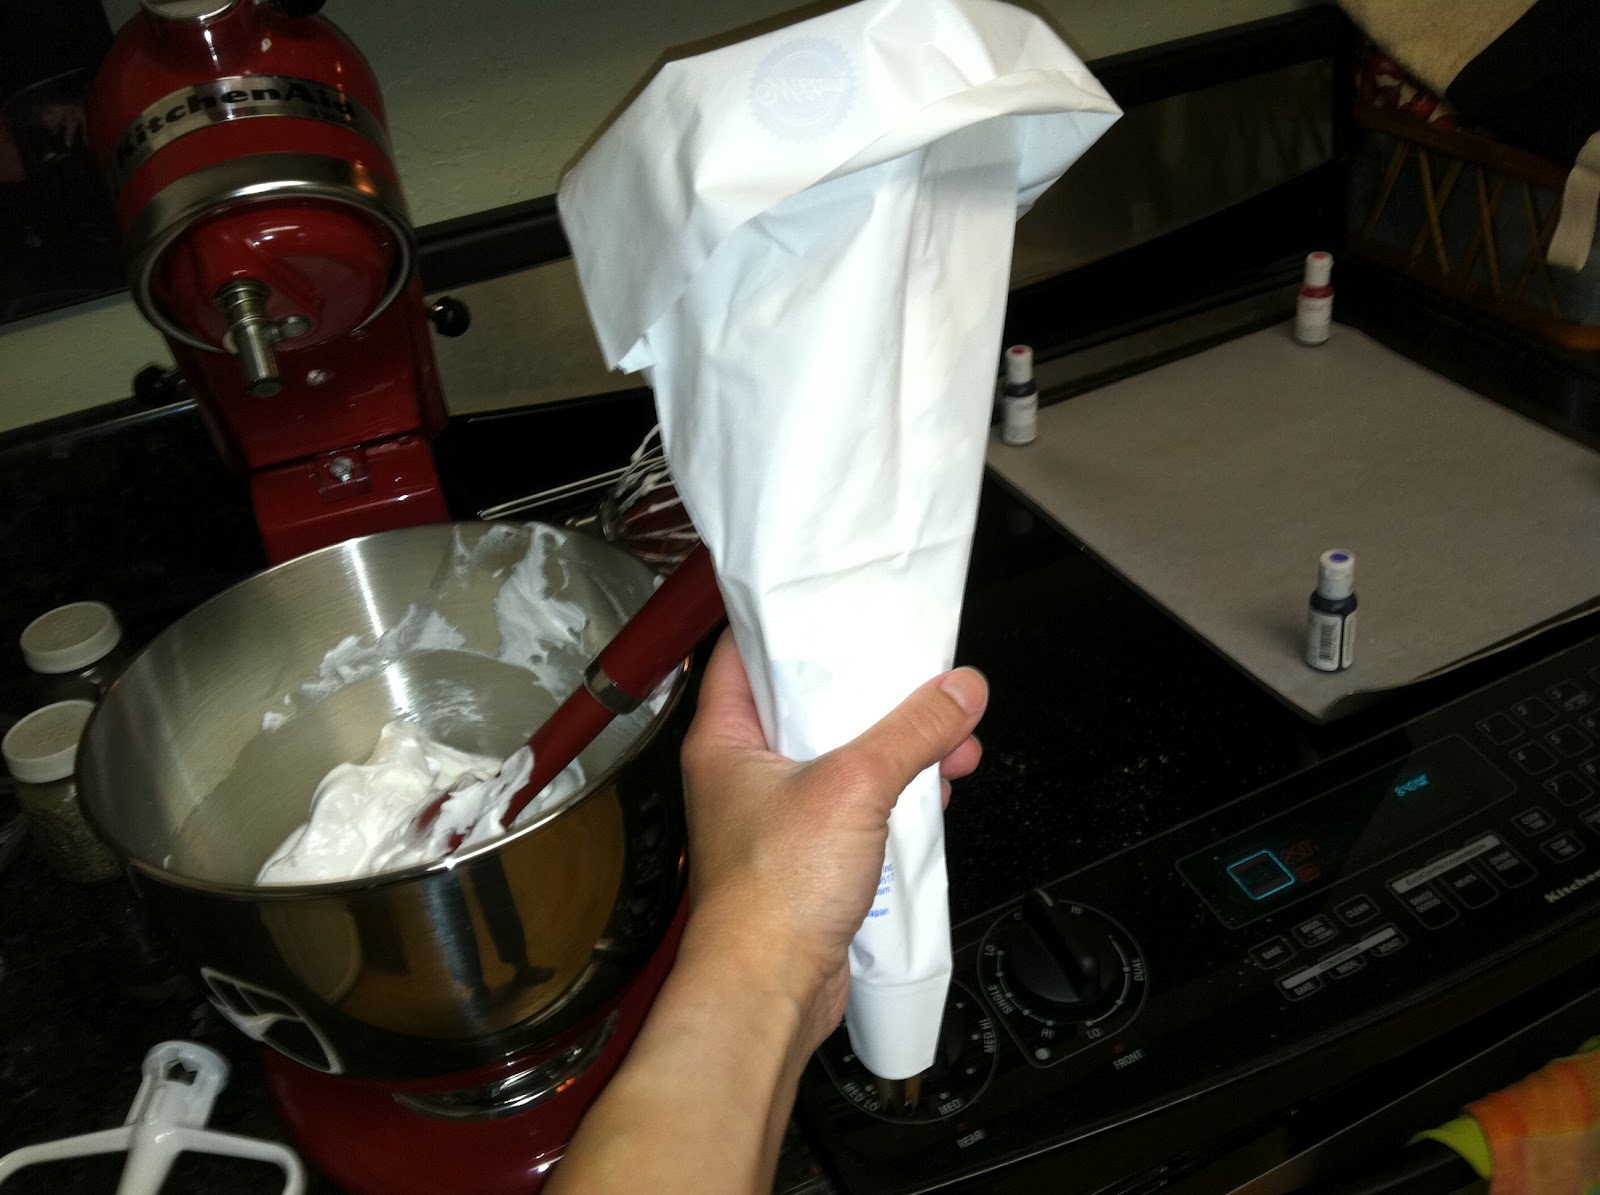
Prepare an 18" pastry bag. Drop in the star tip and cuff the bag a good part of the way up your arm. 
 When you look in the bag, it should look like this.
 Using a cheap craft store paintbrush, paint three 5" lines equidistant to each other inside the bag.
Start to fill the bag by putting a large ball of meringue from a spatula into the open hole; it will act as a sort of placeholder to keep the stripes from touching each other or other parts of the bag…
 …while you uncuff the bag. Make a smaller cuff (a couple of inches) and fill the bag up with half of the meringue (as we're going to make the meringues in two different colors, red and blue).
 Use the side of your thumb to slide the meringue down toward the tip (and to push out as much air as possible).
 Holding the tip at a 90 degree angle and half an inch above the surface, pipe out as many stars as you can fit on the parchment. You can pipe them close together; they don't spread much, if at all. Bake them for at least 45 minutes, but the time will vary depending on their size, your oven, the humidity, etc. They might need much longer. I look in on them every five minutes or so. The ones along the edges may get done first. When I can pluck one right off the paper and the paper doesn't lift with it, it's done.
 When they pop easily off the paper, they'll leave behind this stunning pattern. I'm having a hard time throwing away this piece of paper.
They'll look just as beautiful on the underside…
 
…as they do from above. This recipe made about 120 meringues, or roughly 2 servings (I'm only slightly kidding about that last part). 

Tuesday, May 29, 2012

Fireworks Cupcakes

Last year, the July cover of Martha Stewart Living magazine featured fireworks cookies, which were the first icing technique I piped on this blog back on New Year's Eve. I'd always wondered if the same technique would work on cupcakes; I mean, why not? When I made cupcakes for Memorial Day yesterday, I set aside half of them to try it out on. The tips I needed were a pair of round #8 tips, and a #806 (by Ateco). 
 Here are the cupcakes, awaiting the rest of their patriotic garb.
 Start by attaching the tip #806 to a piping bag (you won't need a coupler). Fill the bag with white frosting (I simply used canned vanilla frosting from the cake aisle; it's the right consistency for this).
 Pipe a ring around the outer edge of each cake. For this and all other piping on this project, hold the tip perpendicular to the surface.
 Pipe a dollop in the center and smooth the icing out with an offset spatula (or a fingertip, if you can be fastidious about it). Keep the cupcakes in a covered container (like a whatever-ware box) so they won't start crusting over. Remove each one individually when you're ready to work on it.
 Load up two piping bags with red and blue icing and the #8 tips. You may recall, my favorite red and blue colors are Royal Blue and Super Red by AmeriColor.
 Have a scad of round toothpicks handy.
 Pipe a dot in the center and two larger rings around it. Use all the same color or mix them up.
 Drag a toothpick through the icing, either from the edge to the center or from the center to the edge (like this):
 Wipe the tip on a paper towel after each drag through the icing. Be sure to not push the toothpick all the way down to the surface of the cake; you should just sort of ski through the icing.
 Here's one with loose "C" shapes radiating from the inside out:
 Here's one with straight lines radiating outward from the center:
 Here's the first lazy "S" shape on one of my favorites…
 …which looked like this when finished. I like how the red frames the inner blue dot and ring.
 This one is formed by alternating dragging the toothpick from the inside out, then the outside in (wiping after each drag, of course).
 You can really see the depth of the stripes from this angle; that's one reason why I prefer the cupcakes over the traditional fireworks cookies, which dry perfectly flat.
 The only downside I can think of about these cupcakes is they do take a few extra steps to pipe, and a platter like this would be empty within minutes after being brought in to any party. An offering to bear in mind for 4th of July, Veterans Day, Memorial Day…even Election Night! And of course you can pipe them in any color imaginable.

Monday, May 28, 2012

Striped Cupcakes for Memorial Day

I've striped a bag of icing before, but it was royal icing and for a very different project: piping roses with a striped edge. I wanted to see if the same effect would work for cupcakes (as you can see above, it did!). First, bake up a batch of yummy cupcakes. I really like liners by Cupcake Creations; check out how the white parts of the cup remain white, even when holding a dark chocolate cupcake (not all brands can pull that off). 
 Attach a star tip like the Wilton 1M to a piping bag. You probably won't need a coupler.
 These are my favorites for making red and blue icing; Super Red and Royal Blue by AmeriColor.
Cuff the bag over your hand, folding the bag more or less in half. 
 If you like to have a Pringles can around to act as a third hand, get it ready. I didn't wind up using it, but it might be a good tool to have close by.
 Dish up a couple of spoonfuls of white frosting in small bowls…
 …and use whichever colors you like. I made these for Memorial Day, and can imagine doing an encore for the 4th of July.
 It's a good idea to keep a supply of cheap crafty brushes that are used only for cake projects. Swab one of them into the frosting…
 …and paint a couple of stripes into the bag. Push the brush as far into the tip as you can, and paint the stripe a couple of inches up the side of the bag. I thought of painting a stripe of each color, but thought the likelihood was high that they might mix together, giving me a rather unpatriotic shade of purple. I painted the two stripes near each other, because I figured I'd keep the non-striped side on the underside where it wouldn't be seen. In retrospect, I wish I'd made at least one more stripe (that's the plan for next time).
 Fill the bag with plain white frosting, being careful to not disrupt the stripes more than necessary.
 Pipe the swirl by holding the bag perpendicular to the cupcake. Start by piping a wreath around the edge…
 …then pipe a nice, tight spiral in the center. It almost looks like a flame!
 Thought you might like to see the blue bag as well…
…and how it turned out. I piped a smaller number of cupcakes with the blue, because blue is traditionally regarded as the most unappetizing color and I didn't want to be stuck with a surplus of them. 
 I hope you had a lovely Memorial Day! Get your piping bags ready for the 4th of July…