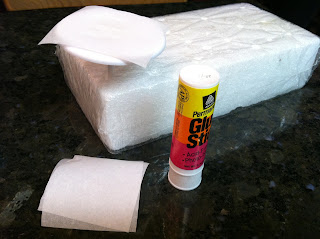
The only tricky part about piping royal icing ghosts is getting the consistency of the icing just right; you want it to flow in a ghostly fashion, but you want it to be stiff enough to hold its shape. My icing wasn't thick enough, so I squeezed it out into a bowl, mixed in some stiffer consistency royal icing, then refilled the bag. In addition to white royal icing, you'll need a petal tip #104, parchment paper squares, a flower nail, a glue stick, a Styrofoam block to rest the nail in, a black food-safe marker like the AmeriColor Gourmet Writer, and a dusting pouch filled with a 50/50 mix of cornstarch and powdered sugar. Start by sticking a parchment square to the flower nail with a dab from the glue stick.
Hold the #104 tip just above the surface, and squeeze steadily while dipping the tip down in a series of curves reminiscent of a cursive letter "w." Bring the tip back up to where you started, stop pressure and pull the tip away.Liberally dust a fingertip by tapping it against the dusting pouch, and tap the center of this shape while drawing your fingertip upwards away from the curvy lower edge to form the ghost's head.
When the icing has firmed up, draw in some eyes with the black food-safe marker. Peel away the parchment and use these ghosts as cupcake toppers (or perhaps in the graveyard scene inside a "panoramic egg" eyeball).


Cute! :)
ReplyDelete