I was recently given the challenge of making a Monster High cake for a 9th birthday party. I was reluctant to say yes, because I'd never done a cake with a character, logo, face, whatever, on it. I've known for some time, though, that I'd better get familiar with doing such things; I mean, what kid is going to be happy with a big pile of icing flowers and drop strings? I must admit, the first step I took before agreeing to take this cake on was I did a Google image search to see what other sorts of Monster High cakes had been done; I wanted to make sure there was some sort of way around creating actual dolls out of cake (WAY beyond my current abilities). I found a few ideas from which to draw inspiration, and got to work. First, I found the logo:

Then I took it into InDesign (I'm sure Word would have worked fine, but once you know your way around InDesign, using any other program to do graphics work is like using hammers for chopsticks). Knowing the cake was going to be a 9" round, I made the document just under that size and printed out a few copies.

My plan was to make the logo the focal point of the cake, and to create it in two layers of fondant: a white layer with cutouts laid over chocolate made even darker with black gel coloring. I made that layer first. You can see I cut out the logo around the outer edge of the black outline. Notice I cut right through the bow; I knew from the start that I wanted to make a
big, poufy bow out of fondant (which was not something I'd seen done on any of the images in my cursory Google image search). Also involved in the set-up are a pile of powdered sugar to dust the work surface, a teaspoon or so of Crisco (in case the fondant got dry, which my
chocolate fondant from scratch tends to), a surface scraper, and a few cutting tools; I didn't know which one would work best at the time.
I wound up using the cutting wheel tool from the
Wilton Deluxe Gum Paste Tool Set around the edge of the skull, which I then wrapped in plastic wrap on a small cookie sheet…
…and set aside. This sort of thing is definitely best kept in a safe place; don't set a hot coffee cup or a phone down on it.
Then I got started on the white fondant. One of my least favorite adaptations from my
fondant recipe is to have to substitute clear vanilla; the brown tastes
so much better, However, it will make otherwise white fondant a sort of dust color, so clear vanilla it is. I also gave the fondant a dose of
Wilton White White Icing Color; I'm not convinced this stuff actually works, but I wanted to feel like I'd been thorough. Here you can see I've cut the skull out on the inside of the thick black outline, and also cut the eyes and nose from the first skull pattern with the outline, which I was done with.
I used the cutting wheel, once again, to cut around the edge of the skull.
For the detail work of the eyes and nose, I switched to a small paring knife. At that moment I should have realized the white fondant should have been rolled thicker; the area between the "eyelashes" and the edge of the skull is less than half an inch! I didn't think it would actually crack, but when it did, I responded with the old Club Kid fix for everything: Throw some glitter on it! Here it is laid out on top of the chocolate layer with plastic wrap in between; I just wanted to make sure everything was indeed going to line up, and it did:
The day prior when I was in a bow-making mood, I made this
hot pink bow. I left the tissue in the loops until just before I put the bow on the cake; no point in giving gravity an opportunity to kick in.
The cake is a 9", 4 layer chocolate fudge cake. Separating the layers is vanilla frosting colored the same shade as the bow (
Electric Pink by AmeriColor). I coated the whole cake in white vanilla frosting, and put it in the fridge while I did battle with the white fondant I planned to cover it with. I was really happy with the end result. One huge mistake I'd made with fondant in previous attempts was I put it on over a freshly iced cake at room temperature. The weight of the fondant would cause the outer edge to be sort of soft and rounded; not at all precise and cylindrical. Another thing that would happen is icing would squish out onto the cake circle at the base, requiring that I pipe a border or make some sort of fondant border to cover it up (which I really didn't want to do with this cake, especially piping). When I cut away the excess and there was no sign of the icing at the base, I made a "note to self" I'll never forget: refrigerate the cake and its undercoating of frosting at least half an hour before putting on the fondant.
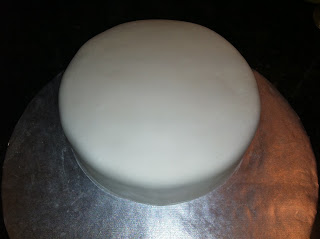
There wasn't a whole lot more to do other than assemble everything at this point. The skull stuck to the cake under its own weight, and I used some royal icing to attach the bow. Note I gave a bow a coating of hot pink
Disco Dust, which is one of my new favorite substances. You can just smooth it on with your fingertips or a brush; no water or anything else is necessary to make it adhere. I used black Disco Dust on the chocolate layer of the skull before laying down the white layer, too.

I lucked out in having just the right size of diamond-shaped cookie cutter for the argyle pattern on the sides. The pieces adhered with water applied with a
water brush (a regular brush dipped in water would work, but I don't like the idea of an open bowl of water sitting anywhere near a cake). The stitching is royal icing, as is the text below. I visited the Monster High site to get a feel for their font, which I tried to approximate. This amount of text is also why I used a larger
foil-wrapped board; I didn't want to sacrifice that amount of real estate on the cake itself for text:
It's been a long time since I've made a cake that I was sorry to see go; I swear this cake made eye contact with me! I know it went to a good home when I saw The Birthday Girl holding it in her lap in her mom's car, and carefully touching the glittery bow. I hope I'll get the opportunity to do another like this; I'm definitely over my aversion to making character cakes.