Showing posts with label Eddie Spence. Show all posts

Wednesday, April 18, 2012

Another Royal Icing Violet

Back in January I piped one version of a violet (the one from Wilton's Course 2: Flowers and Cake Design). I recently learned another while reading The Art of Royal Icing by Eddie Spence. I'm not sure if it's better, but it is slightly different (and possibly more botanically accurate). You'll need a flower nail, a parchment paper square for each violet, a non-toxic glue stick, a Styrofoam brick, a dusting pouch filled with a 50/50 mix of powdered sugar and cornstarch, yellow royal icing in a bag fitted with a #1 or #2 round tip, and purple royal icing in a bag fitted with an Ateco #59 tip (or any curved petal tip designed for piping violets; bear in mind there are tips available that curve in the opposite direction if you happen to be left-handed).
 Start by attaching a parchment paper square to the flower nail with a dab from the glue stick.
 I try to follow everything in the Eddie Spence book to the letter, but I find I have better success if I pipe the large bottom petal first (he starts from the top and works his way down; you should try it both ways to see which works best for you). Hold the wide end of the curved-teardrop-shaped tip in the center, and turn the nail as you pipe; you'll form this cupped petal that's more or less a semicircle:
 Pipe two smaller petals above it, again with the wide end of the petal at the center. It's looking a bit like Mickey Mouse, isn't it?
 Then, pipe a small narrow petal on either side of the two small petals for a grand total of 5 petals.
 You can touch a finger to the dusting pouch, then lightly nudge any petals that are standing in unattractive ways, or smooth out any rough edges. You might want to allow the petals to firm up for a few minutes before piping the yellow stamen, which is done by holding the small round #1 or #2 tip just above and at a perpendicular angle to the center, then piping a small bead, stopping pressure, then pulling the tip toward the bottom of the largest petal; the stamen should resemble an upside-down teardrop.
These look especially charming on top of tiny desserts like petits fours and bite-sized cupcakes. Perfect for tea parties! 

Tuesday, April 17, 2012

Royal Icing Cherry Blossoms

I’ve been spending more time lately with the incredible book “The Art of Royal Icing” by Eddie Spence. I’m not delusional; some of his projects will probably always be beyond my abilities (like his royal icing gazebo), but there’s a beautiful section of the book called “Piped Flowers Using an Icing Nail” that seems pretty achievable. San Francisco has an annual Cherry Blossom Festival for two weekends in April (which we’re right in the middle of), so today’s post is inspired by that (based on Eddie Spence’s directions for royal icing cherry blossoms). You’ll need royal icing in two shades of pink. I made the darker one first, using Deep Pink by AmeriColor…
…then I mixed some of that one into a container of white icing to make the lighter shade. You could also use straight white edged with dark or light pink.
 You’ll also need a piping bag fitted with a #101 petal tip, a cap and a bag tie, a parchment square for each cherry blossom, a Styrofoam block, a flower nail, a non-toxic glue stick, a small craft brush (that is dedicated solely to the purpose of working with icing), and a dusting pouch filled with a 50/50 mix of powdered sugar and cornstarch. You'll also need a bag of yellow royal icing fitted with a round #1 or #2 tip.
 Make sure the narrow end of the petal tip is lined up with one of the bag’s seams.
 Cuff half the length of the bag over your hand.
 Use the brush to paint a stripe of the deep pink icing along the seam of the bag; paint it as far down into the tip as possible.
 Gently add the light pink icing; try not to disturb the stripe more than necessary.
 I haven't really mentioned bag ties before; they're much more than "cake gadgetry." They're essential for keeping your icing from drying out. Twist the bag as tightly as you can above the icing, lay the tie flat behind it…
…and slip the pointy end through the loop. 
 Also, when you're not actively piping, you should always cap the tip. Tip covers come in two sizes that I'm aware of (and they cover most tips).
 Stick a parchment square to the nail with a dab from the glue stick.
 You'll be piping five equal petals. Creating the ruffled edge may take some practice; it's formed by vibrating your hand back-and-forth while piping each petal in an upside-down "U" motion. Start by holding the petal tip flat on the nail with the wide end at the center. Aim the first petal toward one of the corners of the square.
 The second petal is identical to the first, but you should aim it toward one of the square's sides, in between two of the corners. At this point, you have a very darling little heart; why not just stop here? Continuing on…
 …pipe the third petal toward the next corner of the square…
 …and the fourth toward the next straight side…
 …and the fifth toward the final corner of the square. With practice, the five petals will be close in size.
 You may need to touch your finger to the dusting pouch, then tap out any uneven ridges in the center of the petals.
 Squeeze a cluster of small pull-up stamens with the yellow icing. Barely touch the tip to the center of the blossom at a perpendicular angle, squeeze, and pull away the bag at the same angle. Stop pressure after less than a quarter-inch.

 As the dark pink runs out, the cherry blossoms will start to vary in appearance (which is fine, because that's pretty much what happens in nature!). My plan for these is to use them to decorate pink lemonade cupcakes; who's inviting me over? ;)

Tuesday, March 13, 2012

Royal Icing Baskets

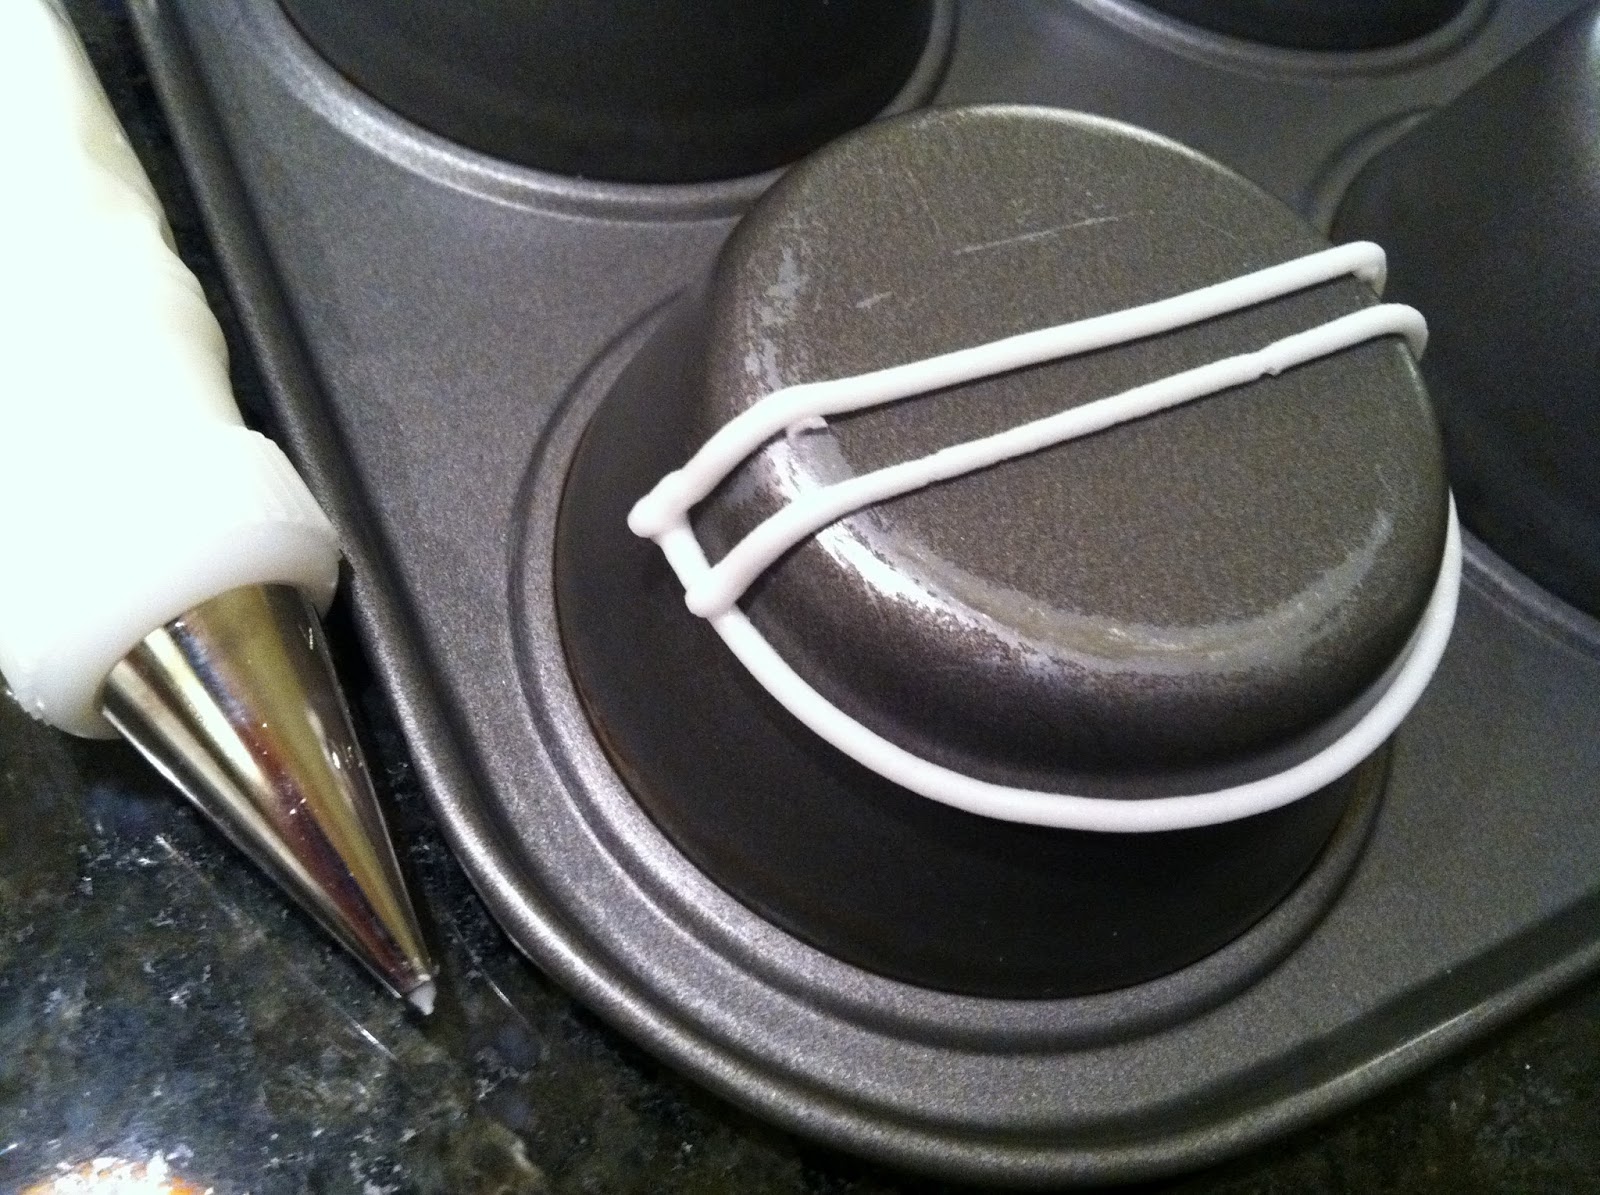
I received the phenomenal 2010 book "The Art of Royal Icing" by Eddie Spence for my birthday. If I were to attempt all the projects in it, this blog would be like Julie & Julia all over again (and nobody wants that). His projects run the gamut from relatively simple blooms piped on a flower nail to a freestanding royal icing gazebo, so I thought I'd attempt something in the middle and toward the easier end: royal icing baskets (what with Easter being on the way and all). The setup for this project is simple…and baffling. I'd always heard the warnings of "royal icing and grease don't mix," "make sure all your utensils are grease-free," "grease will cause royal icing to 'break down'", etc. So when the brilliant Eddie Spence starts his instructions with "Grease the underside of the tin/container with white vegetable fat" I thought the man must have had a little too much cake with his wine. I considered attempting this project sans Crisco, but decided against it; Eddie bleeds royal icing, and must know what he's talking about. So, to make royal icing baskets, here's all you'll need: Crisco, a muffin pan, and a piping bag full of stiff-consistency royal icing, fitted with a round #2 tip.
 Start by greasing the underside of the muffin pan with Crisco. Use the tiniest amount you can imagine:
 I made a couple of dots to give myself a permanent reminder of the middle of the cup. The first line is basically a drop string, which I haven't blogged about yet (I'm going to need to post a video to properly demonstrate them). Essentially, you'll need to pick up the muffin pan, squeeze a dot as a sort of anchor on one side of the cup, and then continue squeezing as you move the tip around the cup; the icing won't be touching the cup until you reach the other side, when you rein it in by touching and anchoring the tip to the opposite side of the cup from where you started. Alternately, I suppose you could just pipe a curved line along the cup, but I wouldn't have trusted my oft-shaking hands to get that first line as straight as with the drop string method. This line won't matter too much, by the way, as it'll be covered in all sorts of other elements shortly.
 In between each step I allowed a few minutes to pass so the icing could firm up a bit (a process that can be sped up by having a heat-producing desk lamp handy). The next step is to pipe a couple of cross-pieces:
 I kept my dusting pouch (filled with a 50/50 mix of powdered sugar and cornstarch) handy so I could touch my finger to it and tap down any points that formed at the end of each piped line. The next step is to pipe the latticework. Start in the middle and work your way in one direction or another, piping diagonal lines that connect the lower cross-piece and the curved line at the bottom. The lines should be evenly spaced, about the width of the tip #2.
 After allowing the first set of diagonal lines to firm up for a few minutes, the second set in the opposite direction gets piped, again starting from the middle:

 The next steps are all about strengthening the structure. First you'll want to do something with the top cross-pieces; you could pipe leaves, lines, dots, whatever. I piped a wavy line first in one direction, then the other:
 Finally, pipe a border along the bottom; this border is known as a running bead.
I allowed it to dry for about 10 hours, confident the whole time that everything I'd ever heard about royal icing and grease would cause an enormous meltdown. When I gently nudged the underside (near the border) with my thumbnail, the basket popped off effortlessly, thus dashing all the lies and propaganda I'd ever been fed on the subject of Crisco. Here's the basket's underside:
And here it is in a potential final position, filled with a bouquet of blossoms (all attached with royal icing). A handle, leaves, or further decoration could be piped once the basket is firmly attached to the side or top of a cake. Imagine all the other containers royal icing baskets could be piped on! I'm planning to do a bowl of some sort to use as a cake topper in the near future (possibly using a small basketweave tip).